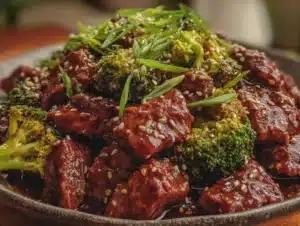
There is a specific kind of hunger that hits around 8 PM on a Tuesday. It’s not just hunger; it’s a craving for something salty, crunchy, and slightly spicy. You know the feeling. You’re staring into the fridge, hoping the leftovers will magically transform into dinner. They won’t. Instead, you’re tempted to order takeout from that Chinese place down the street. But here is the thing: I’ve been there, and I’ve spent years trying to replicate it at home. The result? Crispy Salt And Pepper Chicken.
I first really nailed this recipe during a rainy weekend in Seattle. I had a bag of chicken thighs that needed using up before they went bad. I didn’t have much else in the pantry except cornstarch, some dried chilies, and a jar of salt and pepper mix I’d bought on a whim years prior. I threw everything together in a wok, expecting a mediocre stir-fry. What I got was magical. The chicken came out shatteringly crisp, coated in a savory, aromatic dust that stuck to your fingers. It was better than takeout. Honestly, it was better than most restaurants I’ve paid $20 for.
This isn’t just another stir-fry recipe. It’s a quick, high-protein dinner that feels indulgent but comes together in minutes. You’ll love how simple the ingredient list is, yet how complex the flavor profile becomes. It’s perfect for busy weeknights when you want something fast but don’t want to sacrifice taste. Plus, making it at home means you control the sodium and the heat level. No more wondering what’s in that sauce. Just pure, crispy chicken goodness.
I’ve tested this version dozens of times. Some days I use boneless skinless thighs for juiciness. Other nights, I swap in chicken breast for a lighter option. The key is the coating and the high heat. Once you get the hang of it, you’ll make this Crispy Salt And Pepper Chicken on repeat. It’s become my go-to for when I need comfort food that doesn’t leave me feeling sluggish. Let’s face it, life is too short for soggy chicken. This recipe ensures every bite is a crunch.
Why You’ll Love This Recipe
After testing countless variations of Chinese-inspired chicken dishes, I can confidently say this Crispy Salt And Pepper Chicken stands out. It’s not just about the crunch; it’s about the balance of flavors. I learned this the hard way after burning my first batch of chicken in a crowded apartment kitchen. The smoke alarm became my dinner companion. But I persisted. Now, this recipe is tested, trusted, and totally foolproof if you follow the steps. It’s chef-approved in my book, and definitely family-approved by my picky eaters.
- Quick & Easy: From prep to plate, this comes together in under 15 minutes. It’s perfect for those chaotic weeknights when you’re racing against the clock.
- Simple Ingredients: You likely already have cornstarch, soy sauce, and garlic in your kitchen. No fancy grocery trips needed for this one.
- Perfect for Weeknight Dinners: It’s fast enough for Tuesday but fancy enough for a casual Friday night with friends.
- Crowd-Pleaser: Kids love the crispy texture, and adults appreciate the savory depth. It’s a win-win for the whole table.
- Unbelievably Delicious: The combination of aromatic spices and crispy chicken creates a texture and flavor combo that is next-level comfort food.
What makes this recipe different is the technique. Most people boil or fry the chicken too long. I use a double-coating method with cornstarch to get that shatteringly crisp exterior without using a deep fryer. It’s a small tweak that makes a huge difference. This isn’t just another version; it’s the best version. It taps into that soul-soothing satisfaction of good food. It’s healthy-ish, fast, and incredibly satisfying. You’ll close your eyes after the first bite and just smile. It’s the kind of meal that turns a simple dinner into a memorable event without any stress.
What Ingredients You Will Need
This recipe relies on a few key components to deliver bold flavor and satisfying texture. The magic happens in the coating and the seasoning blend. You don’t need exotic spices if you have the basics. I recommend using fresh garlic and ginger whenever possible, as pre-minced jars just don’t have the same punch. The chicken choice matters too. Thighs are juicier, but breast works if you don’t overcook it.
- Chicken Thighs (1.5 lbs / 680g): Boneless and skinless are easiest to work with. They stay moist during high-heat cooking. If you prefer leaner meat, chicken breasts work too, but keep an eye on the time.
- Cornstarch (1/2 cup / 60g): This is non-negotiable for that crispiness. All-purpose flour makes it tough. Cornstarch creates a light, airy crust. I use the store brand, but Arthur King is great if you want premium quality.
- Garlic (4 cloves): Freshly minced. Don’t skip this. It provides the aromatic base. If you hate garlic, you can reduce it, but it won’t be the same.
- Ginger (1 tbsp fresh, grated): Adds a zesty warmth. Powdered ginger is a backup, but fresh is best for this specific flavor profile.
- Dried Red Chilies (1-2 tbsp): Adjust based on your heat tolerance. They add a smoky heat without overwhelming the saltiness. Seed them if you want less spice.
- Green Onions (4 stalks): Both the white and green parts. The whites go in early for flavor; the greens go on top for color.
- Salt and Pepper Seasoning Mix (1.5 tbsp): You can buy pre-made packets or make your own. A mix of coarse black pepper, sea salt, and a touch of five-spice powder works wonders.
- Soy Sauce (2 tbsp): For umami depth. Use low-sodium if you’re watching your salt intake.
- Sesame Oil (1 tsp): Added at the end for that nutty aroma. Toasted sesame oil is stronger, so use sparingly.
- Neutral Oil (for frying): Vegetable, canola, or peanut oil. High smoke point is key here.
For substitutions, you can use potato starch instead of cornstarch if needed, though the texture might be slightly different. If you’re gluten-free, use tamari instead of soy sauce. The cornstarch coating is naturally gluten-free, so just check your seasoning mix. In the summer, I sometimes add a squeeze of lime juice at the end for a citrusy twist. It’s a nice variation that cuts through the richness.
Equipment Needed
You don’t need a fancy kitchen to make this. A large wok or a heavy-bottomed skillet is ideal. I use a carbon steel wok because it heats up fast and distributes heat evenly. If you don’t have one, a cast iron skillet works well too. The key is having enough surface area so the chicken isn’t crowded. Crowding leads to steaming, not frying. That’s the enemy of crispiness.
A wire rack set over a baking sheet is helpful if you’re frying in batches. It keeps the chicken crisp while you finish the rest. I’ve tried using paper towels, but they can make the bottom soggy if left too long. A rack lets air circulate. For mixing, a large bowl is fine. I also recommend having a pair of chopsticks or tongs ready for flipping. It’s much faster than a spatula for small pieces of chicken.
If you’re on a budget, you don’t need to buy new gadgets. Your existing skillet will do the job. Just make sure it’s clean and dry before heating. For maintenance, wipe down your wok after use. Don’t use soap if it’s seasoned carbon steel. Just hot water and a brush. It’s easy to care for and lasts forever. Having these tools ready makes the cooking process smooth and stress-free.
How to Make Crispy Salt And Pepper Chicken

Start by prepping your chicken. Pat the pieces completely dry with paper towels. Moisture is the enemy of crispiness. If the chicken is wet, it will steam instead of fry. Cut the thighs into bite-sized pieces, about 1.5 inches. Uniform size ensures even cooking. Place them in a large bowl.
Step 1: Coat the Chicken (5 minutes)
Add the cornstarch to the chicken. Toss until every piece is lightly coated. You want a thin layer, not a thick dough. If it’s too thick, it might burn. Shake off any excess. This first coat helps dry the surface. Let it sit for 10 minutes while you prep the aromatics. This resting time allows the cornstarch to adhere better.
Step 2: Prepare the Aromatics (2 minutes)
Mince the garlic and grate the ginger. Slice the green onions, separating the whites from the greens. Seed the dried chilies if you want less heat. Have your salt and pepper mix ready in a small bowl. Having everything measured out is crucial because this cooks fast. You don’t want to be chopping while the chicken is frying.
Step 3: Fry the Chicken (8 minutes)
Heat about 1/2 inch of oil in your wok or skillet over medium-high heat. The oil is ready when a drop of water sizzles immediately. Carefully add the chicken in a single layer. Do not overcrowd the pan. Fry for 3-4 minutes per side until golden brown and crispy. Use tongs to flip them. If you’re using a smaller pan, fry in batches. Transfer cooked chicken to the wire rack. Drain excess oil.
Step 4: Make the Stir-Fry Base (2 minutes)
Drain all but a tablespoon of oil from the pan. Lower the heat to medium. Add the garlic, ginger, white parts of the green onions, and dried chilies. Stir-fry for 30 seconds until fragrant. Be careful not to burn the garlic. It turns bitter quickly. Add the fried chicken back into the pan.
Step 5: Season and Serve (1 minute)
Sprinkle the salt and pepper mix over the chicken. Toss everything together quickly. Add the soy sauce and sesame oil. Toss again to coat evenly. Turn off the heat. Add the green onion tops. Serve immediately while the chicken is still hot and crispy. The longer it sits, the softer it gets. Enjoy it with steamed rice or on its own.
Cooking Tips & Techniques
Getting the oil temperature right is the most important part. If the oil is too cool, the chicken absorbs oil and becomes greasy. If it’s too hot, the outside burns before the inside cooks. Aim for 350°F (175°C). If you don’t have a thermometer, test it with a wooden chopstick. Bubbles should form around it steadily.
A common mistake is overcrowding the pan. This drops the oil temperature and steams the chicken. I always fry in small batches. It takes a few extra minutes, but the result is worth it. Another tip is to double-coat if you want extra crunch. Dip the cornstarch-coated chicken in a little water or egg white, then back into cornstarch. I usually skip this for speed, but it’s great for parties.
I once tried to save time by using frozen chicken. It was a disaster. The ice crystals made the coating slide off and created a mess in the oil. Always use fresh, thawed chicken. If you’re short on time, buy pre-cut chicken pieces. It’s worth the extra cost for weeknight dinners. Also, don’t skip the resting time after coating. It helps the starch set.
For consistency, use the same size pieces of chicken. This ensures they all finish cooking at the same time. If you have small pieces and large chunks, remove the small ones first. Keep the heat consistent. Adjust as needed based on your stove. Gas stoves react faster than electric ones. Pay attention to the color. You want golden brown, not dark brown.
Variations & Adaptations
This recipe is flexible. You can adapt it to fit your dietary needs or taste preferences. For a gluten-free version, use tamari instead of soy sauce and check your seasoning mix for wheat fillers. Most cornstarch is gluten-free, but always double-check labels.
If you want more heat, add a spoonful of chili crisp or fresh sliced jalapeños. I love adding a bit of sugar to balance the saltiness. About 1 teaspoon works well. For a lighter option, bake the coated chicken at 400°F (200°C) for 20 minutes, flipping halfway. It won’t be as crispy as frying, but it’s healthier.
You can also swap the chicken for tofu or shrimp. Tofu needs to be pressed dry first. Shrimp cooks much faster, so adjust the frying time to 2-3 minutes. For a vegetarian twist, use cauliflower florets. They absorb the seasoning beautifully. I’ve also made this with pork tenderloin slices. It’s equally delicious.
For a different flavor profile, add a splash of rice vinegar at the end for tanginess. Or mix in some sesame seeds for extra crunch. The base recipe is a canvas. Experiment with what you have in your pantry. The key is keeping the high heat and the quick cooking time.
Serving & Storage Suggestions
Serve this dish immediately for the best texture. It pairs well with steamed jasmine rice or fried rice. The savory sauce is great for soaking up rice. You can also serve it with a side of stir-fried vegetables like bok choy or broccoli. A simple cucumber salad adds a refreshing contrast to the rich chicken.
For storage, let the chicken cool completely before refrigerating. Store it in an airtight container for up to 3 days. Reheating is tricky because you want to keep it crispy. The best method is to use an air fryer at 375°F (190°C) for 3-4 minutes. This restores the crunch. Avoid the microwave, as it will make the chicken soggy. You can also reheat it in a dry skillet over medium heat.
Freezing is possible but not recommended for the best texture. The coating may become soft upon thawing. If you must freeze, freeze the cooked chicken on a tray first, then transfer to a bag. Use within 1 month. The flavors actually meld well if you make it ahead for a salad, but for the classic experience, fresh is best.
Nutritional Information & Benefits
This dish is a good source of protein, especially if you use chicken thighs. Each serving has roughly 350-400 calories, depending on the oil absorbed. The cornstarch adds carbs, but the portion size is moderate. It’s lower in sugar than many takeout versions. You control the sodium by adjusting the soy sauce and seasoning mix.
Chicken thighs provide essential nutrients like iron and zinc. Garlic and ginger have anti-inflammatory properties. This meal is balanced if you pair it with veggies. It’s not a diet food, but it’s not junk food either. It’s a realistic, tasty option for a healthy lifestyle. I enjoy it as part of a varied diet. Moderation is key. Enjoy the crunch, but listen to your body.
Conclusion
Making Crispy Salt And Pepper Chicken at home is easier than you think. It saves money, reduces sodium, and tastes better than takeout. I hope you try this recipe and enjoy the crispy, savory bites. Feel free to adjust the spice level to your liking. It’s a versatile dish that fits many tastes. If you make it, I’d love to hear how it turned out. Leave a comment below with your tips or variations. Share your photos on social media too. Let’s inspire each other in the kitchen. Happy cooking!
Frequently Asked Questions
Can I use chicken breast instead of thighs?
Yes, you can use chicken breast. However, it can dry out faster. Cook it for a shorter time and keep an eye on it. Thighs are more forgiving and stay juicier.
What if I don’t have a wok?
A large skillet or cast iron pan works perfectly. Just make sure it’s wide enough to let the oil spread out. Crowding is the main enemy, so use a large pan.
How do I keep the chicken crispy after cooking?
Serve it immediately. If you need to hold it, place it on a wire rack in a low oven (200°F). Don’t cover it with foil, as that traps steam and makes it soggy.
Can I make this gluten-free?
Absolutely. Use tamari instead of soy sauce and ensure your cornstarch and seasoning mix are gluten-free. Most basic ingredients are naturally gluten-free.
Is this recipe spicy?
It can be. The dried chilies provide heat. You can control the spice level by adding more or fewer chilies. Remove the seeds for less heat. It’s customizable to your taste.
Pin This Recipe!


Crispy Salt And Pepper Chicken: 15-Minute Easy Dinner
- Total Time: 15 minutes
- Yield: 4 servings 1x
Description
A quick, high-protein dinner featuring shatteringly crisp chicken coated in a savory, aromatic salt and pepper blend. This recipe replicates takeout quality at home in under 15 minutes using a double-coating method for maximum crunch.
Ingredients
- 1.5 lbs boneless skinless chicken thighs, cut into 1.5-inch pieces
- 1/2 cup cornstarch
- 4 cloves garlic, freshly minced
- 1 tbsp fresh ginger, grated
- 1–2 tbsp dried red chilies, seeded if desired
- 4 stalks green onions, separated (whites and greens)
- 1.5 tbsp salt and pepper seasoning mix
- 2 tbsp soy sauce (or tamari for gluten-free)
- 1 tsp sesame oil
- Neutral oil (vegetable, canola, or peanut) for frying
Instructions
- Pat chicken pieces completely dry and place in a large bowl.
- Add cornstarch to the chicken and toss until lightly coated. Shake off excess and let rest for 10 minutes.
- Mince garlic, grate ginger, and slice green onions. Seed chilies if less heat is desired. Have all ingredients measured and ready.
- Heat 1/2 inch of neutral oil in a wok or skillet over medium-high heat (approx. 350°F).
- Fry chicken in a single layer in batches for 3-4 minutes per side until golden brown and crispy. Transfer to a wire rack to drain.
- Drain all but 1 tablespoon of oil from the pan. Lower heat to medium.
- Add garlic, ginger, white parts of green onions, and dried chilies. Stir-fry for 30 seconds until fragrant.
- Return fried chicken to the pan. Sprinkle with salt and pepper mix, add soy sauce and sesame oil. Toss to coat evenly.
- Turn off heat and stir in green onion tops. Serve immediately.
Notes
Ensure chicken is completely dry before coating to prevent steaming. Do not overcrowd the pan when frying to maintain oil temperature and crispiness. For extra crunch, double-coat by dipping cornstarch-coated chicken in water or egg white, then back into cornstarch. Serve immediately as the chicken loses crispiness if it sits.
- Prep Time: 5 minutes
- Cook Time: 10 minutes
- Category: Main Course
- Cuisine: Chinese
Nutrition
- Serving Size: Approximately 1/4 of
- Calories: 375
- Sugar: 1
- Sodium: 600
- Fat: 22
- Saturated Fat: 5
- Carbohydrates: 20
- Fiber: 1
- Protein: 25
Keywords: crispy chicken, salt and pepper chicken, quick dinner, weeknight meals, chinese food, high protein, gluten-free option