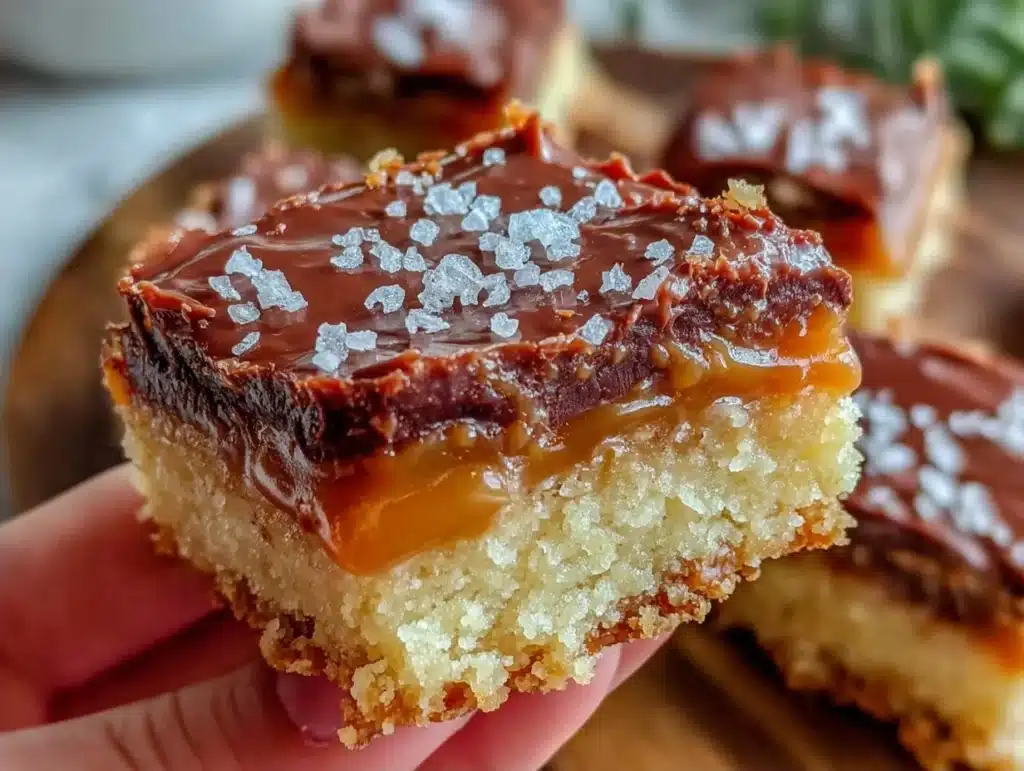
There is a specific kind of panic that sets in when you realize your potluck contribution is still just an idea in your head. You know the one. It’s 6:00 PM on a Tuesday, and the office party is Friday. You need something that travels well, looks impressive, and tastes like you spent hours in the kitchen (even if you didn’t). That’s exactly where I found myself last month, staring at a half-empty pantry and a deadline that wouldn’t wait. I needed a dessert that could survive a car ride, sit on a plastic table under a heat lamp, and still taste decadent by 3:00 PM. The answer? Rich Millionaire Brownies. Honestly, they are the only dessert I trust to carry me through a potluck season.
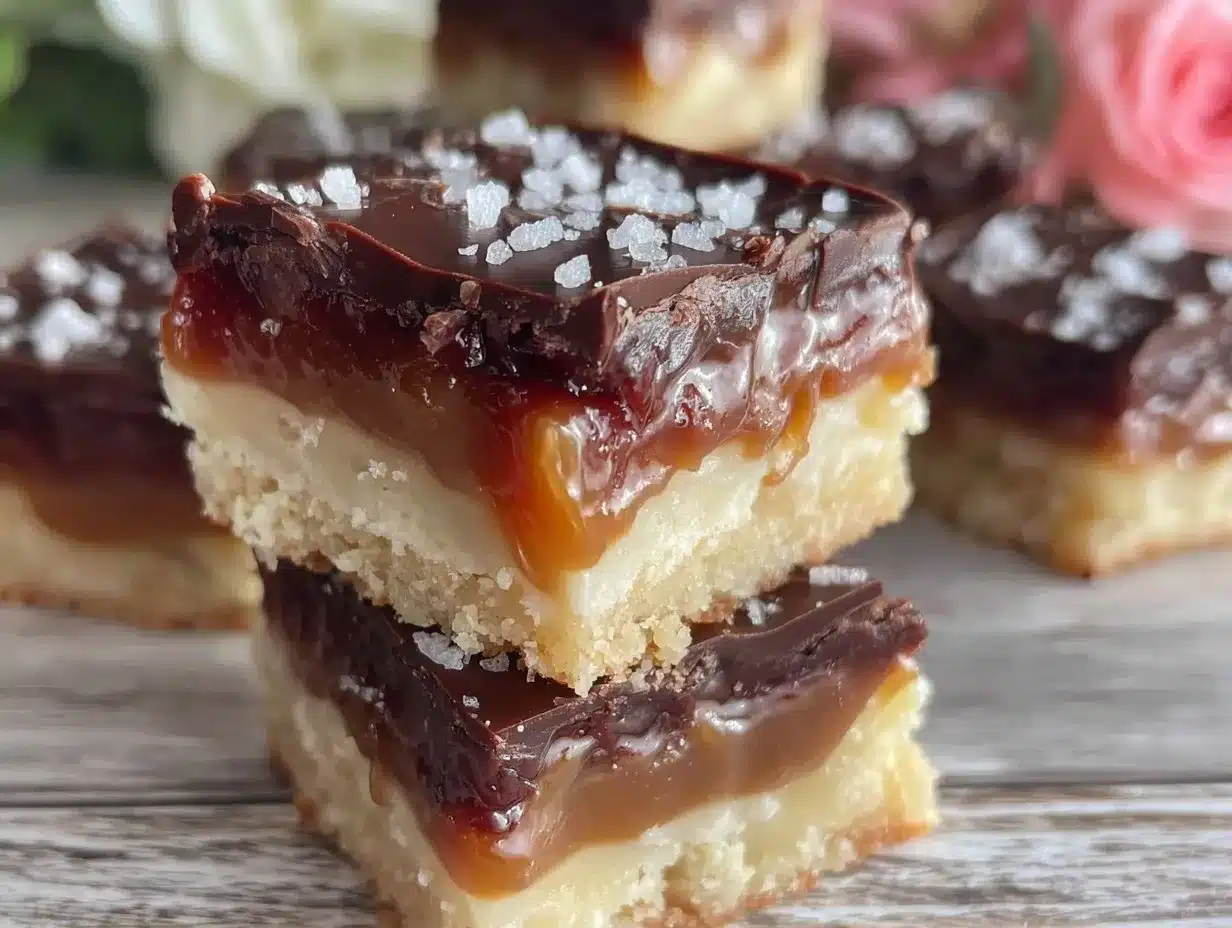
I first stumbled on the concept of combining fudge brownies with salted caramel and a chocolate ganache while scrolling through recipes late one night. I was skeptical. Combining three heavy desserts into one bar seemed like a recipe for disaster, not delight. But I’ve tested this over a dozen times now, and I can tell you with certainty: it works. The key is balance. The chewy brownie base grounds the sweetness, the caramel adds a gooey middle layer that pulls apart satisfyingly, and the ganache tops it off with that professional finish. It’s indulgent, yes, but it’s also structured enough to hold its shape. You know how some desserts turn into a soup in the Tupperware? These don’t. They stay firm, clean, and delicious.
I’ve made these for office gatherings, school bake sales, and even a last-minute neighbor gift. Every single time, they disappear within minutes. People ask for the recipe before they’ve even finished their first square. It’s become my go-to for “packed the way that actually keeps it fresh.” I bake them on Sunday, slice them into neat rectangles, and store them in airtight containers. By Wednesday, they’re still moist and the flavors have had time to marry. If you’re looking for a dessert that screams luxury without the stress, these rich millionaire brownies are your new best friend. They are the ultimate potluck dessert for meal prep because they make your life easier and your reputation stronger.
Why You’ll Love This Recipe
Let’s face it, most potluck desserts are either too dry or too messy. You’ve probably been to one where the cake crumbled into dust, or the fruit tart leaked juice all over the serving platter. These rich millionaire brownies solve all those problems. I’ve spent years refining this recipe, testing different caramel thicknesses and brownie densities, to get it just right. It’s not just another chocolate bar recipe; it’s a layered experience that respects your time and your taste buds. Here is why this specific combination wins every time:
- Structured Indulgence: Unlike a trifle or a mousse, these bars hold their shape. You can cut them, stack them, and transport them without a worry. They are dense enough to be substantial but light enough to not feel like a brick after eating.
- Make-Ahead Magic: This is the biggest selling point for anyone planning meals or events. You can make these three days in advance. In fact, they taste better the next day. The caramel softens slightly, and the chocolate sets firmly, creating a perfect texture contrast.
- Simple Ingredients, Complex Flavor: You don’t need exotic spices or hard-to-find ingredients. You likely have butter, sugar, flour, cocoa, and cream in your kitchen. The complexity comes from the layering technique, not from obscure pantry items.
- Crowd-Pleasing Versatility: Some people love fudgy brownies; others prefer chewy cookies. This hits both notes. Plus, the salted caramel aspect appeals to those who love sweet-and-salty combinations, which is a universal favorite.
- Visual Appeal: When you slice these, you get those beautiful distinct layers. It looks like you bought them from a high-end bakery. That visual wow factor is crucial for potluck success because people eat with their eyes first.
What makes this recipe different from the rest is the attention to the caramel layer. Many recipes skip this or use store-bought jars, which can be too runny. I’ve developed a stovetop method that creates a thick, chewy caramel that stays put. It’s a small detail that makes a huge difference in the overall structure. It’s comfort food reimagined for the busy modern cook. It’s the kind of dessert that makes you feel like a hero when you bring it to the office, even if you spent most of the prep time multitasking with other dinner duties.
What Ingredients You Will Need
This recipe relies on high-quality basics to create that restaurant-quality taste. The beauty of rich millionaire brownies lies in the simplicity of the components, but the quality of each ingredient matters. Since there are only a few elements, you want them to shine. I recommend using a good quality semi-sweet chocolate for the ganache and a reliable butter for the caramel. Here is what you need to gather for the three distinct layers:
- For the Brownie Base: You will need unsalted butter, melted. This gives you control over the salt content. Dark brown sugar is essential here for that molasses depth and chewiness. Granulated white sugar helps with the crisp edges. Eggs should be room temperature to ensure a smooth batter. All-purpose flour is standard, but cake flour can be used for a softer crumb. Unsweetened cocoa powder (Dutch-processed is best for a darker color) and a pinch of salt to balance the sweetness.
- For the Salted Caramel Layer: This is the heart of the “millionaire” aspect. You need light corn syrup to prevent crystallization, which is a common mistake beginners make. Heavy cream must be used; half-and-half won’t get thick enough. Brown sugar again, for that toffee flavor. Unsalted butter, cubed, to add richness. Flaky sea salt, like Maldon, is non-negotiable for the final sprinkle. It provides that essential crunch and salt burst.
- For the Chocolate Ganache Top: Use high-quality semi-sweet chocolate chips or chopped chocolate bar. Heavy cream is needed to emulsify with the chocolate. A tablespoon of butter at the end adds a glossy shine and smoother mouthfeel. A tiny pinch of salt here ties all the layers together.
I personally prefer using a brand like Ghirardelli for the chocolate chips because they melt evenly without seizing up easily. For the caramel, I always use corn syrup instead of honey; honey can make the caramel too sticky and hard to slice cleanly. If you are looking for a gluten-free option, you can swap the all-purpose flour in the brownie base with a 1:1 gluten-free baking blend, but ensure the blend contains xanthan gum for structure. For the dairy-free crowd, you can use coconut oil instead of butter in the brownie layer, though the caramel and ganache will need vegan alternatives. I’ve tested this with coconut cream for the ganache, and it works surprisingly well, offering a subtle tropical note that pairs nicely with the chocolate.
Equipment Needed
You don’t need a fancy kitchen to make these, but having the right tools makes the process much smoother. The most critical piece of equipment is a 9×13 inch baking pan. I recommend using a metal pan rather than glass or ceramic. Metal conducts heat more evenly, which helps the brownie base cook through without burning the edges. If you only have glass, you might need to lower the oven temperature by 25 degrees Fahrenheit to prevent over-browning.
A heavy-bottomed saucepan is essential for the caramel layer. Thin pans can lead to hot spots, causing the sugar to burn before it thickens. I’ve learned this the hard way! A stainless steel or enameled cast iron pot works best. You’ll also need a whisk that can handle thick mixtures, and a spatula for folding the brownie batter. A sharp chef’s knife is vital for slicing. If you use a dull knife, you’ll crush the layers instead of cutting them cleanly. I keep a serrated bread knife handy for this, as the teeth can saw through the chocolate and caramel without squishing the brownie.
Budget-friendly alternatives include using a foil-lined pan to make cleanup effortless. Parchment paper is also a great investment; it allows you to lift the entire block of brownies out of the pan before slicing. This prevents sticking and makes portioning much easier. Avoid using non-stick spray for the caramel layer, as the sugar can still stick. Instead, grease the pan thoroughly with butter. These tools are likely already in your kitchen, so no special shopping trip is required.
Preparation Method
Let’s walk through the process step-by-step. This recipe is methodical, but once you get the rhythm, it’s quite straightforward. The total time is about an hour and a half, including cooling, but most of that is passive time.
- Prepare the Pan and Oven: Preheat your oven to 350°F (175°C). Line your 9×13 inch baking pan with parchment paper, leaving an overhang on the long sides. This overhang is your handle for lifting the brownies out later. Grease the parchment lightly with butter.
- Make the Brownie Base: Melt the butter in a microwave-safe bowl or saucepan. Let it cool slightly. Whisk in the brown sugar and granulated sugar until smooth. Add the eggs one at a time, whisking well after each addition. Stir in the vanilla extract. In a separate bowl, whisk the flour, cocoa powder, and salt. Fold the dry ingredients into the wet mixture until just combined. Do not overmix, or the brownies will be tough. Pour the batter into the prepared pan and spread it evenly. Bake for 20-25 minutes. The edges should be set, but the center should still look slightly underbaked. It will continue to cook as it cools. Remove from the oven and let it cool completely on a wire rack. This step is crucial; if the base is warm, the caramel will melt and run.
- Prepare the Caramel: While the brownies cool, make the caramel. In a heavy-bottomed saucepan, combine the sugar, corn syrup, and water. Stir gently to moisten the sugar, but avoid stirring once it starts boiling to prevent crystallization. Bring to a boil over medium heat. Do not stir. Use a wet pastry brush to wash down any sugar crystals on the sides of the pan. Boil for 5-7 minutes until it reaches 240°F (115°C) on a candy thermometer. This is the soft-ball stage. Remove from heat and carefully whisk in the heavy cream. It will bubble up violently, so be cautious. Stir in the butter and salt until smooth. Let it cool for 10 minutes until it thickens slightly but is still pourable.
- Assemble the Layers: Pour the warm caramel evenly over the cooled brownie base. Use a spatula to spread it to the edges. You want a thin, even layer. Let this set for at least 30 minutes. You can speed this up by placing the pan in the refrigerator, but don’t let it get too hard, or it might crack when you add the ganache.
- Make the Ganache: Heat the heavy cream in a small saucepan until it just begins to simmer. Pour the hot cream over the chocolate chips in a heat-proof bowl. Let it sit for 5 minutes to melt the chocolate. Then, stir gently from the center outward until smooth and glossy. Stir in the butter and salt. Let the ganache cool for 15 minutes until it is thick enough to spread but still fluid.
- Final Assembly: Pour the ganache over the caramel layer. Use an offset spatula to spread it evenly to the edges. Sprinkle flaky sea salt over the top while the ganache is still wet so it adheres properly. Refrigerate for at least 2 hours, or overnight, to set completely.
- Slice and Serve: Use the parchment overhang to lift the brownies out of the pan. Place on a cutting board. Use a sharp knife to cut into squares or rectangles. Wipe the knife clean between cuts for clean lines.
Pro tip: If you are meal prepping, cut the brownies while they are still cold and firm. This gives you the neatest presentation for your containers.
Cooking Tips & Techniques
There are a few common pitfalls with layered desserts, but with a few tricks, you’ll avoid them easily. The biggest mistake people make with the caramel is rushing the cooling process. If you pour the ganache on top of a warm caramel layer, the two layers will merge, and you won’t get those distinct stripes. Patience is key here. Let the caramel cool to room temperature before adding the chocolate.
Another tip is about the brownie texture. For rich millionaire brownies, you want a fudgy base, not a cakey one. That’s why I recommend slightly underbaking the brownie layer. It should still be moist when you take it out. If you bake it until a toothpick comes out clean, it will be dry by the time you eat it. Also, ensure your eggs are at room temperature. Cold eggs can cause the melted butter to seize up, creating lumps in your batter.
When making the caramel, temperature is everything. If you don’t have a candy thermometer, use the cold water test. Drop a small amount of caramel into a bowl of ice water. If it forms a soft ball that holds its shape, it’s ready. If it’s just a thread, it needs more time. If it’s hard, you’ve overcooked it. Overcooked caramel becomes hard and brittle, which is not the chewy texture we want.
For the ganache, the ratio of cream to chocolate is important. A 1:1 ratio by weight is standard for a pourable ganache. If you want a thicker spread, use more chocolate. I find that using high-quality chocolate makes a huge difference in the shine and taste. Cheap chips often contain stabilizers that prevent a smooth melt.
Variations & Adaptations
One of the best things about this recipe is how adaptable it is. You can tweak it to fit your dietary needs or flavor preferences without losing the core appeal. Here are a few variations I’ve tried:
- Gluten-Free Option: Swap the all-purpose flour for a gluten-free 1:1 baking blend. Ensure the blend has xanthan gum. The caramel and ganache are naturally gluten-free, so just watch out for cross-contamination if you use oats or other additives.
- Dairy-Free Version: Use coconut oil instead of butter in the brownie layer. For the caramel, use full-fat coconut milk instead of heavy cream. The ganache can be made with coconut cream. The flavor will have a slight coconut note, which pairs beautifully with chocolate.
- Flavor Twists: Add a layer of crushed pretzels between the brownie and caramel for extra crunch. This adds a savory element that balances the sweetness. You can also add a layer of peanut butter cups in the middle for a Reese’s-inspired version. For a festive touch, add peppermint extract to the ganache and top with crushed candy canes.
- Low-Sugar Option: Use a sugar substitute like erythritol or monk fruit for the brownie and caramel layers. Note that sugar provides structure, so the texture may be slightly different. You might need to add a bit more flour or cornstarch to help it set.
I personally love adding a thin layer of raspberry jam between the brownie and caramel. The tartness cuts through the richness and adds a pop of color. It’s a personal variation that I’ve made for special occasions, and it always gets compliments.
Serving & Storage Suggestions
These rich millionaire brownies are best served chilled. The cold temperature helps the layers set and makes slicing much cleaner. I recommend storing them in an airtight container in the refrigerator. They will keep fresh for up to 5 days. If you are meal prepping for the week, this is perfect. You can pack them in individual containers for lunches or snacks.
For longer storage, you can freeze them. Wrap individual squares in plastic wrap and place them in a freezer-safe bag. They will last for up to 3 months. Thaw them in the refrigerator overnight before eating. The texture remains excellent after freezing.
When serving at a potluck, arrange them on a platter with a small sign indicating the ingredients, especially if there are nuts or dairy involved. They pair well with a hot beverage like coffee or tea, which helps cut through the richness. I also like to serve them with a side of fresh berries, like raspberries or strawberries, to add a fresh, acidic contrast.
Over time, the flavors meld together. The caramel softens the brownie slightly, and the chocolate ganache absorbs some of the caramel aroma. This is why they taste even better on day two. If you notice the ganache softening after a few days in the fridge, just pop them in the fridge for 15 minutes before serving to firm them up again.
Nutritional Information & Benefits
While these are definitely an indulgent treat, understanding the nutritional profile helps with portion control. Each square (assuming 16 servings) contains approximately 350-400 calories, depending on the size and specific ingredients used. The primary sources of calories are fat from the butter, cream, and chocolate, and carbohydrates from the sugar and flour.
The brownie base provides some iron from the cocoa powder. The caramel layer adds calcium from the cream and butter. However, these are high in sugar and saturated fat, so moderation is key. For a healthier twist, you can reduce the sugar in the caramel by 20% without significantly affecting the texture. You can also use dark chocolate with 70% cocoa for the ganache, which has more antioxidants and less sugar.
These brownies are not suitable for vegans due to the dairy and eggs, unless you make the adaptations mentioned earlier. They contain gluten from the flour, so they are not suitable for those with celiac disease unless you use gluten-free ingredients. Always check labels for potential allergens in your specific brands of chocolate and chocolate chips.
From a wellness perspective, I view these as a planned indulgence. They are not a daily snack, but a special treat for when you need a mood boost or a social connection. Enjoying a small square mindfully can be more satisfying than eating a larger portion distractedly.
Conclusion
Making rich millionaire brownies for your next potluck is a surefire way to impress. They are easy to make ahead, travel well, and taste incredible. The combination of fudgy brownie, chewy caramel, and smooth chocolate ganache is a winning trio that appeals to almost everyone. I hope you try this recipe and find it as useful for your meal prep and social gatherings as I have.
Feel free to experiment with the variations I suggested. Add your own twist, whether it’s a different flavor extract or a crunchy addition. The beauty of baking is making it your own. I’d love to hear how you customize these brownies. Leave a comment below with your favorite variation or share your photos on social media. Tag me so I can see your creations!
Happy baking, and enjoy every delicious bite. These brownies are worth the effort, and I promise you’ll be making them again and again. They are the ultimate comfort dessert for any occasion.
Frequently Asked Questions
Can I make these brownies ahead of time?
Yes, absolutely. These brownies are actually better the next day. You can make them up to 3 days in advance and store them in the refrigerator. They also freeze well for up to 3 months. Just thaw them in the fridge before serving.
Why did my caramel turn out hard?
If your caramel is hard and brittle, it was likely overcooked. Sugar temperature is critical. Make sure you cook it to the soft-ball stage (240°F/115°C). If you go higher, it becomes hard candy. Also, ensure you are using a candy thermometer for accuracy.
Can I use milk chocolate instead of semi-sweet?
You can, but the dessert will be much sweeter. Semi-sweet or bittersweet chocolate provides a better balance against the sweet caramel and brownie. If you use milk chocolate, consider reducing the sugar in the brownie batter slightly.
How do I keep the layers distinct when slicing?
The key is temperature. Ensure each layer is completely cool before adding the next. Use a sharp knife, preferably a serrated one, and wipe it clean between cuts. Dipping the knife in hot water and drying it can also help get clean slices.
Can I substitute the corn syrup in the caramel?
Light corn syrup prevents sugar crystallization. You can substitute it with honey or golden syrup, but honey may alter the flavor slightly and can make the caramel stickier. If you don’t have any substitute, you can try boiling the sugar and water longer, but it’s riskier. I recommend sticking with corn syrup for best results.
Pin This Recipe!
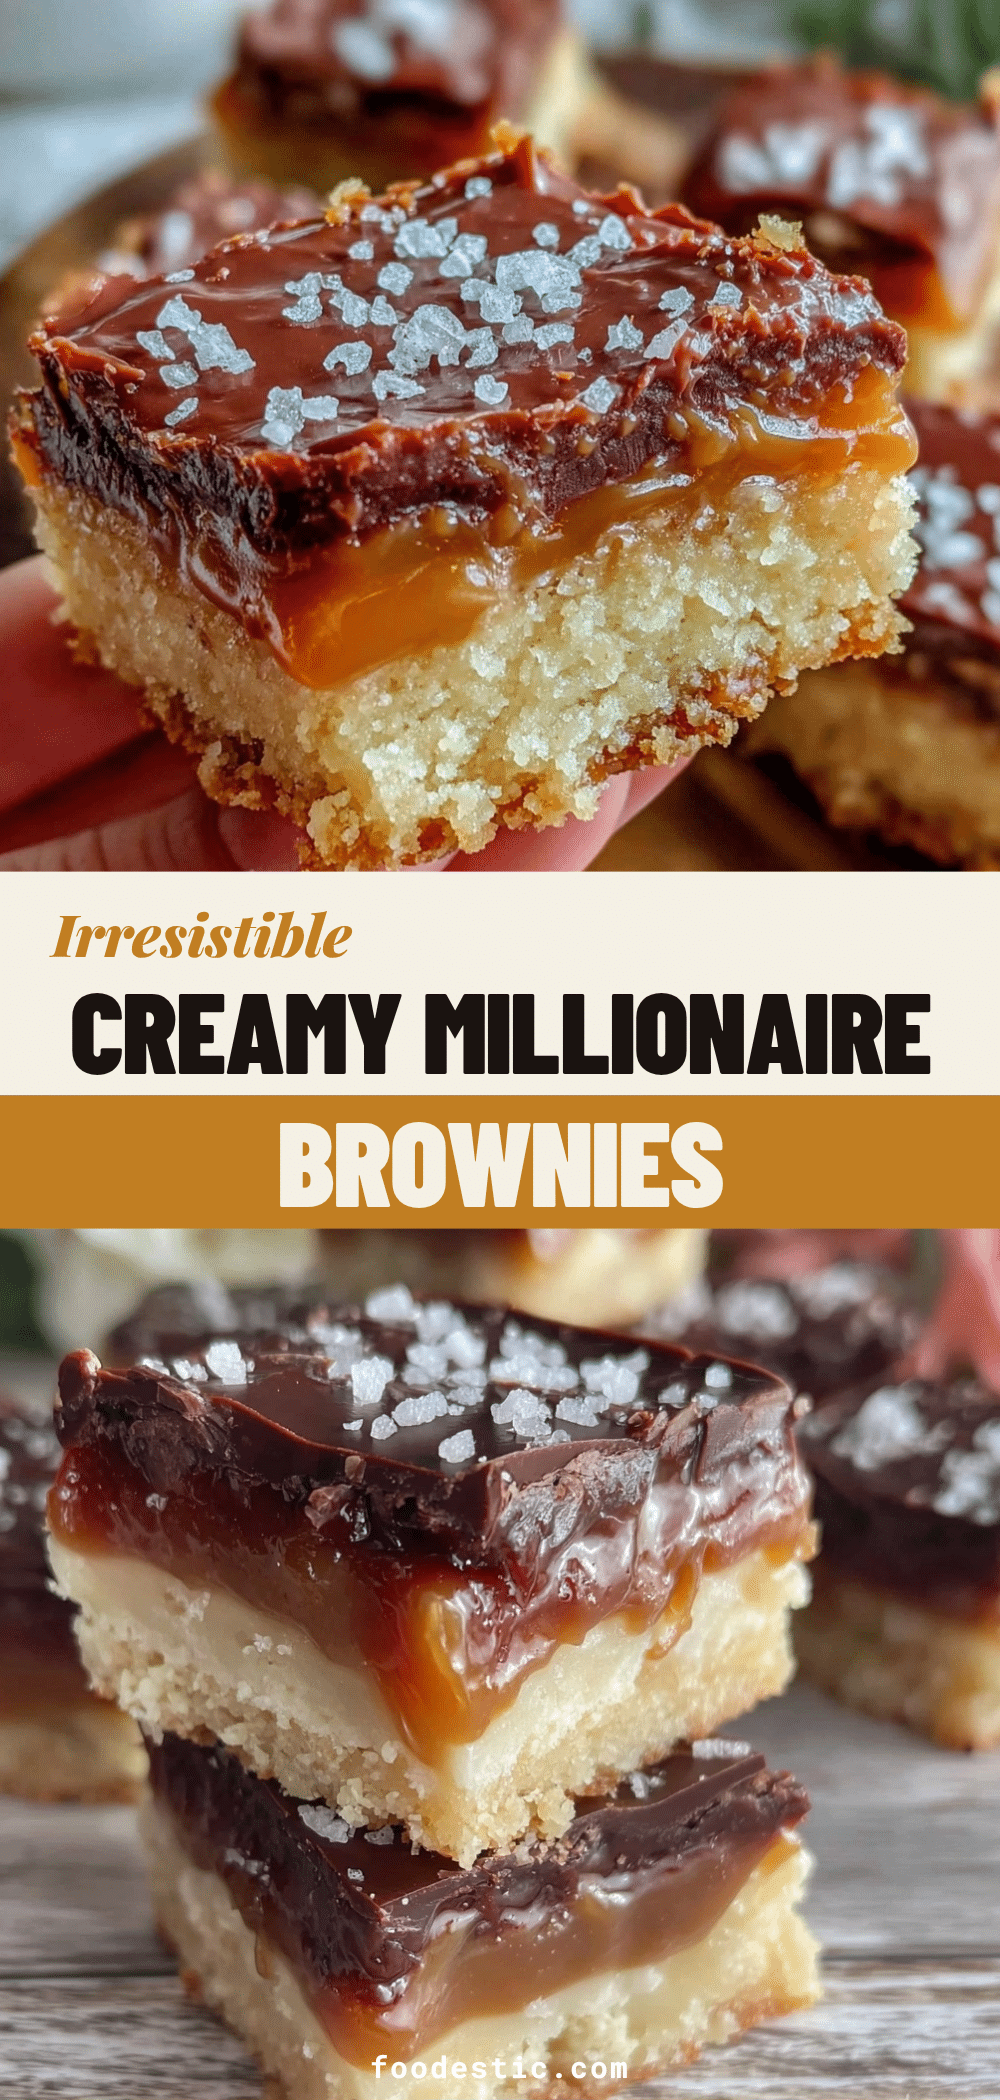
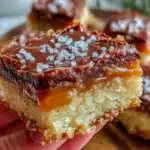
Rich Millionaire Brownies: Best Potluck Dessert for Meal Prep
- Total Time: 1 hour 15 minutes
- Yield: 16 servings
Description
These rich millionaire brownies feature a fudgy brownie base, a chewy salted caramel layer, and a smooth chocolate ganache. They are structured to hold their shape, making them the perfect make-ahead dessert for potlucks and meal prep.
Ingredients
- For the Brownie Base:
- Unsalted butter, melted
- Dark brown sugar
- Granulated white sugar
- Eggs, room temperature
- Vanilla extract
- All-purpose flour (or gluten-free 1:1 blend)
- Unsweetened cocoa powder (Dutch-processed)
- Pinch of salt
- For the Salted Caramel Layer:
- Light corn syrup
- Heavy cream
- Brown sugar
- Unsalted butter, cubed
- Water
- Flaky sea salt (e.g., Maldon)
- For the Chocolate Ganache Top:
- High-quality semi-sweet chocolate chips or chopped chocolate
- Heavy cream
- Butter
- Pinch of salt
Instructions
- Preheat oven to 350°F (175°C). Line a 9×13 inch metal baking pan with parchment paper, leaving an overhang on the long sides. Grease lightly with butter.
- Melt butter and let cool slightly. Whisk in brown sugar and granulated sugar until smooth.
- Add eggs one at a time, whisking well after each addition. Stir in vanilla extract.
- In a separate bowl, whisk flour, cocoa powder, and salt. Fold dry ingredients into wet mixture until just combined. Do not overmix.
- Pour batter into prepared pan and spread evenly. Bake for 20-25 minutes until edges are set but center looks slightly underbaked. Cool completely on a wire rack.
- While brownies cool, make caramel: In a heavy-bottomed saucepan, combine sugar, corn syrup, and water. Stir gently to moisten, then boil over medium heat without stirring until it reaches 240°F (115°C).
- Remove caramel from heat and carefully whisk in heavy cream (it will bubble). Stir in butter and salt until smooth. Let cool for 10 minutes.
- Pour warm caramel over cooled brownie base. Spread evenly and let set for at least 30 minutes (refrigerate to speed up, but don’t let it get too hard).
- Make ganache: Heat heavy cream until simmering. Pour over chocolate chips in a heat-proof bowl. Let sit for 5 minutes, then stir until smooth. Stir in butter and salt. Let cool for 15 minutes.
- Pour ganache over caramel layer. Spread evenly and sprinkle with flaky sea salt while wet.
- Refrigerate for at least 2 hours or overnight to set completely.
- Lift brownies out using parchment overhang. Slice into squares or rectangles with a sharp knife, wiping clean between cuts.
Notes
Ensure the brownie base is completely cool before adding caramel to prevent melting. Use a candy thermometer for the caramel to reach the soft-ball stage (240°F). For clean slices, use a sharp knife and wipe it between cuts. These taste better the next day as flavors meld.
- Prep Time: 30 minutes
- Cook Time: 45 minutes
- Category: Dessert
- Cuisine: American
Nutrition
- Serving Size: 1 square
- Calories: 375
- Sugar: 38
- Sodium: 180
- Fat: 22
- Saturated Fat: 13
- Carbohydrates: 45
- Fiber: 2
- Protein: 4
Keywords: millionaire brownies, potluck dessert, meal prep, salted caramel brownies, chocolate ganache, make ahead dessert, fudgy brownies