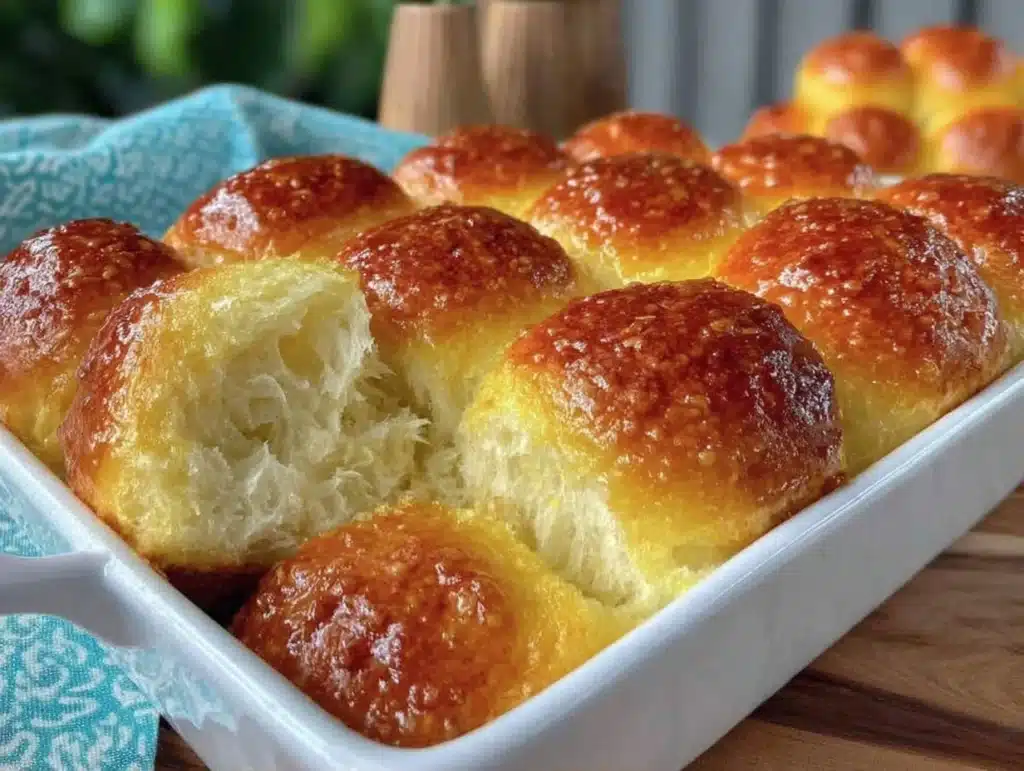
There is nothing quite like the smell of fresh bread baking in a home that feels like a hug. I remember standing in my kitchen during a particularly chaotic holiday season, staring at a tray of dense, brick-like rolls that refused to rise. I was exhausted, the house was a mess, and I thought I had lost my touch. That night, I ate those rolls with butter and felt a strange sense of relief because they were still warm. But the real turning point came a few months later when I decided to stop baking for immediate gratification and start baking for the week ahead.
Let’s face it, homemade bread usually means you have to eat it the same day or risk stale leftovers. But these homemade soft butter dinner rolls are different. I developed this recipe specifically for people who want the taste of fresh-baked goods without the daily stress. You can bake a batch on Sunday, store them properly, and pull them out on Wednesday when your lunchbox is looking a little sad. They stay soft, they stay fluffy, and honestly, they taste better than anything you’ll buy at the grocery store.
I’ve tested this recipe over a dozen times, adjusting the hydration and the resting times to get that perfect pillowy texture. As someone who meal preps lunches every single week, I needed a bread that could survive the fridge and reheat beautifully. These rolls are my secret weapon for turning a simple turkey sandwich into a gourmet experience or adding comfort to a quick weeknight dinner. If you’ve been intimidated by yeast, trust me, this method is foolproof. You’ll wonder why you ever bought store-bought bread again.
Why You’ll Love This Recipe
After years of trial and error in my own kitchen, I can confidently say that these soft butter dinner rolls are the gold standard for make-ahead baking. I’ve shared this recipe with friends who are skeptical of homemade yeast bread, and they all come back for seconds. The secret isn’t just in the ingredients; it’s in the technique that ensures every single roll is tender and airy. Here is why this recipe has earned a permanent spot in my weekly rotation.
- Quick & Easy Prep: While the dough needs time to rise, the active hands-on time is minimal. You can have these ready for the oven in under 30 minutes, leaving the rest to the yeast. This makes them perfect for a lazy Sunday morning or a quick prep session before a busy work week.
- Simple Ingredients: You likely already have everything you need in your pantry. Flour, yeast, sugar, salt, milk, butter, and an egg. No fancy flours or hard-to-find specialty items. It’s wholesome, simple, and budget-friendly.
- Perfect for Meal Prep: This is the big one. These rolls are designed to be baked, cooled, and stored. They remain soft in the refrigerator for up to four days and freeze beautifully for up to three months. You can grab one for lunch on Wednesday morning, and it will still be delicious.
- Crowd-Pleaser: Whether you are serving them with soup, using them for sandwiches, or just eating them with extra butter, everyone loves them. My kids, who usually pick at everything, devour these without complaint. They are a guaranteed hit at any table.
- Unbelievably Delicious: The texture is next-level. The inside is cloud-like and soft, while the outside gets a light, golden crust that shatters slightly when you pull it apart. The buttery flavor is rich but not overwhelming. It’s the kind of comfort food that makes you close your eyes after the first bite.
What makes this recipe different from others is the specific handling of the dough. I use a technique that creates a stronger gluten structure without requiring hours of kneading. This results in a roll that holds its shape well during storage but still feels fresh when reheated. It’s not just another bread recipe; it’s a system for having homemade bread available whenever you need it. It takes the stress out of meal planning and adds a touch of homemade luxury to your week.
What Ingredients You Will Need
This recipe relies on high-quality, simple ingredients to create a rich, tender crumb. The balance of fat and liquid is crucial for keeping the rolls soft for several days. I recommend using bread flour for the best chew, but all-purpose flour works well too if that’s what you have on hand. The key is to measure your flour correctly; scooping it directly from the bag can lead to dry, dense rolls, so spooning it into the measuring cup is the way to go.
- Bread Flour (500g / 4 cups): I prefer King Arthur Bread Flour for its high protein content, which helps the rolls rise tall and stay soft. If you use all-purpose flour, the texture will be slightly more cake-like but still delicious.
- Active Dry Yeast (1 packet / 2 ¼ tsp): This is the engine of the recipe. Make sure it’s fresh. If your yeast is old, your rolls won’t rise. I often bloom it in warm milk with a pinch of sugar to ensure it’s active before adding it to the dough.
- Whole Milk (240ml / 1 cup): Warm milk helps activate the yeast and adds richness to the crumb. Using whole milk ensures a softer texture compared to skim milk. You can substitute with almond milk for a dairy-free option, though the browning might be slightly less golden.
- Unsalted Butter (60g / 4 tbsp): Divided use. Some goes into the dough for flavor and tenderness, and the rest is brushed on top after baking for that irresistible shiny, buttery finish. Use high-quality butter if possible; it makes a noticeable difference in taste.
- Large Egg (1 whole + 1 yolk): The egg binds the dough and adds structure. The extra yolk adds extra richness and helps keep the rolls moist for longer periods. Room temperature eggs incorporate better into the dough.
- Sugar (2 tbsp): A little sugar feeds the yeast and helps with browning. You can use granulated white sugar or brown sugar for a slightly deeper, caramel-like flavor.
- Salt (1 ½ tsp): Salt is essential for flavor and controls the yeast activity. Don’t skip it, or the rolls will taste bland and rise too quickly.
- Vegetable Oil or Neutral Oil (for greasing): To grease the bowl and the baking pan. I use a light oil to prevent sticking without adding extra flavor.
When selecting your ingredients, freshness matters. Check the expiration date on your yeast. Look for flour that is freshly milled if you can find it, as older flour can absorb more liquid and change the dough consistency. For the butter, cold butter is easier to cut into the dough if you are using the pastry method, but melted butter works well for a quicker mix. I always keep a stock of these basics so I can bake these rolls on a whim.
How Do I Store These Rolls to Keep Them Fresh?
Proper storage is the key to maintaining that soft texture for days. Once the rolls have cooled completely to room temperature, you can store them in an airtight container or a heavy-duty freezer bag. For short-term storage (up to 4 days), keep them in the refrigerator. This is actually ideal for meal prep because it slows down the staling process. For long-term storage, freeze them in a single layer on a baking sheet first, then transfer them to a freezer bag. They will last for up to 3 months. When you’re ready to eat, let them thaw at room temperature or warm them directly from the freezer in the oven.
Equipment Needed
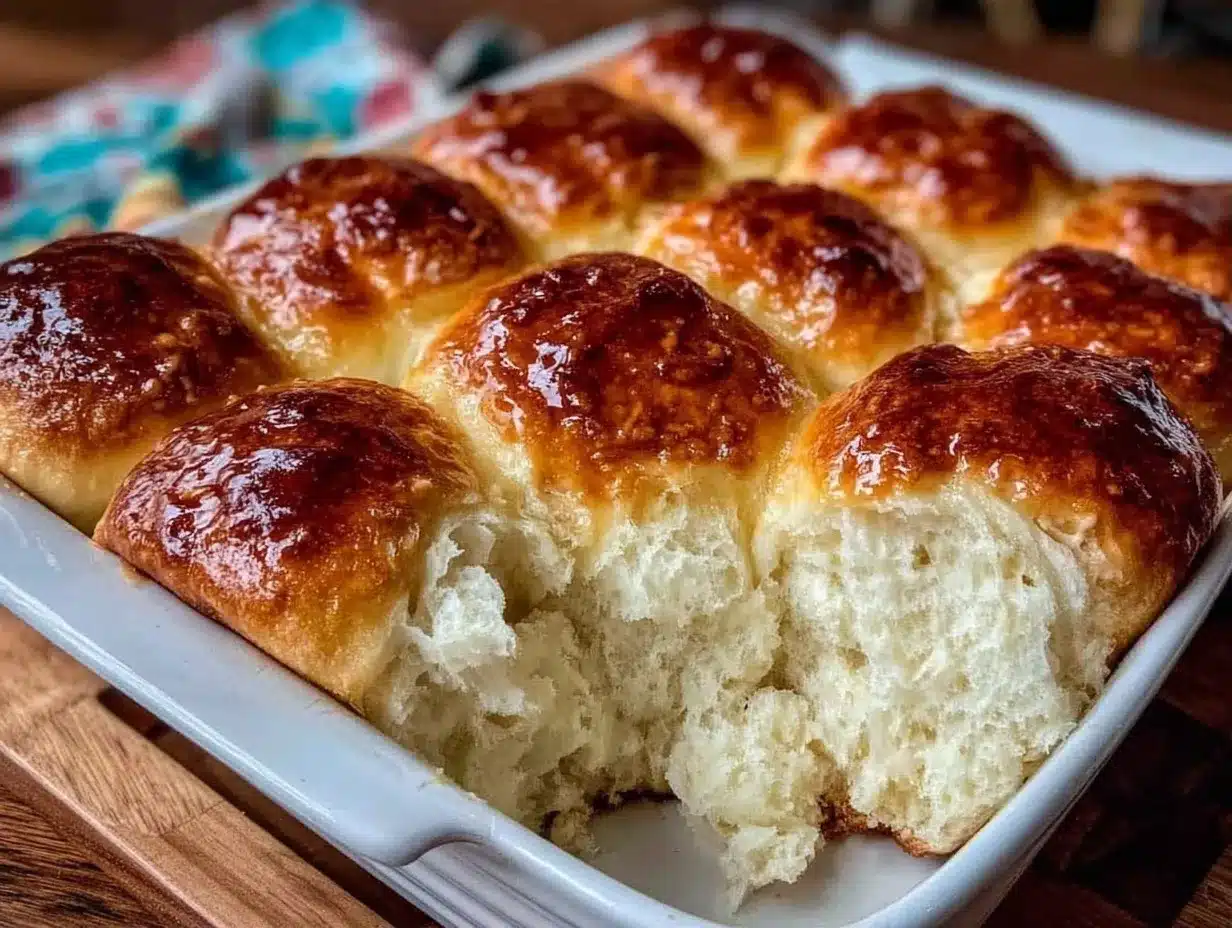
You don’t need a fancy kitchen to make these rolls, but having the right tools makes the process much smoother. A stand mixer with a dough hook is incredibly helpful for kneading the dough, but you can absolutely do this by hand. If you mix by hand, use a sturdy wooden spoon to combine the ingredients initially, then turn the dough out onto a floured surface to knead. It takes about 8-10 minutes of kneading by hand to get the dough smooth and elastic.
A digital kitchen scale is the most important tool for accuracy. Baking is chemistry, and volume measurements can vary wildly depending on how you scoop the flour. Weighing your flour ensures consistent results every time. If you don’t have a scale, use the spoon-and-level method. A 9×13 inch baking dish or a large rimmed baking sheet works well for shaping the rolls. I prefer a baking sheet because it allows for better air circulation around the rolls, leading to more even browning.
A pastry brush is essential for applying the melted butter on top of the rolls. It gives you control over the amount of butter and ensures an even coating. A silicone spatula is useful for scraping down the sides of the bowl and folding the dough during the rise. Finally, an oven thermometer is a good investment. Ovens often run hot or cold, and knowing your actual oven temperature helps you adjust baking times for perfect results.
Can I Use a Bread Machine for This Recipe?
Yes, you can use the dough setting on your bread machine. Simply add the ingredients in the order recommended by your machine’s manual (usually liquids first, then dry, then yeast). Let the machine do the kneading and first rise. Then, punch down the dough, shape the rolls, and let them rise a second time before baking. This is a great option if you want to minimize cleanup or if you have limited counter space. Just be sure to check the dough consistency during the kneading cycle; it should be soft and slightly sticky but not wet.
Preparation Method
Making these soft butter dinner rolls is a straightforward process that rewards patience. The key is to let the yeast do its work and not rush the rising times. Here is how to make them from scratch.
- Bloom the Yeast (5 minutes): In the bowl of a stand mixer, combine the warm milk, sugar, and yeast. Stir gently and let it sit for 5-10 minutes until it becomes foamy. This step confirms that your yeast is alive and active. If it doesn’t foam, start over with fresh yeast.
- Mix the Dough (5 minutes): Add the egg, egg yolk, salt, and melted butter to the yeast mixture. Mix on low speed with the dough hook until combined. Gradually add the flour, one cup at a time, while the mixer is running. Stop when the dough starts to come together and pulls away from the sides of the bowl. You may not need all the flour, so reserve about ¼ cup.
- Knead the Dough (7-10 minutes): Increase the mixer speed to medium-low and knead for 7-10 minutes. The dough should become smooth, elastic, and slightly tacky but not sticky. If it’s too sticky, add the reserved flour a tablespoon at a time. If you’re kneading by hand, turn the dough onto a floured surface and push it away with the heel of your hand, folding it back over itself. Repeat until the dough passes the windowpane test.
- First Rise (1-1.5 hours): Lightly grease a large bowl with oil. Place the dough in the bowl, turning it once to coat the top with oil. Cover the bowl with plastic wrap or a damp kitchen towel. Let it rise in a warm, draft-free place until doubled in size. This usually takes 1 to 1.5 hours, depending on the temperature of your kitchen.
- Shape the Rolls (10 minutes): Punch down the dough to release air bubbles. Turn it out onto a lightly floured surface. Divide the dough into 12 equal pieces. You can weigh them for consistency (about 80-90g each) or eyeball it. Shape each piece into a ball by tucking the edges underneath and rotating it on the counter. Place the balls seam-side down in a greased 9×13 inch baking dish or on a parchment-lined baking sheet. Leave about 2 inches of space between them.
- Second Rise (30-45 minutes): Cover the shaped rolls loosely with plastic wrap or a towel. Let them rise again until puffy and nearly doubled. They should touch or nearly touch each other. This step is crucial for their soft texture. Preheat your oven to 375°F (190°C) during the last 15 minutes of rising.
- Bake (20-25 minutes): Brush the tops of the rolls with melted butter. Bake for 20-25 minutes until they are golden brown on top and sound hollow when tapped on the bottom. If they brown too quickly, cover them loosely with foil for the last 10 minutes.
- Finish with Butter (2 minutes): As soon as the rolls come out of the oven, brush them generously with the remaining melted butter. This keeps the crust soft and adds incredible flavor. Let them cool in the pan for 5 minutes, then transfer to a wire rack to cool completely before storing.
One common mistake is opening the oven door too early during baking, which can cause the rolls to collapse. Trust the timer and resist the urge to peek. Another tip is to ensure your kitchen is warm for the rising steps. If your kitchen is cold, you can turn on the oven to 200°F for a minute, turn it off, and place the dough inside to create a warm environment.
Cooking Tips & Techniques
Getting the texture right requires a bit of practice, but these tips will help you succeed. The most important factor is the temperature of your liquids. If the milk is too hot, it will kill the yeast. If it’s too cold, the yeast won’t activate properly. Aim for 105-110°F (40-43°C). You can use a candy thermometer to be precise, or test it with your finger—it should feel warm but not hot.
Kneading is another critical step. Under-kneaded dough will result in dense rolls, while over-kneaded dough can become tough. The windowpane test is the best way to check. Take a small piece of dough and gently stretch it. If you can stretch it thin enough to see light through it without it tearing, it’s ready. If it tears immediately, keep kneading.
Don’t skip the second rise. This is what gives the rolls their final volume and light texture. If you bake them immediately after shaping, they will be dense and bread-like. Let them get puffy and jiggly before baking. Also, pay attention to your oven temperature. Every oven is different. Use an oven thermometer to verify the temperature. If your rolls are consistently pale, your oven might be running cool. If they burn on the bottom, try placing a baking sheet on the rack below to shield them.
For the best meal prep results, cool the rolls completely before storing. Trapped steam will make them soggy. If you store them while they are still warm, the moisture will condense and create a damp environment that promotes mold. Let them sit on a wire rack until they are no longer warm to the touch. This usually takes about 30-45 minutes.
What Can I Do If My Rolls Are Too Dense?
If your rolls turn out dense, it could be due to several factors. Check your yeast expiration date. Ensure you measured the flour correctly; too much flour makes dough dry and dense. Make sure you kneaded the dough enough to develop gluten. Also, ensure the rising environment was warm enough. Yeast is sensitive to temperature, and a cold kitchen will slow down the rising process significantly.
Variations & Adaptations
These rolls are incredibly versatile and can be adapted to suit different tastes and dietary needs. Here are a few variations I love.
- Garlic Herb Rolls: Add 1 teaspoon of dried parsley and ½ teaspoon of garlic powder to the dough. Brush with garlic butter (melted butter mixed with minced fresh garlic) after baking for a savory twist.
- Whole Wheat Rolls: Substitute half of the bread flour with whole wheat flour. You may need to add a little more milk, as whole wheat flour absorbs more liquid. These rolls are heartier and have a nuttier flavor.
- Honey Butter Rolls: Replace the sugar in the dough with honey. Brush the tops with honey butter (melted butter mixed with a drizzle of honey) after baking for a sweet and savory treat.
- Cinnamon Sugar Rolls: Before the second rise, brush the tops with melted butter and sprinkle with a mixture of cinnamon and sugar. These are great for breakfast or as a dessert.
- Dairy-Free Option: Use almond milk or oat milk instead of dairy milk, and use coconut oil or vegan butter instead of dairy butter. The texture will be slightly different but still delicious.
I often make a batch of garlic herb rolls for meal prep lunches. They pair perfectly with tomato soup or a simple salad. The garlic flavor holds up well in the refrigerator and actually gets more pronounced after a day or two. It’s a great way to add some variety to your weekly menu without much extra effort.
Serving & Storage Suggestions
These rolls are best served warm, but they are equally delicious at room temperature. For meal prep, I recommend storing them in the refrigerator. To reheat, simply place the roll on a microwave-safe plate and heat it for 20-30 seconds. Alternatively, wrap it in foil and warm it in a 350°F oven for 10 minutes. This method restores the softness and warmth perfectly.
For freezing, wrap the cooled rolls individually in plastic wrap, then place them in a freezer bag. They can be frozen for up to 3 months. To serve, thaw them overnight in the refrigerator or at room temperature. You can also reheat them directly from the freezer in the oven at 350°F for 15-20 minutes. This is perfect for having breakfast or lunch ready to go.
Pair these rolls with a simple weeknight meal like roasted chicken and vegetables, or a hearty bowl of chili. They also make a great addition to a sandwich. For lunch, slice them in half and use them for turkey and cheese sandwiches. They hold up well and don’t get soggy quickly, which is a huge plus for meal prep.
How Long Do These Rolls Last?
At room temperature, these rolls will stay fresh for 2-3 days if stored in an airtight container. In the refrigerator, they will last for up to 4 days. In the freezer, they will last for up to 3 months. Remember to always let them cool completely before storing to prevent condensation and sogginess.
Nutritional Information & Benefits
These homemade soft butter dinner rolls are a source of carbohydrates for energy and contain some protein from the egg and flour. They are a good source of thiamin, riboflavin, and iron, especially if you use enriched flour. However, they do contain butter and egg, so they are not vegan or dairy-free unless you use substitutions.
One serving (one roll) contains approximately 180-200 calories, depending on the size and the amount of butter used. They are relatively low in sugar and fat compared to store-bought buns, which often contain preservatives and added sugars. Making them at home allows you to control the ingredients and avoid unnecessary additives.
For those watching their calorie intake, you can reduce the amount of butter used in the dough and only brush the tops lightly. You can also use whole wheat flour to increase the fiber content. These rolls can be part of a balanced diet when enjoyed in moderation. They provide comfort and satisfaction without the guilt of processed foods.
Conclusion
Making homemade soft butter dinner rolls is a rewarding experience that pays off in every bite. These rolls are not just a side dish; they are a staple for meal prep and a comfort food that brings warmth to your home. By baking a batch on the weekend, you set yourself up for success during the busy week ahead. You’ll have soft, delicious bread ready whenever you need it, whether for lunch, dinner, or a quick snack.
I encourage you to try this recipe and make it your own. Experiment with different flavors, add herbs, or swap in whole wheat flour. The possibilities are endless. I’d love to hear how you enjoy these rolls. Do you add them to your lunchbox? Do you serve them with soup? Share your experiences in the comments below.
If you make these rolls, please take a photo and share it on social media. Tag me so I can see your creations. Happy baking, and enjoy the joy of homemade bread!
Frequently Asked Questions
Can I use instant yeast instead of active dry yeast?
Yes, you can use instant yeast. You can mix it directly with the dry ingredients without blooming it first. You may need to reduce the liquid slightly, so add it gradually. The rising time might be slightly faster, so keep an eye on the dough.
Why are my rolls flat and dense?
This usually happens if the yeast is old or inactive, or if the dough was under-kneaded. Make sure your yeast is fresh and your kitchen is warm enough for rising. Also, ensure you didn’t add too much flour, which can weigh down the dough.
How do I freeze these rolls?
Let the rolls cool completely after baking. Wrap them individually in plastic wrap, then place them in a freezer-safe bag. They can be frozen for up to 3 months. Thaw them at room temperature or reheat them directly from the freezer in the oven.
Can I make these rolls ahead of time and bake them later?
Yes, after shaping the rolls, you can cover them tightly and refrigerate them overnight. Let them sit at room temperature for 30 minutes before baking. This is a great option for having fresh rolls ready in the morning.
What is the best way to reheat refrigerated rolls?
For the best texture, wrap the roll in foil and warm it in a 350°F oven for 10-15 minutes. You can also microwave it for 20-30 seconds, but the texture may become slightly chewy. The oven method restores the softness better.
Pin This Recipe!


Homemade Soft Butter Dinner Rolls
- Total Time: 55 minutes
- Yield: 12 servings 1x
Description
Soft, fluffy butter dinner rolls designed for meal prep. These rolls stay fresh in the refrigerator for up to four days or freeze for up to three months, making them perfect for lunches and weeknight dinners.
Ingredients
- 500g (4 cups) Bread Flour
- 1 packet (2 ¼ tsp) Active Dry Yeast
- 240ml (1 cup) Whole Milk, warm
- 60g (4 tbsp) Unsalted Butter, divided
- 1 Large Egg + 1 Egg Yolk
- 2 tbsp Sugar
- 1 ½ tsp Salt
- Vegetable Oil or Neutral Oil (for greasing)
Instructions
- Bloom the yeast: In a stand mixer bowl, combine warm milk, sugar, and yeast. Let sit for 5-10 minutes until foamy.
- Mix the dough: Add egg, egg yolk, salt, and melted butter to the yeast mixture. Mix on low with a dough hook until combined. Gradually add flour, one cup at a time, stopping when the dough pulls away from the sides.
- Knead the dough: Knead on medium-low speed for 7-10 minutes until smooth and elastic. The dough should be slightly tacky but not sticky.
- First rise: Place dough in a greased bowl, cover, and let rise in a warm place for 1-1.5 hours until doubled in size.
- Shape the rolls: Punch down dough and divide into 12 equal pieces. Shape into balls and place seam-side down in a greased 9×13 inch baking dish or on a baking sheet, leaving space between them.
- Second rise: Cover rolls and let rise for 30-45 minutes until puffy and nearly doubled. Preheat oven to 375°F (190°C) during the last 15 minutes.
- Bake: Brush tops with melted butter. Bake for 20-25 minutes until golden brown and hollow when tapped.
- Finish: Immediately brush hot rolls with remaining melted butter. Cool in pan for 5 minutes, then transfer to a wire rack to cool completely.
Notes
Ensure milk is warm (105-110°F) but not hot to avoid killing yeast. Use the spoon-and-level method for flour to prevent dense rolls. Rolls can be stored in the fridge for up to 4 days or frozen for up to 3 months. Reheat in oven at 350°F for best texture.
- Prep Time: 30 minutes
- Cook Time: 25 minutes
- Category: Side Dish
- Cuisine: American
Nutrition
- Serving Size: 1 roll
- Calories: 190
- Sugar: 3
- Sodium: 350
- Fat: 6
- Saturated Fat: 3
- Carbohydrates: 28
- Fiber: 1
- Protein: 5
Keywords: dinner rolls, soft butter rolls, meal prep bread, homemade rolls, yeast bread, make ahead bread