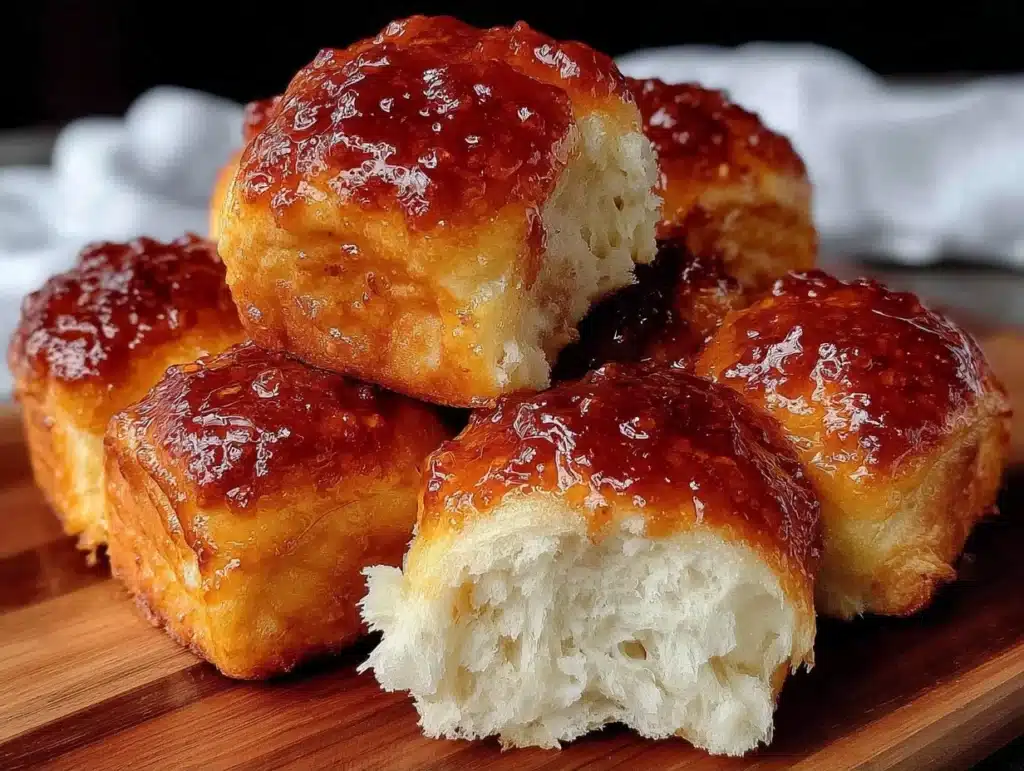
There is nothing worse than that 2pm slump. You know the one. Your stomach starts rumbling, your energy crashes, and you’re staring at your screen wondering if you should just eat a donut for lunch. I used to be that person. Every single day. Until I discovered the magic of soft sweet Hawaiian rolls as my go-to meal prep hero.
I first made these rolls during a particularly chaotic week when I had three projects due and zero time to cook. I needed something that tasted like a treat but kept me sane. I grabbed a pack of those sweet, pineapple-flavored dough balls from the bakery section and decided to hack them. Honestly, I was skeptical. Would they stay soft? Would they get weird in the fridge? Spoiler alert: they didn’t. They became my weekly savior.
These aren’t your average sandwich bread. They are pillowy, slightly sweet, and hold up beautifully all day long. Whether you are making turkey clubs or just enjoying them with a bit of cream cheese, they provide that steady energy boost without the sugar crash. I’ve tested this method over a dozen times now, tweaking the baking time and the glaze ratio to get the perfect texture. As someone who meal preps for a living, I can tell you that these rolls are the real deal.
Why do I love them so much? Because they bridge the gap between comfort food and practical nutrition. They are easy to make in batches, freeze beautifully, and taste fresh even three days later. If you are looking for a way to stop grazing at your desk, this recipe is your answer. Let’s face it, life is busy. You need food that works as hard as you do. These soft sweet Hawaiian rolls do exactly that.
Why You’ll Love This Recipe
After baking these rolls for my own meal prep routine, I realized why they have become such a staple in my kitchen. It isn’t just about the taste, although that is definitely a big part of it. It is about the reliability. When you are planning your week, you need ingredients and recipes that behave. These rolls have never let me down. I have tried countless variations of sweet breads, but this specific method strikes the perfect balance between fluffy and sturdy.
Here is why these rolls stand out in my weekly rotation:
- Quick & Easy: If you use store-bought dough balls, you are looking at less than an hour of active time. Even from scratch, the process is straightforward. This is perfect for busy weeknights or Sunday meal prep sessions where you want to get things done fast.
- Simple Ingredients: You likely already have most of this in your pantry. Flour, sugar, butter, eggs, and maybe some pineapple juice if you are making them from scratch. No fancy grocery trips needed. It is just wholesome, simple food.
- Perfect for Meal Prep: These rolls are the ultimate lunch companion. They don’t get soggy like bagels can, and they don’t stale out like sourdough. They stay soft and sweet, making them ideal for packing in a lunchbox or keeping at your desk.
- Crowd-Pleaser: I have brought these to office potlucks and family gatherings. They always get rave reviews. Kids love the sweetness, and adults appreciate the homemade quality. They are versatile enough to be a side dish or a sandwich base.
- Unbelievably Delicious: The texture is next-level comfort food. Crispy on the bottom, soft and airy on top, with a hint of vanilla and pineapple. It is the kind of bread that makes you close your eyes after the first bite.
What makes this recipe different from the rest is the attention to detail in the baking process. Many recipes skip the step of letting the dough rise properly or forget to brush them with butter immediately after baking. I have learned through trial and error that these small steps make all the difference. This isn’t just another version of sweet rolls; it is my best version. It connects emotionally because it solves a real problem: the need for reliable, delicious food that keeps you satisfied through the afternoon.
What Ingredients You Will Need
This recipe uses simple, wholesome ingredients to deliver bold flavor and satisfying texture without the fuss. The beauty of these rolls lies in their simplicity. You don’t need expensive specialty flours or rare spices. Just good, basic ingredients that come together to create something magical. I like to keep these on hand because they are versatile and forgiving.
- All-Purpose Flour: 3 to 3.5 cups (360-420g). This is your base. I recommend using a reliable brand like King Arthur for consistency. If you need a gluten-free option, a 1:1 gluten-free blend works well, though the texture might be slightly denser.
- Granulated Sugar: 1/4 cup (50g). Adds that signature sweetness. You can reduce this slightly if you prefer less sweet rolls, but the sugar also helps with browning.
- Instant Yeast: 2.25 teaspoons (1 packet). Instant yeast is faster and easier for beginners. You don’t need to proof it first. Just mix it right into the dry ingredients. Active dry yeast works too, but you’ll need to dissolve it in warm water first.
- Warm Milk: 1 cup (240ml). Warm, not hot. You want it around 110°F (43°C). Whole milk gives the best richness, but 2% or even plant-based milk like almond or oat milk works fine.
- Unsalted Butter: 4 tablespoons (56g), melted. Adds flavor and tenderness. Use real butter if you can; it makes a huge difference in taste compared to margarine.
- Large Eggs: 2 large eggs, room temperature. These help bind the dough and add structure. Room temperature eggs incorporate better into the batter.
- Salt: 1 teaspoon. Balances the sweetness. Do not skip this step; it makes the flavor pop.
- Pineapple Juice (Optional but Recommended): 2-3 tablespoons. If you want that classic Hawaiian roll flavor, substitute some of the milk with pineapple juice. It adds a tropical tang that pairs beautifully with the sweetness.
- Vanilla Extract: 1 teaspoon. Enhances the sweet flavor profile.
- Butter for Glazing: 2 tablespoons, melted. Brushing the rolls with melted butter immediately after they come out of the oven keeps them soft and adds a shiny finish.
I personally prefer small-curd cottage cheese if I want to boost the protein, but for traditional soft rolls, I stick to the basics. Look for fresh, high-quality butter and eggs. For the flour, I always check the expiration date on the yeast packet to ensure it is still active. In summer, the dough rises faster, so you might need less time. In winter, give it a little extra time to proof.
Equipment Needed
You don’t need a fancy kitchen to make these rolls. Here is what you will need to get started. A large mixing bowl is essential for combining the dough. I use a glass bowl because I can see the dough rise clearly. A stand mixer with a dough hook is helpful but not required. I have made these by hand many times, and it is a great workout. Just be prepared to knead for about 8-10 minutes until the dough is smooth and elastic.
A 9×13 inch baking pan is the standard size for this recipe. It allows the rolls to bake evenly and touch each other, which helps them stay soft. If you don’t have a 9×13 pan, two 9-inch round pans work well too. A pastry brush is useful for applying the butter glaze. Silicone brushes are easier to clean than bristle ones. An oven thermometer is a smart investment. Ovens can be inaccurate, and checking the temperature ensures your rolls bake properly and don’t end up dense or undercooked.
If you are on a budget, you can skip the stand mixer and use a sturdy wooden spoon. For the pan, any heavy-duty metal baking dish works. Avoid glass pans if you want a crisper bottom, as glass heats slower. Keep your equipment clean and dry to ensure the yeast works properly. Moisture in the bowl can sometimes affect the rise.
Preparation Method
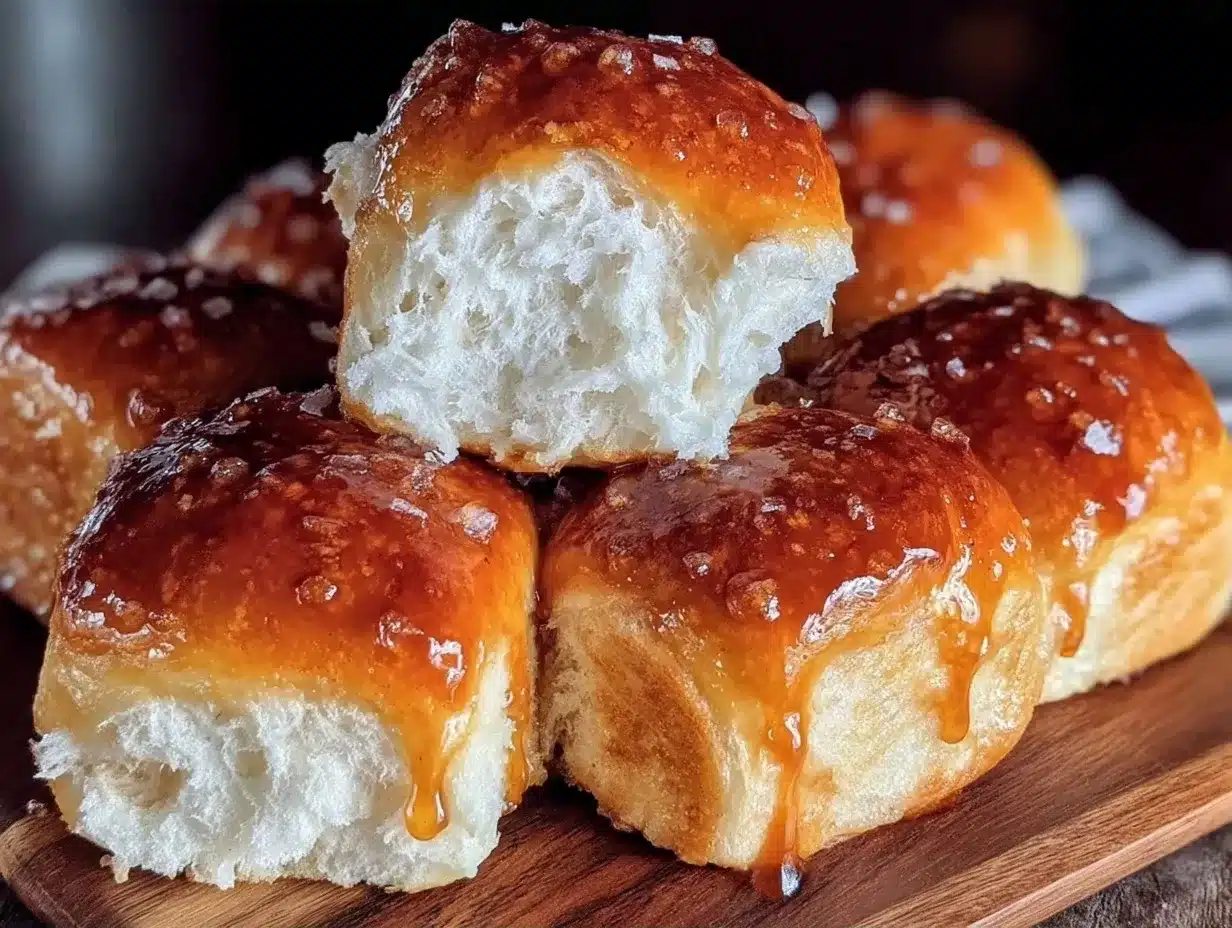
- Mix the Dry Ingredients: In a large bowl, whisk together the flour, sugar, instant yeast, and salt. Make sure the yeast is evenly distributed. This step takes about 2 minutes. If you are using active dry yeast, skip this and dissolve it in the warm milk first.
- Combine Wet Ingredients: In a separate bowl or measuring cup, whisk together the warm milk, melted butter, eggs, vanilla extract, and pineapple juice (if using). Ensure the milk isn’t too hot, or it will kill the yeast. It should be warm to the touch, like baby formula temperature. This takes about 1 minute.
- Form the Dough: Pour the wet ingredients into the dry ingredients. Mix with a wooden spoon or your stand mixer on low speed until a shaggy dough forms. If using a mixer, switch to the dough hook and increase speed to medium. Knead for 5-7 minutes. The dough should be smooth, slightly sticky, and spring back when poked. If it is too sticky, add flour one tablespoon at a time. If it is too dry, add milk one teaspoon at a time. This step is crucial for texture and takes about 10 minutes total.
- First Rise: Lightly grease a clean bowl with oil or butter. Place the dough in the bowl and turn it once to coat. Cover with plastic wrap or a damp towel. Let it rise in a warm, draft-free place for 1 to 1.5 hours, or until doubled in size. This takes about 60-90 minutes. A warm oven (turned off) with the light on is a great spot.
- Shape the Rolls: Punch down the dough to release air bubbles. Divide the dough into 12 equal pieces. Roll each piece into a smooth ball. Place the balls into the greased 9×13 baking pan, leaving a little space between them if you want separate rolls, or push them close together for pull-apart rolls. This takes about 10 minutes.
- Second Rise: Cover the pan again and let the rolls rise for another 30-45 minutes. They should look puffy and jiggly. Preheat your oven to 350°F (175°C) during the last 15 minutes of rising. This step takes 30-45 minutes.
- Bake: Place the pan in the center of the oven. Bake for 18-22 minutes, or until the tops are golden brown. If they start browning too quickly, tent them with foil. Check for doneness by tapping the bottom of a roll; it should sound hollow. This takes 20 minutes.
- Glaze and Cool: Immediately upon removing from the oven, brush the tops with melted butter. Let them cool in the pan for 5 minutes, then transfer to a wire rack. This takes 10 minutes. The butter adds shine and keeps them soft.
Common issues include under-rising or dense texture. If your dough doesn’t rise, check your yeast expiration date. If the rolls are dense, you might have added too much flour during kneading. Trust your senses. The dough should feel soft, not stiff.
Cooking Tips & Techniques
Getting the perfect roll takes a bit of practice. One common mistake is over-kneading. If you use a stand mixer, watch the dough closely. Once it is smooth and elastic, stop. Over-kneading can develop too much gluten, making the rolls tough instead of soft. I learned this the hard way on my first attempt. They came out looking great but tasted like breadsticks.
Another tip is to pay attention to your kitchen temperature. Yeast is sensitive to cold. If your kitchen is chilly, your dough will take longer to rise. You can speed this up by placing the covered dough near a warm appliance or in a slightly warmed oven. Conversely, if it is too hot, the yeast might activate too quickly and then die, leaving you with flat rolls. Aim for a consistent, warm environment.
Multitasking is key here. While the dough is rising, you can prepare your lunch components. Chop vegetables, make dressings, or organize your containers. This saves time later. Also, don’t skip the second rise. It is what gives the rolls their final puffiness. If you bake them too soon, they will be dense and flat.
For consistency, weigh your ingredients if you have a kitchen scale. Volume measurements can vary, especially with flour. Using grams ensures your ratios are correct every time. I keep a small scale on my counter for this reason. It makes baking more precise and less frustrating.
Variations & Adaptations
One of the best things about this recipe is how adaptable it is. You can customize it to fit your dietary needs or taste preferences. Here are a few variations I love:
- Gluten-Free Option: Use a high-quality 1:1 gluten-free flour blend. Add a teaspoon of xanthan gum if your blend doesn’t include it. The dough will be stickier, so handle it gently. You may need to add a bit more liquid.
- Dairy-Free: Swap the milk for almond, oat, or soy milk. Use coconut oil or vegan butter instead of dairy butter. The rolls will still be soft and delicious, though the flavor will be slightly different.
- Lower Sugar: Reduce the sugar in the dough to 2 tablespoons. You can also use a sugar substitute like erythritol if you are watching your carb intake. Note that sugar feeds the yeast, so the rise might be slower.
- Savory Twist: Skip the sugar and vanilla. Add garlic powder, dried herbs, and cheese to the dough. Brush with garlic butter after baking. These are perfect for sandwiches or as a side for soup.
- Personal Favorite: I often add a swirl of cinnamon sugar inside the rolls before shaping. It adds a nice surprise in every bite. Just roll out the dough, spread butter, sprinkle cinnamon sugar, roll it up, and then cut into balls.
These variations allow you to keep the recipe interesting. I usually make a batch of plain rolls and a batch of cinnamon swirls for variety. It keeps my meal prep exciting and ensures I don’t get bored with the same flavor every day.
Serving & Storage Suggestions
These rolls are best served slightly warm, but they are excellent at room temperature too. For lunch prep, they hold up well in an airtight container. I like to serve them with turkey and avocado sandwiches, or simply with a slice of cheddar and some mustard. They pair wonderfully with a cold glass of milk or a hot cup of coffee.
For storage, keep the rolls in an airtight container at room temperature for up to 3 days. If you want to keep them longer, freeze them. Wrap them individually in plastic wrap and then place them in a freezer-safe bag. They will last for up to 3 months. To reheat, simply microwave them for 20-30 seconds or toast them in the oven. This restores their softness and warmth.
I have found that the flavors actually develop over the first day. The sweetness mellows out, and the texture becomes even softer. This is why they are so perfect for meal prep. By day two, they are often even better than day one. Just make sure to let them cool completely before storing to prevent condensation, which can make them soggy.
Nutritional Information & Benefits
While these rolls are a treat, they can fit into a balanced diet. Each roll contains approximately 180-200 calories, depending on the size and glaze. They provide carbohydrates for energy, which is essential for keeping you full and focused during the afternoon. The butter adds healthy fats, which help with satiety.
If you use whole wheat flour, you can increase the fiber content, which aids digestion. The eggs provide protein, helping to build muscle and repair tissues. For those with gluten sensitivities, the gluten-free adaptation offers a safe alternative. However, always check labels for allergens.
From a wellness perspective, I enjoy these rolls because they satisfy my sweet tooth without causing a massive sugar spike, especially if I pair them with a protein source like nuts or yogurt. They are a mindful choice for those who want to enjoy comfort food while staying on track with their health goals. Moderation is key, and these rolls are a great way to achieve that balance.
Conclusion
These soft sweet Hawaiian rolls are more than just bread. They are a solution to the afternoon slump, a source of comfort, and a versatile ingredient for your meal prep. I love them because they are reliable, delicious, and easy to make. Whether you stick to the classic recipe or try a variation, you will end up with a batch of rolls that your family and friends will love.
I encourage you to experiment with the flavors and make them your own. Add your favorite fillings or spices. Share them with neighbors or bring them to work. Cooking is about connection, and these rolls are perfect for sharing. Plus, they keep you full at 2pm, which is a win in my book.
Please leave a comment below and let me know how you liked them. Did you try a variation? Did they help you beat the 2pm slump? I love hearing from you. Also, share this recipe with a friend who needs a lunch prep upgrade. Happy baking, and enjoy every soft, sweet bite!
FAQs
Can I make these rolls ahead of time?
Yes, absolutely. You can let them rise in the pan, cover them, and refrigerate them overnight. In the morning, take them out and let them come to room temperature before baking. This is perfect for busy mornings.
Why are my rolls dense?
This usually happens if the dough is over-kneaded, the yeast is old, or there wasn’t enough rise time. Make sure your yeast is active and give the dough enough time to double in size.
Can I freeze the dough before baking?
It is better to bake them first and then freeze. Freezing raw dough can affect the yeast activity and texture. Baked rolls freeze much better and retain their softness.
What is the best way to reheat frozen rolls?
Thaw them overnight in the fridge, then microwave for 20-30 seconds. Or, wrap them in foil and warm them in a 300°F oven for 10 minutes. This restores their freshness.
Can I use honey instead of sugar?
Yes, you can substitute honey for sugar. Use about 3/4 cup of honey for every 1 cup of sugar. Reduce the liquid in the recipe slightly to account for the honey’s moisture content.
Pin This Recipe!


Soft Sweet Hawaiian Rolls: Best 2pm Lunch Prep
- Total Time: 2 hours 50 minutes
- Yield: 12 servings 1x
Description
Pillowy, slightly sweet Hawaiian rolls that stay soft all day long, perfect for meal prep and beating the afternoon slump without the sugar crash.
Ingredients
- 3 to 3.5 cups (360-420g) All-Purpose Flour
- 1/4 cup (50g) Granulated Sugar
- 2.25 teaspoons (1 packet) Instant Yeast
- 1 cup (240ml) Warm Milk (around 110°F/43°C)
- 4 tablespoons (56g) Unsalted Butter, melted
- 2 large Eggs, room temperature
- 1 teaspoon Salt
- 2–3 tablespoons Pineapple Juice (Optional but Recommended)
- 1 teaspoon Vanilla Extract
- 2 tablespoons Melted Butter (for glazing)
Instructions
- In a large bowl, whisk together the flour, sugar, instant yeast, and salt.
- In a separate bowl, whisk together the warm milk, melted butter, eggs, vanilla extract, and pineapple juice (if using). Ensure milk is warm but not hot.
- Pour wet ingredients into dry ingredients. Mix until a shaggy dough forms. Knead for 5-7 minutes until smooth, slightly sticky, and springy.
- Place dough in a greased bowl, cover, and let rise in a warm place for 1 to 1.5 hours until doubled in size.
- Punch down dough and divide into 12 equal pieces. Roll into balls and place in a greased 9×13 baking pan.
- Cover and let rolls rise for another 30-45 minutes until puffy. Preheat oven to 350°F (175°C) during the last 15 minutes.
- Bake for 18-22 minutes until tops are golden brown.
- Immediately brush tops with melted butter. Cool in pan for 5 minutes, then transfer to a wire rack.
Notes
Ensure yeast is active and not expired. Do not let milk get too hot or it will kill the yeast. For gluten-free option, use a 1:1 gluten-free flour blend. Rolls can be frozen for up to 3 months after baking.
- Prep Time: 30 minutes
- Cook Time: 20 minutes
- Category: Side Dish
- Cuisine: American
Nutrition
- Serving Size: 1 roll
- Calories: 190
- Sugar: 8
- Sodium: 250
- Fat: 6
- Saturated Fat: 3.5
- Carbohydrates: 28
- Fiber: 1
- Protein: 5
Keywords: Hawaiian rolls, meal prep, lunch ideas, soft bread, sweet rolls, afternoon slump, easy baking