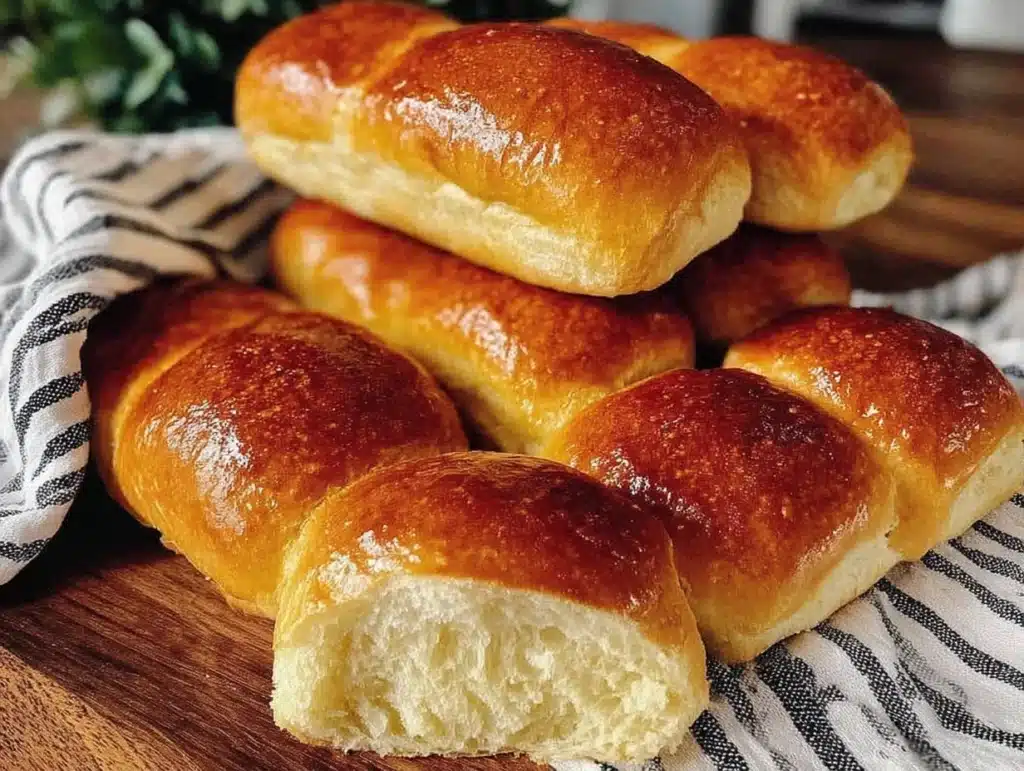
It started with a craving I couldn’t shake, honestly. I was staring into the fridge on a rainy Sunday afternoon, surrounded by leftovers and takeout menus, when I realized I had zero proper bread for the hot dogs I’d bought earlier that week. You know that feeling? The one where you’re just tired of the store-bought, squishy, slightly sweet buns that fall apart before you even take a bite. I decided to fix it. I pulled out the flour, the yeast, and a little bit of milk, and I started mixing. What came out of the oven an hour later wasn’t just bread. It was fluffy, golden, and smelled like pure comfort.
I’ve made these fluffy homemade hot dog buns dozens of times since then. Some weeks I make them for summer cookouts, but lately, I’ve been using them for my weekly meal prep. There’s something incredibly satisfying about baking a batch on Sunday, letting them cool, and then slicing them up for lunches or quick dinners all week long. They freeze beautifully, too, which is a game-changer for busy parents or anyone who just wants dinner to be easier.
Let’s face it, making bread from scratch can feel intimidating. But I promise you, this recipe is forgiving. It doesn’t require a stand mixer if you don’t want one, and it doesn’t need hours of rising time if you’re in a rush. The key is in the hydration and the kneading. When you get the texture right, you’ll understand why I’m so obsessed. These buns hold up to juicy burgers, crispy sausages, and even heavy sandwiches without getting soggy. They have a soft interior and a slightly crisp crust that you just can’t get from the grocery store.
I remember the first time I shared these with my neighbors. They thought I was buying them from that fancy bakery downtown. I just smiled and told them it was all about patience and a little bit of love. Now, I want to share that same secret with you. Whether you’re prepping for a big family dinner or just want to upgrade your weekday lunch game, these buns are the answer. They’re simple, reliable, and absolutely delicious.
Why You’ll Love This Recipe
After testing this recipe through every season imaginable, I can confidently say these are the only buns I’ll ever make again. There’s a specific magic to homemade dough that just isn’t there in packaged versions. Store-bought buns often taste like they’re full of preservatives, whereas these fluffy homemade hot dog buns taste like actual food. Here is why they have earned a permanent spot in my kitchen rotation:
- Quick & Easy: From start to finish, you’re looking at about an hour and a half, but most of that is passive rising time. The active work is less than 20 minutes. This makes it perfect for a Sunday morning prep session where you can get the dough ready while you drink your coffee.
- Simple Ingredients: You don’t need fancy flours or exotic ingredients. Just flour, water, milk, yeast, sugar, salt, and butter. If you have these in your pantry, you’re already 90% done. It’s wholesome, honest food.
- Perfect for Meal Prep: This is the big one for me. I bake a double batch on Sundays. By Tuesday, I have fresh buns for lunch. They stay soft in the fridge for days and can be toasted straight from the freezer. It turns a chaotic weekday into an organized one.
- Crowd-Pleaser: Kids love the soft texture. Adults love the authentic bread flavor. I’ve served these at potlucks, backyard BBQs, and quiet Tuesday nights, and they disappear every time. It’s rare to find a recipe that satisfies everyone.
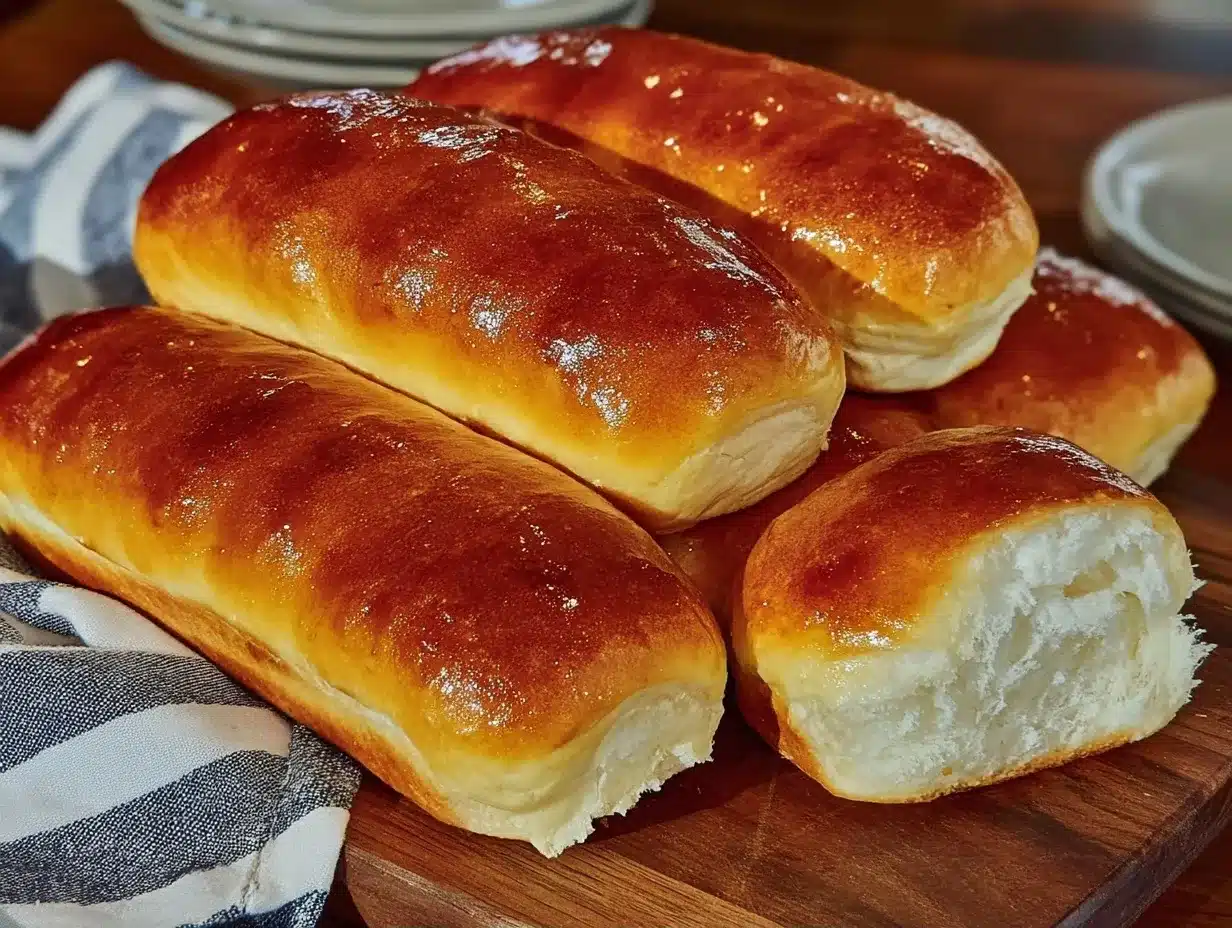
- Unbelievably Delicious: The crumb is airy and tender, yet sturdy enough to hold a thick beef patty or a loaded hot dog. The crust has that perfect golden-brown shine that makes you want to tear into it immediately.
What makes this recipe different is the balance of milk and butter in the dough. Milk tenderizes the gluten, making the buns softer, while the butter adds that rich, savory flavor that pairs perfectly with savory sausages. I’ve tried recipes with just water, but they just don’t have the same mouthfeel. This is my tested, family-approved version. It’s not just bread; it’s a foundation for your best meals.
What Ingredients You Will Need
This recipe relies on high-quality, simple ingredients to create that signature fluffy texture. You don’t need a specialty store for this, but choosing the right components makes a big difference in the final result. Here is what you need to gather:
- All-Purpose Flour: I recommend using a good quality brand like King Arthur or Gold Medal. You’ll need about 3 to 3.5 cups. Bread flour can be used for a chewier bun, but all-purpose gives that classic soft bakery feel.
- Active Dry Yeast: One packet (about 2 ¼ teaspoons) is standard. Make sure it’s not expired! If your yeast is old, your buns won’t rise. I keep mine in the fridge to extend its life.
- Warm Milk: Whole milk is best for richness. Warm it until it’s about 110°F (43°C). It should feel like a warm bath, not hot. This activates the yeast without killing it.
- Water: Half a cup of warm water helps hydrate the dough. You can swap this for more milk if you want an even richer bun.
- Sugar: Two tablespoons of granulated sugar helps feed the yeast and adds a slight sweetness that balances the savory bun. Honey works too, but sugar is more consistent.
- Salt: One and a half teaspoons of kosher salt. Salt controls the yeast and enhances flavor. Don’t skip this, or the bread will taste flat.
- Unsalted Butter: Two tablespoons, melted. This adds tenderness and that bakery-style aroma. You can use oil, but butter tastes better.
- Egg: One large egg, beaten. This goes into the dough for structure and richness. You’ll also use another egg for the wash to get that golden color.
- Vegetable Oil: A little bit for greasing the bowl and the pan. It prevents sticking better than butter.
I always recommend using a kitchen scale for the flour if you have one. Measuring flour by cup can be tricky because you might pack it down, leading to dry buns. If you don’t have a scale, fluff the flour in the bag first, then spoon it into the measuring cup and level it off. This small step saves so many headaches later.
Equipment Needed
You don’t need a fancy kitchen to make these buns. Here is what I use:
- Large Mixing Bowl: A glass or ceramic bowl is great because you can see the dough rising.
- Dough Hook (Optional): If you have a stand mixer, this is helpful. But I often just use a wooden spoon and my hands.
- Cutting Board: For rolling out the dough.
- Baking Sheet: A standard 13×18 inch sheet. I line mine with parchment paper for easy cleanup.
- Pastry Brush: For applying the egg wash. A silicone one is easier to clean.
- Instant Read Thermometer: Not strictly necessary, but helpful to check the internal temp of the buns (190°F is ideal).
I once bought a fancy bread maker, but it never quite got the rise right for my taste. I think there’s something about feeling the dough with your hands that tells you when it’s ready. Stick to basic tools, and you’ll do just fine.
Preparation Method
- Activate the Yeast: In the bowl of a stand mixer (or a large bowl), combine the warm milk, warm water, sugar, and yeast. Stir gently and let it sit for 5-10 minutes. You should see a foamy layer on top. If it doesn’t foam, your yeast is dead. Start over with fresh yeast.
- Mix the Dough: Add the melted butter, salt, and one egg to the yeast mixture. If using a mixer, attach the dough hook and mix on low speed. Gradually add 3 cups of flour. Mix until a shaggy dough forms. If using a wooden spoon, stir until it becomes too thick to stir, then turn it out onto a floured surface.
- Knead: Knead the dough for about 7-10 minutes. It should become smooth and elastic. If it’s too sticky, add flour one tablespoon at a time. If it’s too dry, add water one teaspoon at a time. The dough should pass the “windowpane test” – stretch a small piece thinly without it tearing immediately.
- First Rise: Lightly grease a clean bowl with oil. Place the dough in the bowl, turning it once to coat it in oil. Cover with a damp towel or plastic wrap. Let it rise in a warm spot for 45-60 minutes, or until doubled in size.
- Shape the Buns: Punch down the dough to release air. Turn it onto a lightly floured surface. Roll it into a rectangle about 12×10 inches. Cut the dough into 6 equal strips. Take each strip and gently roll it into a log shape. Place them seam-side down on a parchment-lined baking sheet, leaving about 2 inches between each bun so they can expand.
- Second Rise: Cover the shaped buns loosely with a towel. Let them rise for another 30-45 minutes. They should look puffy and jiggly when you shake the pan.
- Bake: Preheat your oven to 375°F (190°C). Beat the second egg with a teaspoon of water and brush it over the risen buns. Sprinkle with sesame seeds if desired. Bake for 15-18 minutes, or until golden brown and they sound hollow when tapped on the bottom.
- Cool: Remove from the oven and brush with melted butter if you want extra softness. Let them cool on a wire rack for at least 10 minutes before slicing. This step is crucial so the inside doesn’t get gummy.
Cooking Tips & Techniques
Here are some secrets I’ve learned over the years to ensure success:
- Temperature Matters: Your kitchen should be warm. If it’s cold, put the dough in the oven with just the light on. The heat from the bulb is enough to help it rise.
- Don’t Over-flour: It’s tempting to add more flour when the dough sticks, but this makes dense buns. Wet your hands instead to handle sticky dough.
- The Egg Wash: For a shiny, golden crust, don’t skip the egg wash. For a softer crust, brush with milk instead.
- Testing for Doneness: If you don’t have a thermometer, tap the bottom of the bun. If it sounds hollow, it’s done. If it sounds dense, bake for 2 more minutes.
I once burned a batch because I got distracted by a phone call. Lesson learned: set a timer and stick to it!
Variations & Adaptations
These buns are versatile. Try these twists:
- Whole Wheat: Swap half the all-purpose flour for whole wheat flour for a nuttier flavor and more fiber.
- Garlic Herb: Add 1 teaspoon of dried garlic powder and 1 teaspoon of dried parsley to the dough before kneading.
- Gluten-Free: Use a 1:1 gluten-free flour blend. Note that the texture will be slightly different, but they still work well.
I often make a batch with cinnamon sugar for a sweet breakfast bun variation. It’s surprisingly good!
Serving & Storage Suggestions
Serve these buns warm with butter. They are perfect for hot dogs, sliders, or even as breadsticks for soup.
- Storage: Keep them in an airtight container at room temperature for 2-3 days. For longer storage, freeze them. Wrap them tightly in plastic wrap and then foil. They last up to 3 months.
- Reheating: To reheat, wrap in foil and warm in a 350°F oven for 10 minutes. Or, slice and toast in a toaster. They taste fresh again!
Flavors develop nicely after a day. They actually taste better on day two for sandwiches as they absorb moisture from fillings.
Nutritional Information & Benefits
Each bun is approximately 150-180 calories, depending on size. They are a source of carbohydrates and provide some protein from the flour and egg. They are not gluten-free unless you use GF flour. They are lower in sodium than store-bought versions, giving you control over your intake. I appreciate knowing exactly what goes into my food.
Conclusion
Making fluffy homemade hot dog buns is a rewarding experience that pays off in every bite. It transforms a simple meal into something special. I encourage you to try this recipe, maybe on a quiet Sunday afternoon. Customize it with your favorite seeds or spices. I’d love to hear how they turn out for you. Leave a comment below with your variations or questions. Happy baking!
FAQs
Can I make these buns ahead of time?
Yes! You can shape the buns and let them rise in the fridge overnight. In the morning, let them come to room temperature and rise until puffy before baking. This is great for meal prep.
Why are my buns dense?
This usually happens if you add too much flour or if the yeast was old. Make sure to measure flour correctly and check your yeast expiration date. Also, ensure the dough rises properly.
Can I use bread flour instead of all-purpose?
Absolutely. Bread flour will give you a chewier, more structured bun. All-purpose gives a softer, cake-like texture. Both are delicious, so choose based on your preference.
How do I store leftover buns?
Store them in an airtight container at room temperature for a few days. For longer storage, freeze them. Do not refrigerate, as it makes bread go stale faster.
Can I freeze the dough before baking?
It’s better to bake then freeze. Freezing raw dough can affect the yeast activity and rise. However, you can freeze baked buns and toast them later for fresh-tasting results.
Pin This Recipe!


Fluffy Homemade Hot Dog Buns
- Total Time: 1 hour 48 minutes
- Yield: 6 servings 1x
Description
Soft, golden, and fluffy homemade hot dog buns that are perfect for meal prep, freezing, and weekday lunches. These buns hold up to juicy toppings without getting soggy.
Ingredients
- 3 to 3.5 cups All-Purpose Flour
- 1 packet (2 ¼ teaspoons) Active Dry Yeast
- 1 cup Warm Milk (divided, approx 110°F/43°C)
- 0.5 cup Warm Water
- 2 tablespoons Granulated Sugar
- 1.5 teaspoons Kosher Salt
- 2 tablespoons Unsalted Butter, melted
- 1 Large Egg, beaten (divided)
- Vegetable Oil (for greasing bowl and pan)
Instructions
- In a large bowl or stand mixer, combine warm milk, warm water, sugar, and yeast. Stir gently and let sit for 5-10 minutes until foamy.
- Add melted butter, salt, and one beaten egg to the yeast mixture. Mix on low speed with a dough hook (or stir with a wooden spoon) until combined.
- Gradually add 3 cups of flour. Mix until a shaggy dough forms.
- Knead the dough for 7-10 minutes until smooth and elastic. Add small amounts of flour or water if needed to reach the right consistency (passing the windowpane test).
- Place dough in a lightly oiled bowl, turning to coat. Cover with a damp towel or plastic wrap and let rise in a warm spot for 45-60 minutes, or until doubled in size.
- Punch down the dough and turn it onto a lightly floured surface. Roll into a 12×10 inch rectangle.
- Cut the dough into 6 equal strips. Roll each strip into a log shape and place seam-side down on a parchment-lined baking sheet, leaving 2 inches between buns.
- Cover loosely and let rise for another 30-45 minutes until puffy.
- Preheat oven to 375°F (190°C). Brush buns with the remaining beaten egg (mixed with a teaspoon of water) and sprinkle with sesame seeds if desired.
- Bake for 15-18 minutes until golden brown and hollow when tapped on the bottom.
- Remove from oven and brush with melted butter for extra softness. Cool on a wire rack for at least 10 minutes before slicing.
Notes
Ensure yeast is not expired. If your kitchen is cold, rise the dough in the oven with just the light on. Do not over-flour the dough to avoid dense buns. For a softer crust, brush with milk instead of egg wash. Buns freeze well for up to 3 months.
- Prep Time: 20 minutes
- Cook Time: 18 minutes
- Category: Side Dish
- Cuisine: American
Nutrition
- Serving Size: 1 bun
- Calories: 165
- Sugar: 4
- Sodium: 250
- Fat: 4
- Saturated Fat: 2
- Carbohydrates: 28
- Fiber: 1
- Protein: 5
Keywords: hot dog buns, homemade bread, meal prep, fluffy buns, baking, yeast bread, Sunday prep