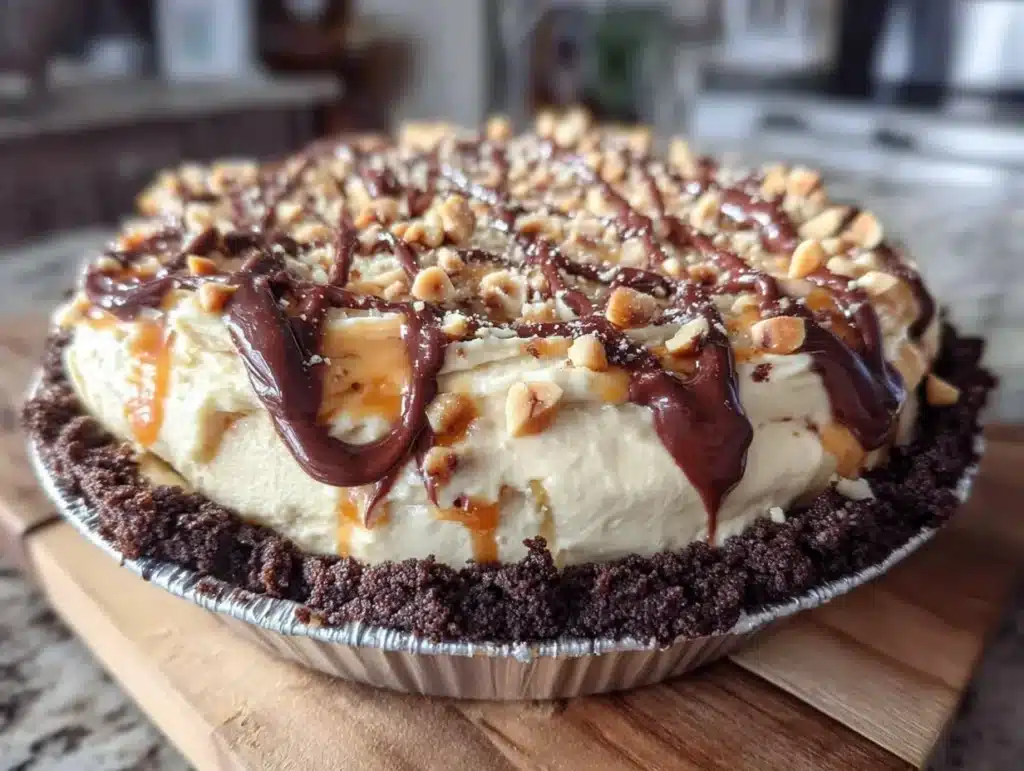
Let’s be honest for a second. You know that feeling when it’s 2 PM on a Tuesday, you’ve just finished a big lunch, and suddenly your energy crashes like a stone in a well. You’re not hungry for a salad, but you’re definitely not hungry for a full dinner yet. You just need something sweet, something creamy, and something that actually keeps you going until dinner time.
I used to fight this battle every single day. I’d reach for a granola bar, only to be hungry again twenty minutes later. Then, a few years ago, I stumbled onto this no bake peanut butter pie recipe while trying to figure out a make-ahead dessert that didn’t require hours in the kitchen. I was tired, I was busy, and I needed a win. This pie became that win.
What started as a desperate attempt to stop the afternoon snack attack turned into a weekly ritual. I make this no bake peanut butter pie every Sunday evening while I’m prepping lunches for the week. It sits in the fridge, getting firmer and more delicious as the hours pass. By Wednesday, when my willpower is weakest, I have a slice of pure, creamy comfort ready to go. It’s not just a dessert; it’s my secret weapon against the midday slump.
This no bake peanut butter pie is simple, yes, but don’t let the simplicity fool you. The texture is incredibly rich, almost like a cheesecake that had a very good day. It’s made with just a few pantry staples, mostly peanut butter, which I know some people shy away from in desserts. But trust me, once you taste how smooth it gets, you’ll never look back. It’s the kind of treat that feels indulgent but actually has some staying power thanks to the protein in the peanut butter.
I’ve tested this recipe dozens of times, tweaking the ratios until it was perfect. I’ve made it with different types of peanut butter, different crusts, and even different sweeteners. But the core idea remains the same: it’s easy, it’s make-ahead, and it keeps you full. If you’re looking for a reliable way to handle your afternoon cravings without derailing your weekly meal prep goals, this is it.
Why You’ll Love This Recipe
There are a lot of no-bake desserts out there, but few hit this specific sweet spot of being both nutritious enough to be a snack and decadent enough to feel like a real treat. I’ve spent years refining my weekly meal prep routine, and this pie has earned its permanent spot in my fridge. Here is why I keep coming back to it, and why I think you will too.
- Truly Make-Ahead Friendly: This pie actually tastes better the next day. The flavors meld together in the fridge, creating a denser, more cohesive texture that holds up perfectly in lunchboxes or dessert plates. It’s designed to last.
- Minimal Cleanup: We are talking about one bowl and a whisk. No oven, no baking sheets, no complicated piping bags. You can have this ready in under fifteen minutes, leaving you more time to organize your week or just relax.
- Protein-Packed Satisfaction: Unlike a standard cookie or cake, the heavy use of peanut butter and cream cheese gives this pie a solid protein foundation. This helps stabilize your blood sugar, meaning you won’t crash an hour later. It’s the reason it keeps you full at 2 PM.
- Customizable Crust Options: While I love a graham cracker crust, you can swap this out for gluten-free cookies, almond flour, or even a nut-based crust if you’re watching carbs. It’s flexible enough to fit your dietary needs without sacrificing taste.
- Crowd-Pleasing Flavor Profile: Peanut butter and chocolate are a classic combo for a reason. This pie captures that nostalgic flavor but elevates it with a lighter, airier texture. It’s a hit with kids who want something sweet and adults who want something that feels a bit more substantial.
- Stress-Free Entertaining: If you have guests coming over, you can make this pie two days in advance. It looks elegant when sliced, especially with a drizzle of chocolate on top, but requires zero last-minute effort. You can host with confidence.
What makes this recipe different from the rest is the attention to texture. Many no-bake pies can be gritty or too runny. By using the right ratio of whipped cream to cream cheese, and ensuring your peanut butter is smooth, you get a silkiness that is unmatched. It’s not just good; it’s the kind of pie that makes you close your eyes after the first bite and forget about your to-do list for a moment.
What Ingredients You Will Need
This recipe relies on high-quality, simple ingredients because there is nowhere to hide. When you have only a few components, each one needs to do its job. I’ve tested this with various brands and types, and here is what works best to ensure that smooth, creamy texture that holds up in the fridge.
For the Filling
- Cream Cheese: You need 8 ounces of full-fat cream cheese, softened to room temperature. This provides the structure and tang that balances the sweetness. I prefer Philadelphia brand because it blends smoothly without lumps. If you use light cream cheese, the pie might be too soft.
- Smooth Peanut Butter: Use 1 cup of creamy peanut butter. Avoid natural peanut butter where the oil separates, as it can make the filling greasy. Brands like Jif or Skippy work well, or any standard processed peanut butter. If you must use natural, make sure you stir it until it’s completely homogenous and emulsified.
- Powdered Sugar: 1 cup of powdered sugar is key. Unlike granulated sugar, powdered sugar dissolves instantly in the cream cheese mixture. This prevents any gritty texture in the final pie. Sift it if it’s clumpy.
- Heavy Whipping Cream: 1.5 cups of cold heavy whipping cream is what gives the pie its airy, mousse-like consistency. Do not substitute with half-and-half or milk; you won’t get the same volume or stability. The fat content is crucial for holding the shape.
- Vanilla Extract: 1 teaspoon of pure vanilla extract adds depth. It rounds out the peanut flavor and makes it taste more like a bakery dessert. Use real vanilla, not imitation, if you can.
For the Crust
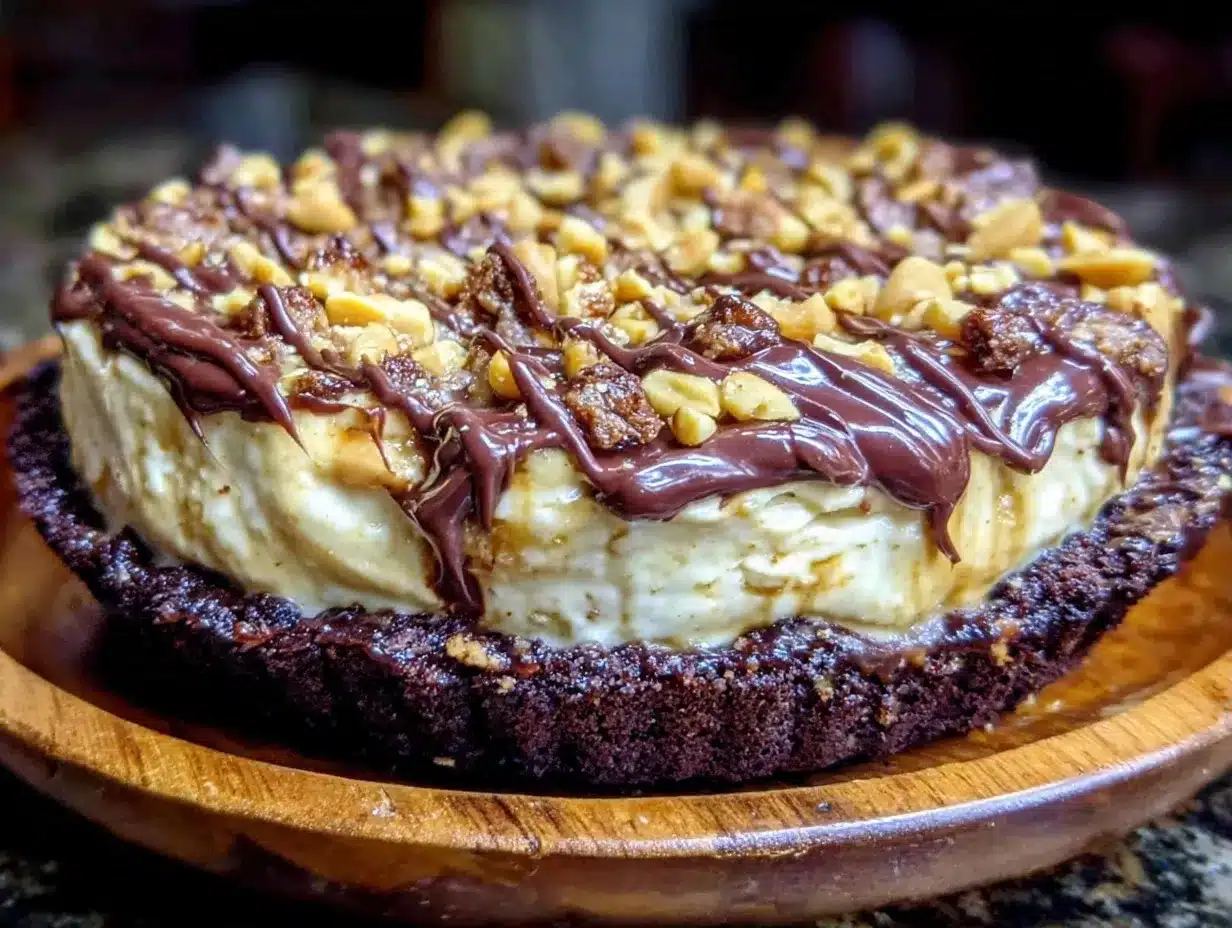
- Graham Crackers: 1.5 cups of graham cracker crumbs form the base. You can make your own by crushing whole sheets in a food processor, or buy pre-made crumbs for convenience. For a gluten-free option, use gluten-free graham crackers or crushed almond cookies.
- Unsalted Butter: 5 tablespoons of melted unsalted butter bind the crumbs together. Using unsalted allows you to control the salt level, especially if your peanut butter is salted.
- Granulated Sugar: 2 tablespoons of granulated sugar adds a slight crunch and sweetness to the crust. It complements the powdered sugar in the filling.
Optional Toppings
- Chocolate Drizzle: Melted semi-sweet chocolate chips add a beautiful finish and extra flavor contrast.
- Crushed Peanuts: A sprinkle of chopped roasted peanuts on top adds a nice textural element.
- Sea Salt Flakes: A few flakes of flaky sea salt on top enhances the peanut flavor significantly. It’s a pro tip you won’t want to skip.
Equipment Needed
You don’t need a fancy kitchen to make this pie. In fact, keeping the equipment minimal is part of the appeal. Here is what you’ll need to get started.
Large Mixing Bowl: You need a bowl large enough to hold the cream cheese mixture and the whipped cream. A stainless steel or glass bowl works best. If you can, chill this bowl in the freezer for 15 minutes before starting; cold bowls help the cream whip faster.
Hand Mixer or Stand Mixer: While you can use a whisk, it will take a lot of elbow grease. A hand mixer is perfect for this recipe. A stand mixer with the paddle attachment is even better for the cream cheese, while the whisk attachment is great for the cream. Just make sure your beaters are clean and dry.
9-Inch Pie Dish: A standard glass or ceramic pie dish works well. Glass allows you to see the layers, which looks nice for serving. If you prefer, you can use a springform pan for easier removal, but it’s not strictly necessary.
Food Processor or Ziplock Bag: If you are making your own graham cracker crumbs, a food processor is the fastest tool. If you don’t have one, put the crackers in a heavy-duty ziplock bag and crush them with a rolling pin. It’s a bit of work, but it’s satisfying.
Spatula: A rubber spatula is essential for folding the whipped cream into the peanut butter mixture without deflating it. Be gentle here. You want to keep those air bubbles intact for that light texture.
Measuring Cups and Spoons: Precision matters more in no-bake desserts than in baked ones. Since there is no oven to set the structure, getting the ratios right is key. Use standard measuring cups for volume.
Preparation Method
Let’s walk through the process step-by-step. This is straightforward, but paying attention to the details will ensure your pie turns out perfectly every time.
Step 1: Prepare the Crust (10 minutes)
Start by crushing your graham crackers. If using a food processor, pulse until you have fine crumbs. If using a bag, crush them until they are small pieces with some fine powder. In a medium bowl, mix the crumbs, melted butter, and granulated sugar until the mixture looks like wet sand. Press this mixture firmly into the bottom of your 9-inch pie dish. Use the bottom of a measuring cup to pack it down tightly. Place the crust in the fridge to set while you make the filling.
Step 2: Whip the Cream (5 minutes)
In a large, chilled bowl, pour the cold heavy whipping cream. Using your hand mixer on medium-high speed, whip the cream until it forms stiff peaks. This means when you lift the beaters, the cream stands up straight. Be careful not to over-whip it into butter. Set this aside. It’s crucial that this cream is stiff so it can support the weight of the peanut butter mixture.
Step 3: Mix the Base (5 minutes)
In a separate large bowl, beat the softened cream cheese and powdered sugar together. Use the paddle attachment if you have a stand mixer, or the beaters on a hand mixer. Beat on medium speed until the mixture is completely smooth and creamy. This might take a few minutes. Scrape down the sides of the bowl to ensure there are no lumps of cream cheese left. Then, add the smooth peanut butter and vanilla extract. Mix until everything is fully combined. The mixture should be thick and creamy.
Step 4: Fold Together (5 minutes)
This is the most important step for texture. Add about one-third of the whipped cream to the peanut butter mixture and fold it in gently with a spatula. This lightens the dense peanut butter mixture. Then, add the remaining whipped cream and continue to fold gently. Use a cutting motion, going from the bottom up and over the top. Stop as soon as the white streaks disappear. Do not overmix, or you will lose the airiness.
Step 5: Assemble and Chill (4+ hours)
Pour the filling into the prepared crust. Smooth the top with your spatula. If you are adding a chocolate drizzle or crushed peanuts, do it now. Cover the pie tightly with plastic wrap or aluminum foil. Place it in the refrigerator for at least 4 hours, but overnight is best. The longer it chills, the firmer it becomes and the better the flavors meld.
Step 6: Serve
When you are ready to serve, slice with a sharp knife. For clean cuts, dip the knife in hot water and wipe it dry between each slice. This prevents the filling from sticking and tearing. Enjoy your slice with a glass of cold milk or coffee.
Cooking Tips & Techniques
I’ve made this pie so many times that I’ve learned a few things the hard way. Here are some tips to help you avoid common pitfalls and get that perfect texture.
Temperature is Everything: Make sure your cream cheese is fully softened. If it’s cold, you’ll get lumps that are hard to beat out. However, your heavy whipping cream must be ice cold. If your kitchen is warm, chill your cream and bowl beforehand. Warm cream will never whip to stiff peaks.
Don’t Skip the Sifting: Powdered sugar can clump up over time. If you see lumps in your sugar, sift it before adding it to the cream cheese. This ensures a silky smooth filling. Nobody wants gritty sugar in their pie.
Choose the Right Peanut Butter: Avoid “natural” peanut butters that require stirring. The oil separation can make your pie greasy and cause it to separate in the fridge. Standard processed peanut butter is more stable and gives a consistent texture. If you are allergic to processed peanut butter, look for a brand that is emulsified with stable oils.
Folding Technique: When folding the whipped cream, be gentle. Think of it like you’re folding a letter, not stirring a pot. You want to keep the air bubbles in the cream. If you stir too vigorously, you’ll deflate the cream, and your pie will be dense and heavy instead of light and airy.
Patience with Chilling: I know it’s tempting to eat it right away. But the pie needs time to set. If you cut into it too soon, it will be soft and messy. Let it chill for at least 4 hours, but ideally overnight. The flavor also deepens after a few hours in the fridge, making it taste even better.
Variations & Adaptations
One of the best things about this no bake peanut butter pie is how easy it is to adapt. Here are a few ways to change it up based on your preferences or dietary needs.
Chocolate Lovers: Add 1/2 cup of mini chocolate chips to the filling before folding in the whipped cream. Or, drizzle melted chocolate over the top before serving. You can also mix cocoa powder into the peanut butter mixture for a chocolate-peanut butter swirl.
Gluten-Free Option: Swap the graham crackers for gluten-free vanilla wafers or almond flour. Crush them into crumbs and mix with butter as usual. The rest of the recipe remains the same, just ensure your peanut butter and other ingredients are certified gluten-free.
Low-Sugar Version: Substitute the powdered sugar with a powdered erythritol or monk fruit sweetener. Note that the texture might be slightly different, as sugar adds bulk. You may need to add a bit more cream cheese to compensate. Also, check that your peanut butter has no added sugar.
Protein Boost: Add a scoop of unflavored or vanilla protein powder to the cream cheese mixture. This will thicken the filling, so you may need to add a splash of milk or extra whipped cream to get the right consistency. This is great for post-workout snacks.
Nut-Free Alternative: If you need to avoid peanuts, you can use sunflower seed butter or almond butter. Sunflower seed butter (like SunButter) has a similar texture and color to peanut butter. Almond butter will give a slightly different flavor but works well too. Just ensure the consistency is similar to creamy peanut butter.
Serving & Storage Suggestions
This pie is incredibly versatile when it comes to serving and storing. Here is how to keep it fresh and delicious.
Serving Suggestions: This pie pairs beautifully with a cup of hot coffee or a glass of cold milk. The creaminess cuts through the bitterness of coffee nicely. For a more indulgent treat, serve it with a dollop of whipped cream and a few chocolate shavings. It also goes well with fresh berries, like strawberries or raspberries, which add a tart contrast to the sweet filling.
Refrigerator Storage: Store the pie in the refrigerator, covered tightly with plastic wrap or in an airtight container. It will keep well for up to 5 days. In fact, it often tastes best on the second or third day when the flavors have fully developed.
Freezing Options: You can freeze this pie, but the texture of the whipped cream may change slightly upon thawing. It might become a bit denser. If you want to freeze it, wrap the whole pie or individual slices tightly in plastic wrap and then in foil. Freeze for up to 1 month. Thaw in the refrigerator overnight before serving. For best results, add fresh toppings like whipped cream or fruit after thawing.
Make-Ahead Strategy: This is the ultimate make-ahead dessert. You can make it 2-3 days before your event. This takes the stress out of hosting. Just keep it covered in the fridge until you are ready to serve. It’s perfect for meal prep Sunday, as I mentioned earlier. Slice it into portions and store them in individual containers for easy grab-and-go snacks.
Nutritional Information & Benefits
While this is a dessert, it does offer some nutritional benefits compared to traditional cakes or pies. Here is a general overview of what you’re getting in each slice.
Calories: Each slice (1/8th of the pie) contains approximately 350-400 calories, depending on the specific brands of ingredients used. This is a substantial slice, so it’s best enjoyed as a special treat or a satisfying snack.
Protein: Thanks to the peanut butter and cream cheese, this pie has a decent amount of protein, around 6-8 grams per slice. This helps with satiety and muscle repair, making it a better option than a plain sugar cookie.
Fat: The pie is high in fat, primarily from the peanut butter, cream cheese, and heavy cream. Most of this is saturated fat, but peanut butter also contains healthy monounsaturated fats. It’s calorie-dense, so portion control is key.
Dietary Considerations: This recipe is not gluten-free unless you use a gluten-free crust. It is not suitable for vegans or dairy-free diets as it contains cream cheese and heavy cream. It is also high in sugar and peanuts, so those with allergies should avoid it. However, for those without restrictions, it’s a satisfying, protein-rich dessert option.
Conclusion
This no bake peanut butter pie is more than just a dessert; it’s a solution to the afternoon slump. It’s easy to make, delicious to eat, and keeps you full for hours. I hope you try it this week and add it to your meal prep routine. It’s a game-changer for busy weekdays.
Feel free to customize it with your favorite toppings or crusts. Make it your own. And if you do try it, I’d love to hear how it turns out for you. Leave a comment below with your variations or just tell me if it helped you beat the 2 PM crash. Happy baking, or should I say, happy no-baking!
Frequently Asked Questions
Can I use crunchy peanut butter?
Yes, you can use crunchy peanut butter, but it will change the texture of the filling. It will have bits of peanut in it, which some people love. However, for the smoothest, most consistent texture, creamy peanut butter is recommended. If you use crunchy, make sure it’s well mixed.
Why is my pie too soft?
If your pie is too soft, it might be because the cream cheese wasn’t fully softened before mixing, or the whipped cream wasn’t stiff enough. Make sure your cream is very cold and whip it to stiff peaks. Also, ensure you chilled the pie for at least 4 hours to let it set properly.
Can I make this pie ahead of time?
Absolutely. This pie is actually better when made ahead. You can make it up to 3 days in advance. Just keep it covered in the refrigerator. It’s perfect for meal prep and planning your week’s desserts.
What can I substitute for heavy cream?
You can try using coconut cream if you want a dairy-free option, but the texture will be different. It will be richer and denser. Regular heavy cream is best for the light, airy texture. If you must use a substitute, whole milk yogurt might work, but it won’t whip up the same way.
How do I store leftover pie?
Store leftover pie in the refrigerator, covered with plastic wrap or in an airtight container. It will keep for up to 5 days. For best quality, try to eat it within the first 2-3 days. You can also freeze individual slices for longer storage.
Pin This Recipe!
No Bake Peanut Butter Pie
- Total Time: 4 hours 15 minutes
- Yield: 8 servings 1x
Description
A creamy, protein-packed no-bake dessert that serves as the perfect solution for afternoon energy crashes. This make-ahead pie combines smooth peanut butter, cream cheese, and whipped cream for a rich texture that keeps you full.
Ingredients
- 8 ounces full-fat cream cheese, softened to room temperature
- 1 cup smooth creamy peanut butter
- 1 cup powdered sugar
- 1.5 cups cold heavy whipping cream
- 1 teaspoon pure vanilla extract
- 1.5 cups graham cracker crumbs
- 5 tablespoons unsalted butter, melted
- 2 tablespoons granulated sugar
Instructions
- Crush graham crackers into fine crumbs. In a medium bowl, mix crumbs, melted butter, and granulated sugar until it resembles wet sand.
- Press the crust mixture firmly into the bottom of a 9-inch pie dish. Place in the fridge to set while making the filling.
- In a large, chilled bowl, whip the cold heavy whipping cream on medium-high speed until stiff peaks form. Set aside.
- In a separate large bowl, beat the softened cream cheese and powdered sugar until smooth and creamy.
- Add the smooth peanut butter and vanilla extract to the cream cheese mixture and mix until fully combined.
- Add about one-third of the whipped cream to the peanut butter mixture and fold in gently with a spatula to lighten the mixture.
- Add the remaining whipped cream and continue to fold gently until white streaks disappear. Do not overmix.
- Pour the filling into the prepared crust and smooth the top.
- Cover tightly with plastic wrap or foil and refrigerate for at least 4 hours, or overnight, until firm.
- Slice with a sharp knife dipped in hot water for clean cuts. Serve chilled.
Notes
Ensure cream cheese is fully softened to avoid lumps. Heavy whipping cream must be ice cold to whip properly. Avoid natural peanut butter with separated oil as it can make the pie greasy. For best results, chill overnight to allow flavors to meld and texture to set.
- Prep Time: 15 minutes
- Cook Time: 0 minutes
- Category: Dessert
- Cuisine: American
Nutrition
- Serving Size: 1 slice (1/8th of pi
- Calories: 375
- Sugar: 22
- Sodium: 180
- Fat: 28
- Saturated Fat: 12
- Carbohydrates: 25
- Fiber: 1
- Protein: 7
Keywords: no bake, peanut butter pie, meal prep, afternoon snack, protein dessert, make ahead dessert, creamy pie