Let’s be honest for a second. The middle of the week is where my meal prep game usually goes off the rails. You know the feeling? It’s Tuesday night, you’re tired, and you’re staring into the fridge hoping the leftover chicken from Monday has somehow transformed into something exciting. It hasn’t. It’s just sitting there, looking dry and sad.
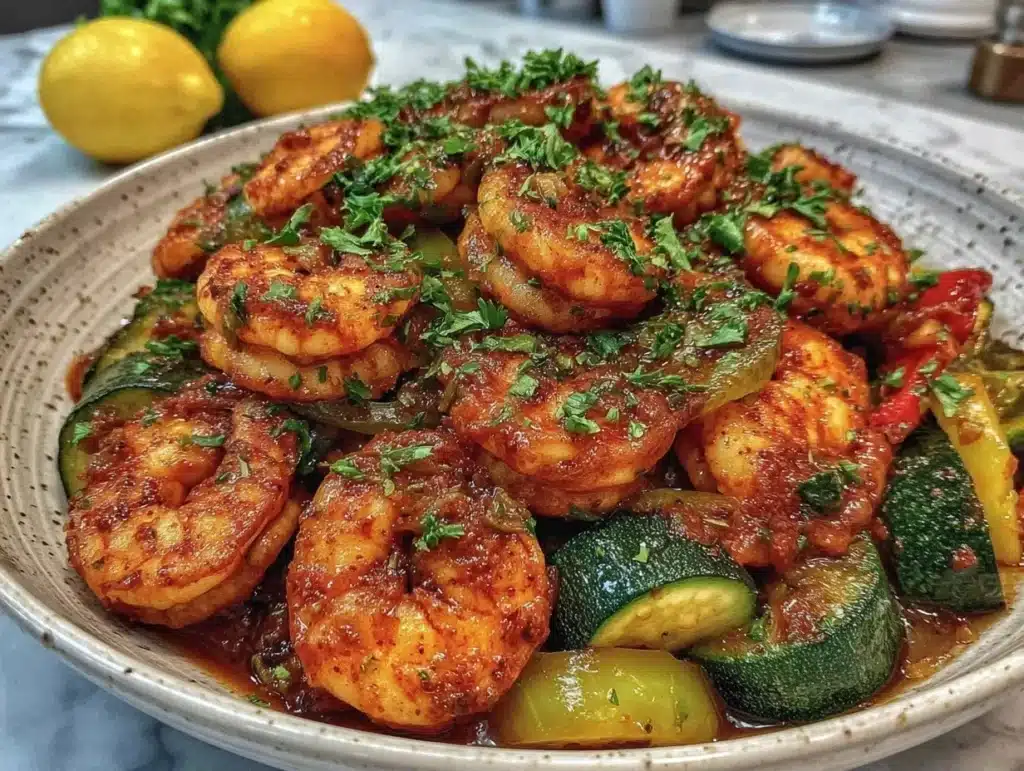
That’s exactly why I fell in love with this garlic butter shrimp with veggies. I wasn’t trying to reinvent the wheel when I first created this recipe. I just wanted something fast, flavorful, and—most importantly—something that wouldn’t turn into a soggy mess by Thursday. Honestly, most shrimp recipes fail the lunch test because the sauce gets absorbed into the vegetables overnight, leaving you with wet, flavorless shrimp and mushy broccoli.
This isn’t that. I’ve tested this batch over a dozen times in my own kitchen, tweaking the sauce ratios and the veggie cuts until I got it right. The secret isn’t just in the garlic butter (though that part is pretty amazing). It’s in how you store it. By keeping the components slightly separate until you’re ready to eat, you keep everything crisp on Wednesday, not soggy. It’s the kind of dish that feels fancy enough for a date night but practical enough for your Tupperware routine.
If you’re someone who loves bold flavors but hates the cleanup that comes with complicated cooking, this is your new best friend. It’s high in protein, low in fuss, and packs enough zing to make you forget you’re eating leftovers. Let’s face it, if it tastes good reheated, it’s a winner in my book. And trust me, this one is a winner.
Why You’ll Love This Recipe
After spending years testing recipes that looked great in photos but tasted disappointing after a day in the fridge, I’ve learned that texture is everything. This garlic butter shrimp with veggies hits that sweet spot between comfort food and healthy eating. It’s not just about throwing ingredients in a pan; it’s about understanding how heat and time affect your food.
Here is why this recipe has earned a permanent spot in my weekly rotation:
- Quick & Easy: You can have this from freezer to fork in under 20 minutes. Seriously, if you have thawed shrimp, you’re looking at 15 minutes of active cooking time. It’s perfect for those nights when you want something better than takeout but don’t have hours to spare.
- Simple Ingredients: You likely have everything you need right now. Shrimp, butter, garlic, and whatever veggies you have hanging out in your crisper drawer. No fancy grocery trips or obscure spices required.
- Perfect for Meal Prep: This is the holy grail of lunchbox food. Because the shrimp is cooked quickly and the veggies are blanched or sautéed to a crisp-tender state, they hold up beautifully. I’ve eaten this for lunch four days in a row, and the texture remains satisfying.
- Crowd-Pleaser: My kids, who usually pick at anything with a green leaf on it, devour this. The garlic butter sauce masks any bitterness from the broccoli or asparagus, making it a safe bet for picky eaters.
- Unbelievably Delicious: The combination of rich, savory butter with the sweet snap of fresh shrimp and crisp vegetables is next-level comfort food. It’s savory, slightly sweet, and deeply satisfying.
What makes this different from other shrimp recipes? It’s the balance. Many recipes drown the shrimp in sauce, which leads to sogginess. Here, we use just enough butter and garlic to coat everything without overwhelming it. It’s a delicate dance, but once you get it, you’ll never go back to bland chicken breast again. It’s the kind of meal that makes you feel like you’re treating yourself, even if you’re eating it at your desk.
What Ingredients You Will Need
This recipe relies on high-quality, simple ingredients to deliver bold flavor without the fuss. The magic happens because of the synergy between the rich butter and the fresh produce. You don’t need a pantry full of exotic items; you just need to be smart about your selections.
- Prawns or Large Shrimp: I recommend using wild-caught shrimp if you can find them, but frozen, peeled, and deveined shrimp works perfectly fine and is often more budget-friendly. Look for “16/20” count shrimp, which means they are large and meaty. Smaller shrimp tend to overcook and become rubbery in this dish. If you use frozen shrimp, make sure to thaw them completely and pat them very dry. Moisture is the enemy of good searing.
- Unsalted Butter: This is the base of your sauce. I prefer unsalted butter because it allows you to control the sodium level. Salted butter can work, but you’ll need to reduce or omit the added salt in the recipe. Use high-quality European-style butter if you want an extra rich flavor, but standard supermarket butter is totally fine.
- Fresh Garlic: Please, for the love of good cooking, use fresh garlic. Pre-minced garlic from a jar has a metallic taste that ruins the delicate flavor of the shrimp. You’ll need about 4-5 cloves. Finely mince them so they distribute evenly throughout the dish. If you’re in a huge rush, you can use a microplane to grate the garlic into a paste.
- Broccoli Florets: Broccoli is my go-to veggie here because it holds its structure well during reheating. Cut the florets into bite-sized pieces. Avoid the stems unless you peel them and slice them thinly; otherwise, they can be tough. I like to blanch them briefly before adding them to the pan to ensure they are tender but still crisp.
- Red Bell Pepper: This adds a nice pop of color and a slight sweetness that balances the savory garlic butter. Slice it into thin strips. Red peppers are sweeter than green ones, which helps round out the flavor profile. If you prefer a bit of heat, you can swap half of the red pepper for a jalapeño.
- Asparagus Spears: Asparagus is another vegetable that shines in this recipe. Snap off the woody ends and cut the spears into 2-inch pieces. They cook quickly, so add them to the pan later than the broccoli. Look for thin to medium spears; thick ones can be stringy and tough.
- Red Pepper Flakes: Just a pinch. You don’t want it spicy, but you want that subtle warmth that complements the garlic. If you’re sensitive to heat, omit this or use half a teaspoon.
- Lemon: Fresh lemon juice is non-negotiable. It cuts through the richness of the butter and brightens up the whole dish. Use about half a lemon for this batch. Squeeze it over the shrimp right before serving for the freshest flavor.
- Sea Salt and Black Pepper: To taste. Since we are using unsalted butter, you’ll need to salt the shrimp and veggies generously. Freshly cracked black pepper adds a nice earthy note.
- White Wine (Optional): If you want to add a bit of sophistication, deglaze the pan with a splash of dry white wine after cooking the shrimp. It adds depth and acidity. I often skip this for weekday meals, but it’s great for weekends.
Equipment Needed
You don’t need a professional kitchen to make this dish, but having the right tools makes a huge difference in the final texture. Here is what you’ll need:
- Large Skillet or Wok: A 12-inch stainless steel or cast iron skillet is ideal. You need enough surface area so the shrimp and veggies aren’t crowded. If they are piled on top of each other, they will steam instead of sear. A wok is great because its shape encourages constant movement, ensuring even cooking.
- Sharp Chef’s Knife: Having a sharp knife is crucial for prepping the veggies quickly and safely. Dull knives slip and cause injuries. I use a 8-inch chef’s knife for most of my prep work.
- Colander: You’ll need a colander to drain the thawed shrimp and rinse the vegetables. Make sure it’s fine-mesh so small bits of garlic or seasoning don’t fall through.
- Measuring Spoons: While this recipe is forgiving, having standard measuring spoons helps keep the seasoning balanced. You’ll need teaspoons for the garlic and pepper flakes.
- Tongs: Tongs are much easier to use than a spatula for flipping shrimp and tossing veggies. They give you better control and prevent you from breaking the delicate shrimp tails.
- Microplane or Garlic Press: If you want a finer garlic texture, a microplane is perfect. It creates a paste that melts into the butter instantly. A garlic press works too, but you’ll need to scrape it clean more often.
If you don’t have a wok, a large non-stick pan works well, just be careful not to scratch the coating with metal tongs. Also, keep your knives sharp; it makes prep time fly by. I’ve ruined many a dinner by trying to chop veggies with a dull knife, resulting in uneven pieces that cook at different rates.
Preparation Method
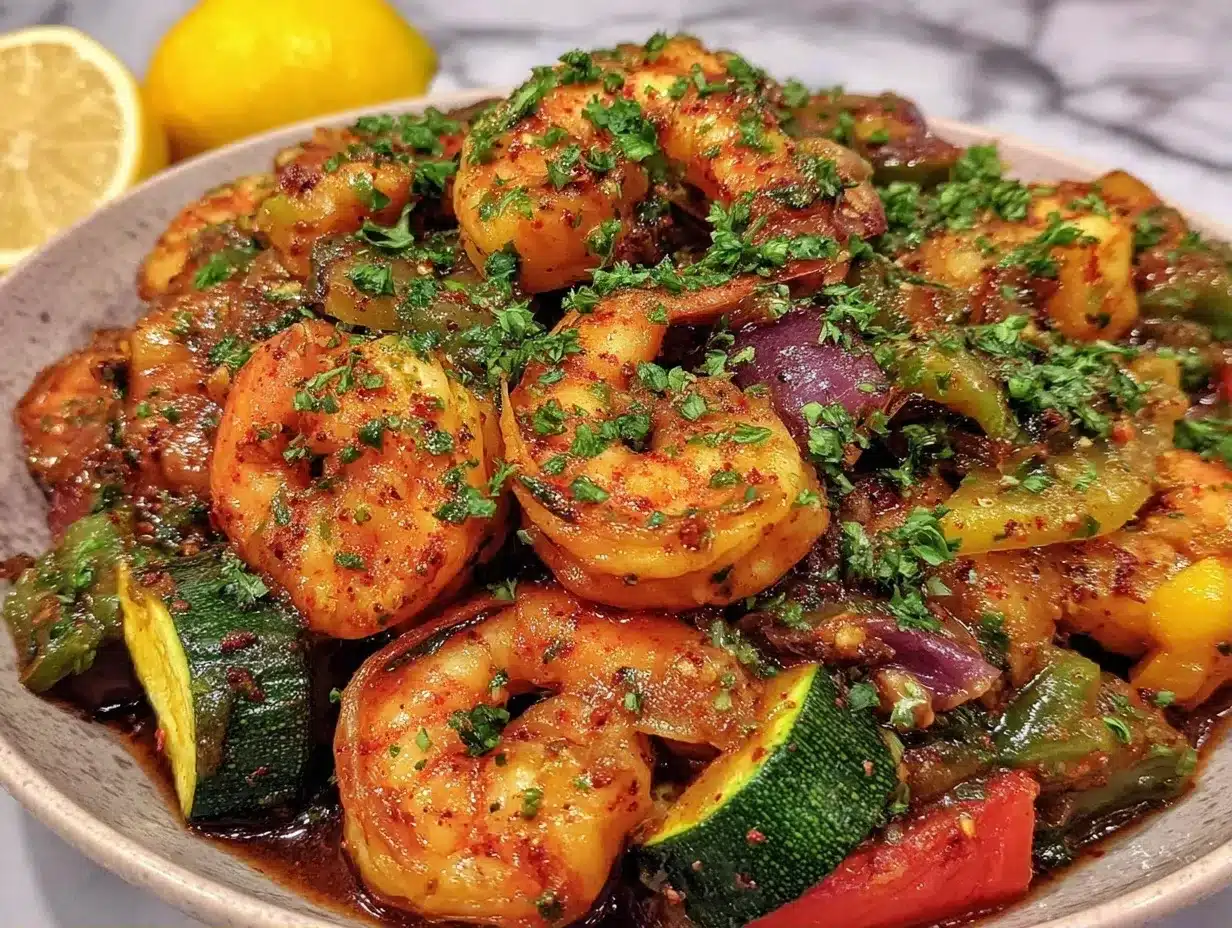
Getting this garlic butter shrimp with veggies right is all about timing and temperature. We want the shrimp to be pink and opaque, and the veggies to be tender-crisp. Here is how to do it step-by-step.
Step 1: Prep Your Ingredients (5 Minutes)
First, ensure your shrimp are fully thawed if frozen. Place them in a colander and rinse under cold water. Pat them completely dry with paper towels. This is the most important step. Wet shrimp will steam instead of sear, and you won’t get that nice golden color. Once dry, season them lightly with salt and pepper. Set them aside.
Step 2: Prepare the Vegetables (5 Minutes)
Wash and chop your broccoli, bell pepper, and asparagus. Keep the pieces uniform in size so they cook evenly. If you are using thick asparagus spears, slice them on a bias (at an angle) to increase the surface area. This helps them cook faster and absorb more flavor. Set the veggies aside in a bowl.
Step 3: Sear the Shrimp (3 Minutes)
Heat a large skillet over medium-high heat. Add a tablespoon of olive oil or butter. Once the oil is shimmering but not smoking, add the shrimp in a single layer. Do not overcrowd the pan. Cook for about 1-2 minutes per side until they turn pink and opaque. Remove the shrimp from the pan and set them aside on a plate. They will continue to cook slightly from residual heat, so don’t overcook them now.
Step 4: Sauté the Vegetables (5 Minutes)
In the same pan, add another tablespoon of butter. Add the broccoli and bell pepper first, as they take longer to cook. Sauté for 2-3 minutes, stirring frequently. Then add the asparagus and cook for another 1-2 minutes. The veggies should be bright green and tender-crisp. If they look dry, add a splash of water and cover the pan for a minute to steam them slightly.
Step 5: Make the Garlic Butter Sauce (2 Minutes)
Reduce the heat to medium-low. Add the minced garlic and red pepper flakes to the pan. Stir constantly for about 30 seconds until fragrant. Be careful not to burn the garlic, as it will turn bitter. If the pan looks too dry, add a little more butter.
Step 6: Combine and Finish (2 Minutes)
Return the cooked shrimp to the pan. Toss everything together gently to coat the shrimp and veggies in the garlic butter sauce. Squeeze the juice of half a lemon over the top. Taste and adjust seasoning with more salt or pepper if needed. Remove from heat immediately.
Step 7: Serve or Store
Serve immediately over rice or quinoa, or let it cool completely before storing in airtight containers for meal prep. If storing, make sure the food is at room temperature before putting the lid on to prevent condensation.
Cooking Tips & Techniques
There are a few tricks I’ve picked up along the way that make this recipe fail-proof. First, dry shrimp are non-negotiable. I once tried to rush the process and skipped the drying step, and the result was a sad, steamed mess. Take the extra two minutes to pat them dry; your taste buds will thank you.
Second, don’t skip the high heat for searing the shrimp. You want a Maillard reaction, which gives that delicious browned flavor. If your pan isn’t hot enough, the shrimp will just sit in their own juices. Wait until the oil shimmers before adding them.
Third, add the garlic last. Garlic burns very quickly, especially in butter. If you add it at the beginning with the veggies, it will turn black and bitter. Add it right before you return the shrimp to the pan, and stir constantly.
Finally, taste as you go. Every brand of shrimp and vegetable has different natural sweetness levels. Adjust your salt and lemon juice accordingly. If the dish tastes flat, it probably needs more acid (lemon) rather than more salt. This balance is what makes the dish pop.
Variations & Adaptations
This recipe is incredibly versatile. Here are a few ways to switch it up:
- Spicy Version: Double the red pepper flakes or add a diced fresh jalapeño with the garlic. Serve with a dollop of sour cream or Greek yogurt to cool it down.
- Low-Carb Option: Skip the rice or quinoa and serve this over cauliflower rice or zucchini noodles. The garlic butter sauce pairs perfectly with both.
- Vegan Swap: Use vegan butter and swap the shrimp for firm tofu or chickpeas. The garlic butter sauce works well with both, though the texture will be different. Marinate the tofu in soy sauce and cornstarch before frying for a crispy exterior.
- Seafood Mix: Add scallops or mussels to the pan. Scallops cook just like shrimp, so add them at the same time. Mussels should be added last and cooked until they open, about 3-4 minutes.
- Herb Infusion: Stir in fresh parsley or cilantro at the end for a fresh, herbal note. This adds color and brightness to the rich butter sauce.
I often make the spicy version when I want a kick, but the classic version is my go-to for weekday lunches. It’s reliable and comforting.
Serving & Storage Suggestions
This dish is best served immediately, but it stores beautifully. To keep it crisp on Wednesday, not soggy, follow these storage tips:
- Cool Completely: Let the shrimp and veggies cool to room temperature before storing. Trapped heat creates condensation, which leads to mushiness.
- Airtight Containers: Use glass containers with tight-fitting lids. Glass is better than plastic because it doesn’t absorb odors and keeps food fresher longer.
- Separate Storage (Optional): For maximum crispness, store the shrimp and veggies in one container and the rice or grains in another. Combine them when you reheat.
- Reheating: Reheat in a skillet over medium heat for a few minutes. This restores the texture better than a microwave. If using a microwave, cover the container with a damp paper towel to keep the shrimp moist.
- Shelf Life: This dish stays fresh in the refrigerator for up to 3 days. After that, the shrimp may start to lose its texture and develop an off-flavor.
I usually eat this for lunch from Wednesday to Friday. By Wednesday, it still tastes fresh, which is rare for meal prep. The flavors actually meld together nicely over time, making it even more delicious on day three.
Nutritional Information & Benefits
This garlic butter shrimp with veggies is a nutritional powerhouse. Shrimp is an excellent source of lean protein, which helps keep you full and satisfied. It’s also low in calories and high in selenium, an antioxidant that supports thyroid health.
The vegetables add fiber, vitamins A and C, and various phytonutrients. Broccoli is particularly rich in sulforaphane, a compound with anti-cancer properties. Bell peppers provide a massive dose of vitamin C, which supports immune function.
While the butter adds richness and calories, it also helps absorb fat-soluble vitamins from the vegetables. The dish is naturally gluten-free and can be made dairy-free with vegan butter. It’s a balanced meal that supports overall wellness without feeling restrictive.
I include this in my weekly rotation because it keeps me energized and focused. The protein helps stabilize my blood sugar, preventing the afternoon crash that often comes with carb-heavy lunches.
Conclusion
This garlic butter shrimp with veggies is more than just a meal; it’s a solution to the mid-week slump. It’s fast, flavorful, and holds up incredibly well in the fridge. I hope you try it and find it as useful in your meal prep routine as I have found it in mine.
Feel free to customize the veggies and spices to suit your taste. Meal prep should be enjoyable, not a chore. I’d love to hear how you adapt this recipe. Let me know in the comments if you added extra heat or swapped out the veggies. Don’t forget to share your photos on social media; I love seeing your creations!
Here’s to healthy, delicious, and stress-free eating. Happy cooking!
Frequently Asked Questions
Can I use frozen shrimp for this recipe?
Yes, absolutely. Just make sure to thaw them completely and pat them very dry with paper towels before cooking. Excess moisture will prevent the shrimp from searing properly.
How do I keep the vegetables from getting soggy?
Blanch the broccoli and asparagus briefly before sautéing, or cook them until they are tender-crisp. Avoid overcooking them, and let the dish cool completely before storing it in the fridge.
Can I meal prep this for more than 3 days?
It’s best eaten within 3 days. After that, the texture of the shrimp may start to deteriorate. If you need to store it longer, consider freezing the rice and grains separately and freezing the shrimp for only 1 month.
What can I serve with this dish?
This pairs well with jasmine rice, quinoa, cauliflower rice, or zucchini noodles. A simple green salad with a vinaigrette also complements the rich garlic butter sauce.
Is this recipe gluten-free?
Yes, this recipe is naturally gluten-free. Just ensure that any add-ins like soy sauce (if used) are gluten-free, and serve it with gluten-free grains or vegetables.
Pin This Recipe!
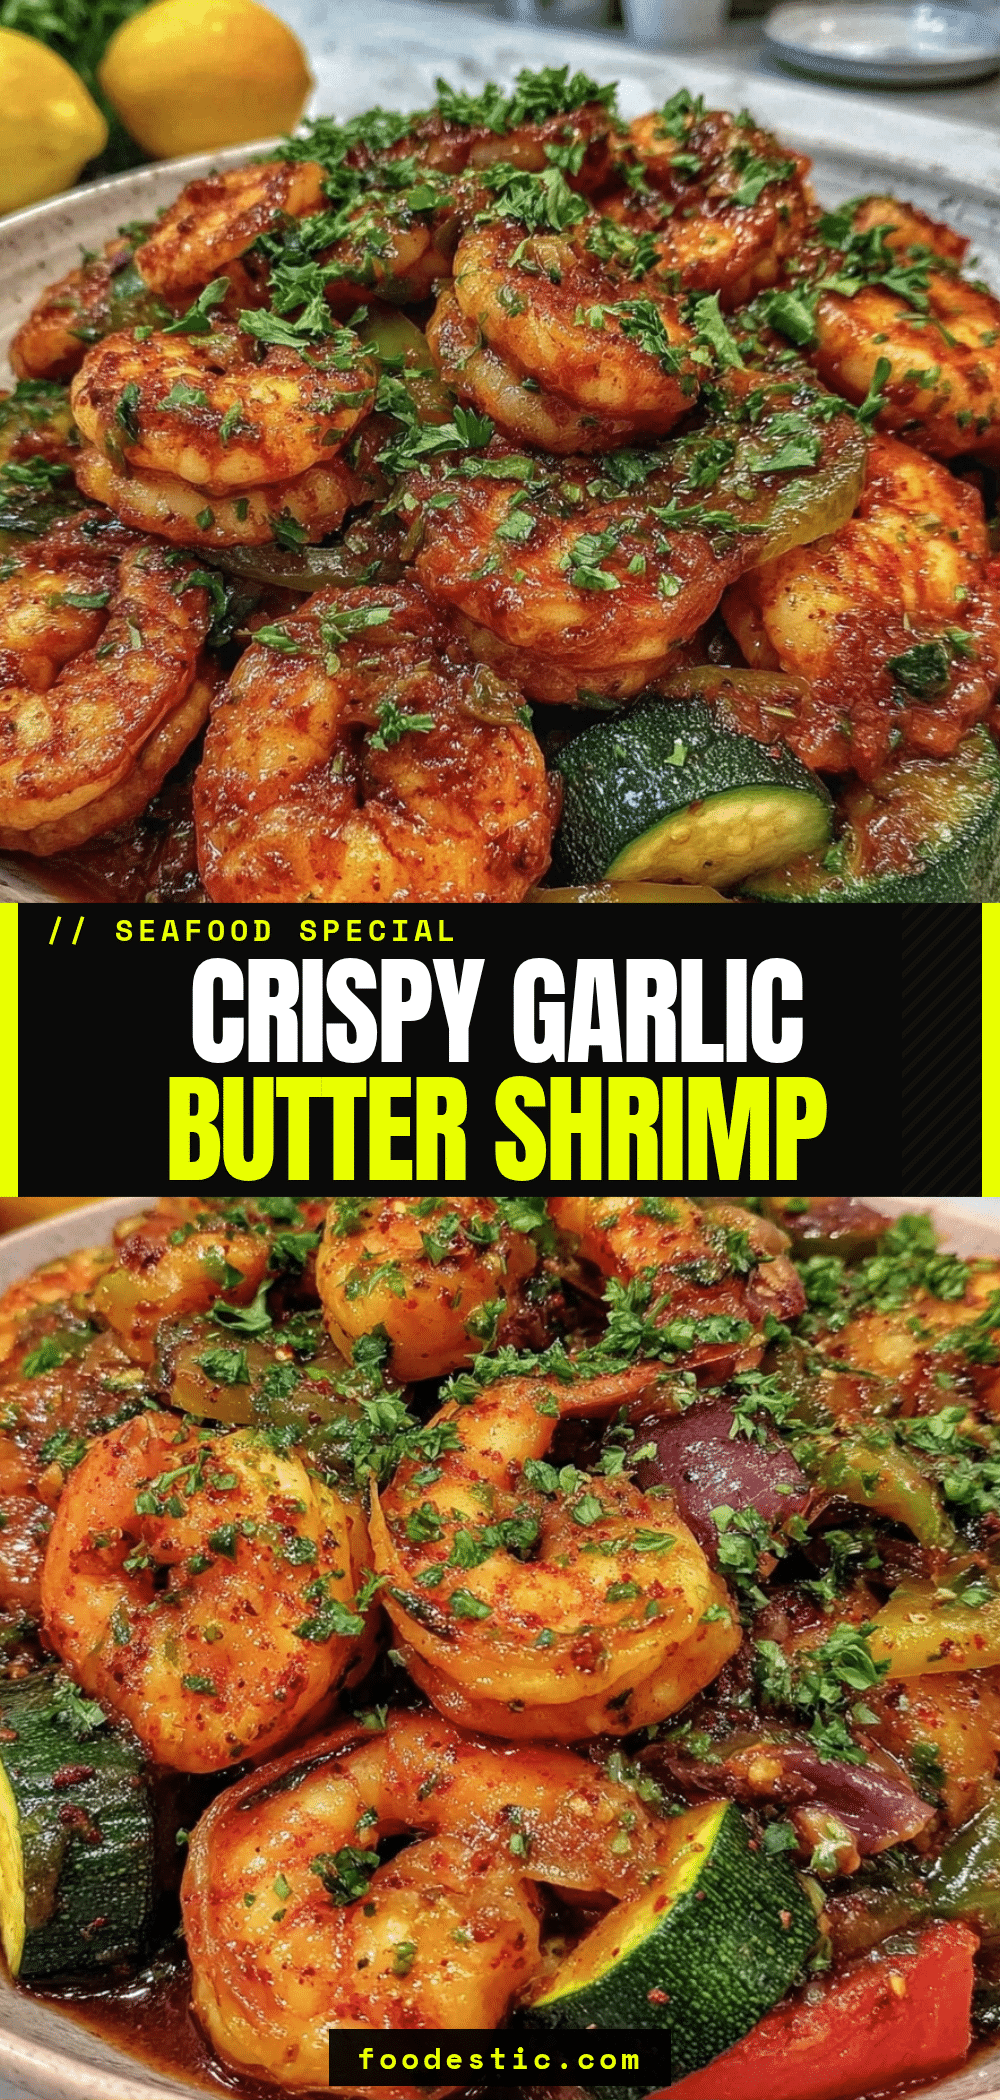
Garlic Butter Shrimp With Veggies
- Total Time: 20 minutes
- Yield: 4 servings 1x
Description
A quick, flavorful, and meal-prep friendly dish featuring seared shrimp and crisp-tender vegetables in a rich garlic butter sauce. Designed to stay fresh and non-soggy for up to three days.
Ingredients
- 1 lb large shrimp (16/20 count), peeled and deveined
- 4–5 cloves fresh garlic, finely minced
- 3 tbsp unsalted butter
- 1 tbsp olive oil
- 2 cups broccoli florets, bite-sized
- 1 red bell pepper, sliced into thin strips
- 1 bunch asparagus, woody ends snapped off, cut into 2-inch pieces
- 1/2 lemon, juiced
- 1/4 tsp red pepper flakes
- Sea salt and black pepper, to taste
- 1/4 cup dry white wine (optional)
Instructions
- Thaw shrimp if frozen, rinse under cold water, and pat completely dry with paper towels. Season lightly with salt and pepper.
- Wash and chop broccoli, bell pepper, and asparagus into uniform pieces.
- Heat a large skillet over medium-high heat with olive oil. Add shrimp in a single layer and sear for 1-2 minutes per side until pink and opaque. Remove shrimp and set aside.
- In the same pan, add 1 tbsp butter. Add broccoli and bell pepper, sautéing for 2-3 minutes. Add asparagus and cook for another 1-2 minutes until tender-crisp.
- Reduce heat to medium-low. Add minced garlic and red pepper flakes, stirring constantly for 30 seconds until fragrant without burning.
- Return shrimp to the pan. Toss to coat in the garlic butter sauce. Squeeze lemon juice over the top and adjust seasoning.
- Serve immediately over rice or quinoa, or cool completely for storage.
Notes
Ensure shrimp are completely dry before searing to prevent steaming. Do not overcrowd the pan. Add garlic last to prevent burning. For best meal prep results, store in airtight glass containers and reheat in a skillet to maintain texture.
- Prep Time: 10 minutes
- Cook Time: 10 minutes
- Category: Main Course
- Cuisine: American
Nutrition
- Serving Size: Approximately 1/4 of
- Calories: 350
- Sugar: 5
- Sodium: 450
- Fat: 22
- Saturated Fat: 10
- Carbohydrates: 12
- Fiber: 4
- Protein: 28
Keywords: garlic butter shrimp, meal prep, quick dinner, healthy seafood, shrimp and veggies, gluten-free, low carb options