
There is a specific kind of magic that happens when you pull a tray of warm, golden-brown bread from the oven. But honestly, the real magic for me happens on Sunday afternoon. You know that feeling when you’re staring at a pile of Tupperware containers, trying to figure out how to make next week’s lunches feel less like a chore and more like a treat? That’s where these homemade hoagie rolls come in. They aren’t just bread; they are the backbone of my entire weekly meal prep strategy. I first started making these rolls about three years ago, right when I decided to take control of my lunch schedule. I was tired of buying those sad, stale store-bought rolls that tasted like cardboard and preservatives. I wanted something that could stand up to heavy fillings without falling apart, and something that actually tasted good the second time around.
Let’s face it, most homemade breads are best eaten fresh. They go stale fast. But these rolls? They are different. They have this sturdy, slightly chewy crumb that holds its structure even after being refrigerated or frozen. I’ve tested this recipe over a dozen times, tweaking the hydration and the proofing time, until I landed on this version that truly reheats like it was just made. Whether you’re packing a turkey and provolone sandwich on Tuesday or a grilled chicken Caesar on Thursday, these rolls keep their softness. It’s a game-changer for anyone who needs to batch-cook or prep ahead. You’ll save time, money, and you’ll get to eat something that actually tastes homemade all week long.
Why You’ll Love This Recipe
After spending countless hours in the kitchen testing doughs that collapsed or turned out too dense, I can confidently say that these hoagie rolls are the gold standard for meal prep. I’ve shared this recipe with my meal prep group chat, and it’s become the most requested dish. Here is why you’ll want to make these for your weekly routine:
- Reheats Like It Was Just Made: This is the big one. Unlike other breads that get tough in the fridge, these rolls stay soft. A quick 30-second zap in the microwave or a minute in the oven brings them back to life. It’s like magic, but with yeast.
- Perfect for Batching: You can make a double batch and freeze half. This means you always have fresh bread on hand, even on your busiest weeknight. No more running to the store because you forgot to buy lunch ingredients.
- Sturdy Enough for Heavy Fillings: These rolls have a tight enough crumb to hold wet ingredients like tomato slices or heavy dressings without getting soggy or falling apart. You know how frustrating it is when your sandwich slides out of the bread? Not here.
- Simple Ingredients: You don’t need fancy flours or exotic seeds. Just flour, water, yeast, salt, sugar, and a little oil. If you have these in your pantry, you can make these rolls anytime.
- Crowd-Pleaser: Even my picky eater husband loves these. He says they taste like the rolls from that old-school deli we used to go to, but better because they’re fresh.
- Versatile: Use them for sandwiches, but don’t stop there. They are also great for dipping in soup or turning into breadcrumbs later in the week. It’s a win-win.
What makes this recipe different from the rest is the technique. I use a mix of bread flour and all-purpose flour to get that perfect chew. Also, the addition of a small amount of honey helps with browning and keeps the crumb moist for days. It’s not just another bread recipe; it’s a tool for a better, more organized week. Imagine opening your fridge on Wednesday and grabbing a sandwich that feels comforting and fresh. That’s the feeling these rolls provide.
What Ingredients You Will Need
This recipe relies on simple, wholesome ingredients to deliver bold flavor and satisfying texture without the fuss. The beauty of hoagie rolls is that they don’t need a lot of extras to taste great. The focus is on the bread itself—soft, airy, but sturdy. Most of these items are pantry staples, which makes Sunday prep even easier. You likely already have everything in your kitchen, so you can start mixing immediately.
- Bread Flour (500g / 3 ½ cups): I recommend using bread flour for the higher protein content. It gives the rolls that essential chew and structure. King Arthur Bread Flour is my go-to brand because it’s consistent and reliable. If you only have all-purpose flour, you can use it, but the texture will be slightly softer and less chewy.
- Warm Water (320ml / 1 ⅓ cups): The water needs to be warm, not hot. Think bathwater temperature. Too hot will kill the yeast, and too cold will slow it down. This hydration level is key for a soft crumb.
- Active Dry Yeast (7g / 1 packet): Standard packet size. Make sure it’s not expired. If you’ve had yeast in the back of the cupboard for years, check it first. Dissolve it in the warm water with a pinch of sugar to wake it up.
- Honey (30ml / 2 tbsp): Honey adds a subtle sweetness that balances the salt and helps with browning. It also acts as a natural preservative, helping the rolls stay fresh longer. You can use maple syrup if you prefer a different flavor profile.
- Salt (10g / 1 ½ tsp): Don’t skip the salt. It strengthens the gluten and brings out the flavor. Use fine sea salt or table salt. If you use kosher salt, you might need a bit more, so taste as you go.
- Olive Oil (30ml / 2 tbsp): Extra virgin olive oil adds richness and helps keep the crust soft. It also helps the dough come together smoothly. You can substitute with neutral oil like canola or vegetable oil if you prefer a milder taste.
- Optional: Egg Wash (1 egg beaten with 1 tbsp water): This gives the rolls that shiny, golden-brown finish. It’s not strictly necessary, but it makes them look professional and appetizing. For a vegan option, use almond milk or oat milk.
I always measure my flour by weight if I can, as it’s more accurate. But if you’re using cups, fluff the flour first and spoon it into the cup. Don’t scoop directly from the bag, or you’ll pack it down and end up with dry dough. These small details make a big difference in the final texture.
Equipment Needed
You don’t need a fancy stand mixer to make these rolls, but having the right tools makes the process much smoother. I use a digital kitchen scale for measuring ingredients because it ensures consistency. Every batch tastes the same, which is crucial for meal prep. A large mixing bowl is essential for combining the dough. I prefer a glass or ceramic bowl because it’s easy to see the dough coming together.
A bench scraper is my favorite tool for handling sticky dough. It helps me clean the bowl and cut the dough without making a mess. If you don’t have one, a rubber spatula works, but it takes more effort. For baking, a heavy-duty baking sheet or a stone is best. I use a rimmed baking sheet lined with parchment paper. The parchment prevents sticking and makes cleanup a breeze. If you don’t have parchment, lightly grease the pan with oil.
A pastry brush is needed for the egg wash. A silicone brush is easier to clean than a traditional bristle brush. Also, a cooling rack is important. You don’t want to trap steam in the rolls, which can make the bottom soggy. Letting them cool completely on a rack ensures they stay fresh longer. For storage, airtight containers or heavy-duty freezer bags are your best friends. I like to use bags that can be sealed tight to prevent freezer burn.
Preparation Method

Getting these rolls right is all about timing and patience. Here is the step-by-step process to ensure they turn out perfect every time.
- Activate the Yeast (5 minutes): In a small bowl, combine the warm water, honey, and a pinch of sugar. Sprinkle the yeast on top and stir gently. Let it sit for 5-10 minutes until it becomes foamy. If it doesn’t foam, your yeast might be dead, or the water was too hot. Start over if needed.
- Mix the Dough (10 minutes): In a large bowl, combine the flour and salt. Make a well in the center and pour in the yeast mixture and olive oil. Mix with a wooden spoon or your hands until a shaggy dough forms. It will look messy at first, but that’s normal.
- Knead the Dough (8-10 minutes): Turn the dough onto a lightly floured surface. Knead by hand, pushing the dough away from you with the heel of your hand, then folding it over. Repeat this motion. If using a stand mixer, use the dough hook on medium speed. The dough is ready when it is smooth, elastic, and springs back when poked. It should pass the windowpane test—you can stretch a small piece thin enough to see light through it without tearing.
- First Rise (1-2 hours): Place the dough in a lightly oiled bowl, turning once to coat. Cover with plastic wrap or a damp towel. Let it rise in a warm, draft-free place until it has doubled in size. This usually takes 1-2 hours, depending on the room temperature. Don’t rush this step. Proper rising develops the flavor.
- Shape the Rolls (15 minutes): Punch down the dough to release air. Divide it into 8-10 equal pieces. Roll each piece into an oval shape, slightly elongated like a small baguette. Place them seam-side down on the lined baking sheet, leaving about 2 inches between each roll. They should be close together so they rise into each other, creating soft sides.
- Second Rise (30-45 minutes): Cover the rolls loosely with plastic wrap. Let them rise again until they look puffy and slightly doubled. This is a shorter rise, so keep an eye on them. They shouldn’t rise too much, or they might spread out too flat.
- Bake (15-18 minutes): Preheat your oven to 375°F (190°C). Brush the tops with egg wash for a golden finish. Bake for 15-18 minutes, rotating the pan halfway through, until the rolls are deep golden brown. Tap the bottom of a roll; it should sound hollow. If it sounds dull, it needs more time.
- Cool Completely (30 minutes): Transfer the rolls to a cooling rack. Let them cool completely before storing or slicing. This step is crucial for meal prep. If you slice them warm, they will crush and become gummy. Cool them for at least 30 minutes, or until they are room temperature.
Personal tip: If your kitchen is cold, you can rise the dough in the oven with just the light turned on. The residual heat creates a perfect rising environment. Just make sure the oven is off!
Cooking Tips & Techniques
I’ve made a few mistakes along the way, and I want to help you avoid them. One common error is over-flouring the dough. It’s tempting to add more flour to stop the stickiness, but this leads to dense rolls. Instead, wet your hands with water when handling the dough. It prevents sticking without altering the hydration ratio.
Another tip is to pay attention to your oven temperature. Ovens can vary, so use an oven thermometer to check. If your rolls are browning too fast but the inside is raw, lower the temperature by 25°F and bake for a few minutes longer. Conversely, if they are pale, increase the heat slightly.
Multitasking is key here. While the dough is rising, you can prep your sandwich fillings. Chop veggies, cook meats, and make sauces. This way, when your rolls are ready, you’re halfway through your meal prep. It saves so much time on Monday morning.
For consistency, try to bake the rolls at the same time each week. This builds a routine. Also, don’t skip the second rise. It’s what gives the rolls their light, airy texture. If you skip it, you’ll get dense, bread-like rolls that aren’t as pleasant for sandwiches.
Variations & Adaptations
These rolls are a blank canvas. Here are a few ways to customize them for your taste or dietary needs.
- Whole Wheat Option: Substitute half of the bread flour with whole wheat flour for a nuttier flavor and more fiber. You may need to add a tablespoon of water, as whole wheat absorbs more liquid.
- Garlic Herb Rolls: Add 1 teaspoon of dried garlic powder and 1 teaspoon of dried Italian herbs to the flour before mixing. This adds a savory twist that pairs well with tomato-based sandwiches.
- Seeded Rolls: Sprinkle sesame seeds, poppy seeds, or everything bagel seasoning on top before baking. Press them gently into the egg wash so they stick.
- Gluten-Free: Use a 1:1 gluten-free flour blend that contains xanthan gum. Note that the texture will be different, and the rolls may be more fragile. Handle them gently.
I once tried adding sun-dried tomatoes to the dough, and it was delicious, but it made the dough very sticky. If you want to add mix-ins, keep them small and fold them in gently at the end of kneading. Too much moisture from mix-ins can interfere with the yeast activity.
Serving & Storage Suggestions
These rolls are best served fresh, but their true star quality is how they store. For meal prep, here is how I handle them.
Room Temperature: Store cooled rolls in an airtight container for up to 2 days. They stay soft and fresh.
Refrigerator: Place rolls in a sealed bag or container in the fridge for up to 5 days. They may firm up slightly, but they reheat beautifully. Just microwave for 20-30 seconds before eating.
Freezer: This is the best option for long-term storage. Wrap each roll individually in plastic wrap, then place them in a freezer-safe bag. They can be frozen for up to 3 months. To use, thaw at room temperature or reheat directly from frozen in the oven at 350°F for 10-15 minutes.
When reheating, if you want a crispy crust, bake them in the oven. If you want them soft, microwave them. For meal prep lunches, I usually reheat them in the microwave while I’m heating up my side dish. It saves time and keeps everything warm.
Nutritional Information & Benefits
Homemade rolls allow you to control the ingredients, which is a huge benefit for health-conscious eating. Here is an approximate nutritional breakdown per roll (assuming 8 rolls):
- Calories: ~220 kcal
- Carbohydrates: 40g
- Protein: 7g
- Fat: 3g
- Fiber: 2g
These rolls are a good source of complex carbohydrates, providing sustained energy for your busy day. The bread flour offers more protein than all-purpose flour, which helps with satiety. By making them at home, you avoid the added sugars and preservatives found in store-bought versions. They are naturally vegan (unless you use egg wash), dairy-free, and nut-free, making them safe for most diets. I love that I can pack a hearty sandwich without worrying about unhealthy additives. It’s a simple way to support your wellness goals without sacrificing taste.
Conclusion
Making homemade hoagie rolls for meal prep might seem like a lot of work, but the payoff is worth it. You get fresh, delicious bread that lasts all week and reheats like new. It transforms your lunch routine from mundane to enjoyable. I encourage you to try this recipe and customize it to your liking. Add your favorite seeds, herbs, or flours. The possibilities are endless.
These rolls have become a staple in my kitchen, and I hope they become one in yours too. They represent more than just bread; they represent a system that saves time and reduces stress. So, mark your calendar for Sunday, get your ingredients ready, and let’s get baking. I’d love to hear how you customize these rolls. Share your variations in the comments below, and don’t forget to tag me if you post a photo on social media. Happy meal prepping!
FAQs
Can I freeze the dough instead of the baked rolls?
Yes, you can. After the first rise, shape the rolls and place them on the baking sheet. Freeze them solid, then transfer to a bag. Thaw in the fridge overnight and let them do their second rise before baking. This saves even more time on baking day.
Why are my rolls dense and heavy?
This is usually due to over-kneading or not letting them rise enough. Make sure the dough is elastic but not tough. Also, ensure your yeast is active and your rising environment is warm enough. Don’t rush the rising steps.
Can I use this dough for other types of bread?
Absolutely. You can shape the dough into a loaf for sandwich bread, or into buns for burgers. The recipe is versatile. Just adjust the baking time accordingly. Loaves take longer, and smaller buns take less time.
How do I keep the rolls from getting soggy in my lunch box?
Make sure the rolls are completely cool before storing them. Any residual steam will create moisture. Also, wrap them in parchment paper before putting them in the airtight container. This absorbs excess moisture.
Can I make these rolls ahead for a party?
Yes, bake them a day ahead and store them in an airtight container. Reheat them in the oven at 350°F for 5-10 minutes before serving. They will taste fresh and warm, perfect for any gathering.
Pin This Recipe!
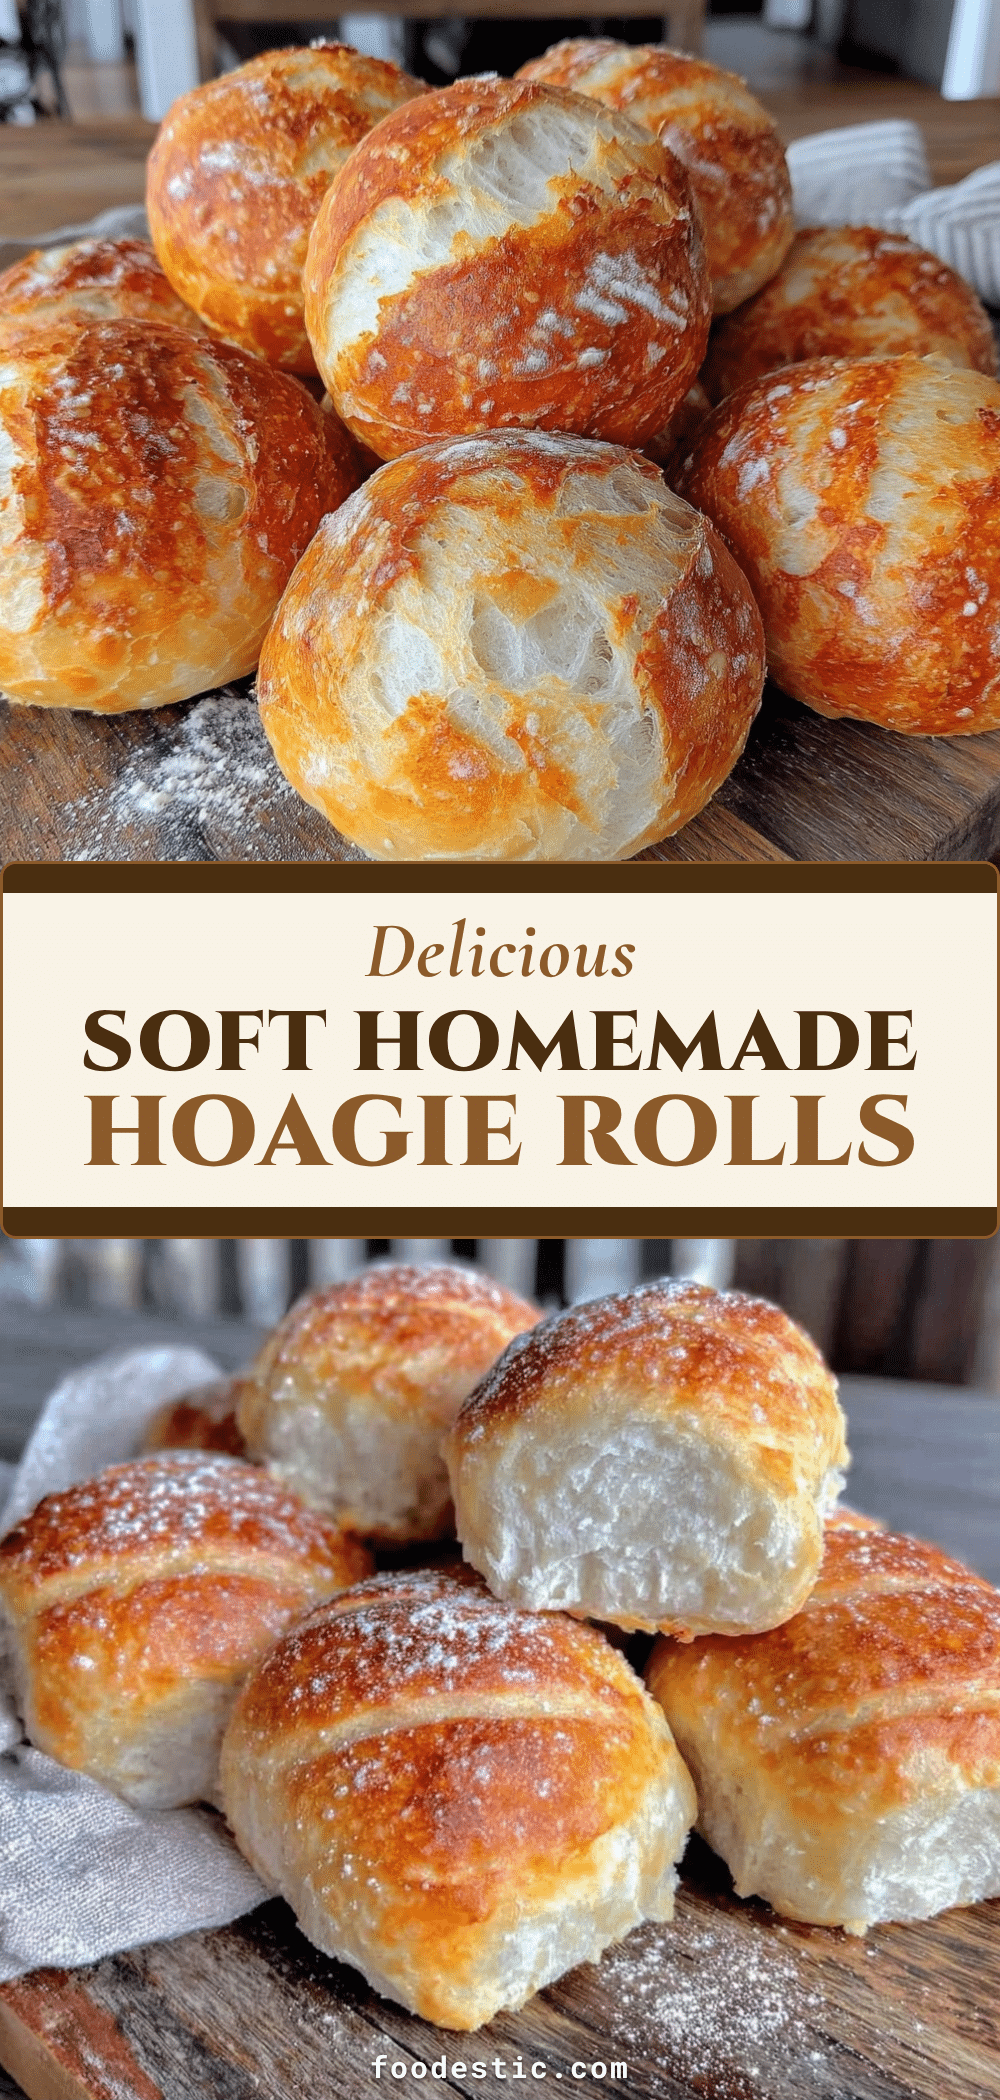

Homemade Hoagie Rolls: Perfect for Meal Prep
- Total Time: 2 hours 45 minutes
- Yield: 8 servings 1x
Description
Sturdy, chewy homemade hoagie rolls designed specifically for meal prep. These rolls reheat perfectly, hold up to heavy fillings, and stay fresh for days, making them ideal for weekly lunch preparation.
Ingredients
- 500g (3 ½ cups) Bread Flour
- 320ml (1 ⅓ cups) Warm Water
- 7g (1 packet) Active Dry Yeast
- 30ml (2 tbsp) Honey
- 10g (1 ½ tsp) Salt
- 30ml (2 tbsp) Olive Oil
- 1 egg beaten with 1 tbsp water (for egg wash, optional)
Instructions
- Activate the yeast: In a small bowl, combine warm water, honey, and a pinch of sugar. Sprinkle yeast on top and stir gently. Let sit for 5-10 minutes until foamy.
- Mix the dough: In a large bowl, combine flour and salt. Make a well and pour in the yeast mixture and olive oil. Mix until a shaggy dough forms.
- Knead the dough: Turn dough onto a lightly floured surface and knead for 8-10 minutes until smooth, elastic, and passes the windowpane test.
- First rise: Place dough in a lightly oiled bowl, cover, and let rise in a warm place for 1-2 hours until doubled in size.
- Shape the rolls: Punch down dough and divide into 8-10 equal pieces. Roll each into an oval shape and place seam-side down on a lined baking sheet, leaving 2 inches between rolls.
- Second rise: Cover rolls loosely and let rise for 30-45 minutes until puffy.
- Bake: Preheat oven to 375°F (190°C). Brush tops with egg wash and bake for 15-18 minutes until deep golden brown and hollow-sounding when tapped.
- Cool: Transfer to a cooling rack and let cool completely (at least 30 minutes) before storing or slicing.
Notes
Ensure water is warm (bathwater temperature) but not hot to avoid killing the yeast. If your kitchen is cold, rise the dough in the oven with just the light turned on. For best meal prep results, ensure rolls are completely cool before storing to prevent sogginess. You can freeze the shaped dough after the first rise for even more convenience.
- Prep Time: 45 minutes
- Cook Time: 18 minutes
- Category: Side Dish
- Cuisine: American
Nutrition
- Serving Size: 1 roll
- Calories: 220
- Sugar: 6
- Sodium: 350
- Fat: 3
- Carbohydrates: 40
- Fiber: 2
- Protein: 7
Keywords: hoagie rolls, meal prep bread, homemade sandwich rolls, bread recipe, batch cooking, vegan bread, gluten-free option