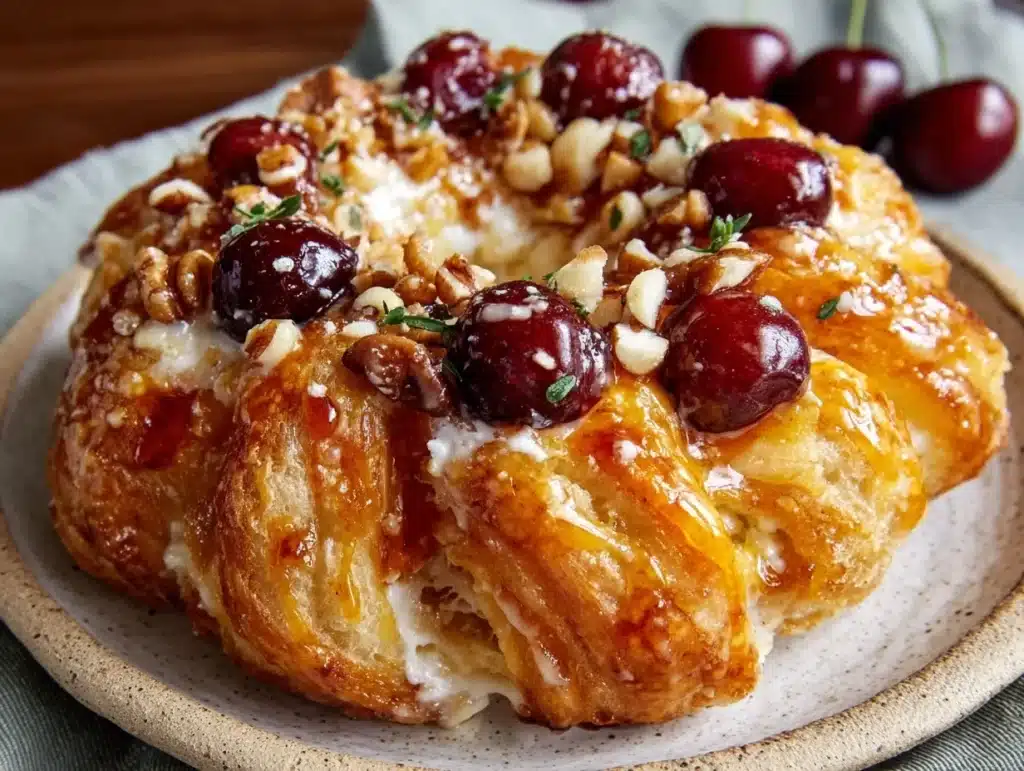
You know that moment when you open your fridge at 7:00 AM, still half-asleep, and you’re faced with the dreaded “what’s for lunch?” panic? I used to live in that panic. But then I discovered the magic of these cherry Hawaiian danishes. Honestly, they changed my entire weekday routine. These aren’t your typical, flaky, butter-heavy pastries that crumble everywhere and stain your white shirt. No, these are soft, sweet, and surprisingly easy to pack.
I first stumbled onto this concept years ago when I was trying to use up some leftover crescent roll dough before it went bad. I had a can of cherry pie filling sitting in the pantry, looking at me like it wanted to be part of something special. I mixed them together, popped them in the oven, and wow. The smell alone was enough to wake up the whole house. It was like a tropical vacation in a bite-sized pastry.
Since then, I’ve tested this recipe over a dozen times. I’ve tweaked the ratios, tried different types of cherries, and even experimented with adding a cream cheese swirl for extra richness. This version? It’s the winner. It’s the one I make every Sunday night for the week ahead. They are perfectly portioned, hold up well in a lunchbox, and taste just as good on Wednesday as they did on Monday. If you’re looking for a way to stop buying overpriced pastries at the coffee shop, you need to try this.
Let’s face it, most meal prep is boring. Think boiled chicken and steamed broccoli. But these cherry danishes? They are a treat. They feel indulgent, but because they are made with simple ingredients and can be pre-portioned, they fit right into a balanced lunch plan. You get your sweet fix without the sugar crash that comes from a standard donut. Plus, the Hawaiian sweet roll dough is so soft, it’s like eating a cloud with a cherry center. It’s comfort food that actually helps you stay organized.
What I love most is how versatile they are. You can pack them in a container, stack them neatly, and grab two or three on your way out the door. No reheating required, though they are delicious warm. They are perfect for busy parents, office workers, or anyone who wants to start their day with a little bit of joy. These danishes are proof that healthy-ish eating doesn’t mean sacrificing flavor. They are the ultimate grab-and-go breakfast or lunch snack that keeps you satisfied until dinner time.
Why You’ll Love This Recipe
There is a reason this recipe has become a staple in my kitchen, and it’s not just because they taste amazing. It’s because they solve a real problem: the lack of good, portable sweet options for lunch. After testing this recipe countless times, I’ve learned that consistency is key. Here is why these cherry Hawaiian danishes are worth the Sunday prep session.
- Quick & Easy: You can have these ready to eat in under 30 minutes. The dough comes from a tube or a simple homemade mix, and the filling is just a spoon away. It’s perfect for those nights when you’re tired but still want to provide something special for the next day.
- Simple Ingredients: You likely already have everything you need. Sweet rolls, cherry pie filling, and maybe some powdered sugar. No fancy grocery trips or hard-to-find items. It’s pantry-friendly cooking at its finest.
- Perfect for Meal Prep: These store beautifully in the fridge for up to five days. They don’t get soggy, and the flavors actually meld together over time, making them taste even better on day three.
- Crowd-Pleaser: Whether you are packing lunch for a picky eater or bringing them to a team meeting, these are always a hit. Kids love the sweet cherry center, and adults appreciate the soft, bread-like texture.
- Unbelievably Delicious: The combination of the buttery, sweet dough and the tart cherry filling is next-level. It’s a balance of sweet and tart that keeps you coming back for more.
What makes this recipe different from other danish recipes is the use of Hawaiian sweet roll dough. Traditional danishes use puff pastry, which can be finicky and hard to work with. Hawaiian dough is already sweet, soft, and slightly dense, which holds the heavy cherry filling without falling apart. It’s a hack that I swear by. It takes the stress out of baking and guarantees a soft, pillowy result every single time. It’s not just another recipe; it’s my best version because it balances ease with genuine comfort food satisfaction.
Emotionally, these danishes remind me of weekend brunches with family. They bring a sense of nostalgia and warmth. Making them feels like an act of self-care, even if it’s just for yourself. You get to enjoy a little treat that you prepared with care, knowing it will fuel you through a busy afternoon. It’s that feeling of being prepared and having something delicious waiting for you that reduces stress and adds a little sunshine to your day.
What Ingredients You Will Need
This recipe relies on a few key components that work together to create that signature soft texture and burst of flavor. You don’t need any specialty items, which is part of the charm. Here is what you need to gather before you start.
- Hawaiian Sweet Rolls (1 can or homemade dough): This is the star of the show. I recommend using the refrigerated dough found in the baking aisle for convenience. Look for brands like Pillsbury or a local bakery brand. If you are making it from scratch, ensure the dough is well-kneaded and has risen properly. The sweetness of the dough balances the tart cherries perfectly.
- Cherry Pie Filling (1 can, 21 oz): Use a standard canned cherry pie filling. I prefer the ones with real cherry pieces rather than just syrup. Brands like Smucker’s or Duncan Hines work well. Avoid low-sugar versions if you can, as the sugar helps with the texture and browning.
- Unsalted Butter, melted (1/4 cup): Brushing the tops with melted butter adds richness and helps the powdered sugar stick. Use high-quality butter for the best flavor. Salted butter can work, but reduce any added salt in other steps.
- Powdered Sugar (1 cup): For the dusting. This adds a touch of elegance and extra sweetness. Make sure it is sifted if you want a fine, snow-like coating.
- Optional: Cream Cheese, softened (4 oz): For those who want an extra layer of richness. Spread a thin layer on the dough before adding the cherries. This mimics a traditional cream cheese danish filling.
When selecting your ingredients, quality matters. For the cherry filling, check the expiration date and ensure the jar is sealed. For the dough, freshness is key, so buy it close to when you plan to bake. If you are using homemade dough, look for a recipe that includes milk and an egg for richness. These small details make a big difference in the final product. Substitutions are easy too. If you can’t find Hawaiian rolls, you can use cinnamon roll dough, though the texture will be slightly different. For a dairy-free option, use a plant-based butter and check your dough labels.
Equipment Needed
You don’t need a fancy kitchen to make these. Here is what you’ll need.
- Baking Sheets: Standard half-sheet pans work best. Line them with parchment paper for easy cleanup.
- Parchment Paper: Essential for preventing sticking and making cleanup a breeze.
- Pastry Brush: For brushing the melted butter on top. A silicone brush is easy to clean.
- Sifter or Fine Mesh Strainer: For dusting the powdered sugar evenly.
- Bowl: For melting the butter and mixing if you add cream cheese.
If you don’t have a pastry brush, you can use a fork or just spoon the butter on. The key is to cover the surface evenly. For the powdered sugar, a simple spoon tap works, but a sifter gives a more professional look. I always keep parchment paper on hand because it saves so much time on dishwashing.
Preparation Method
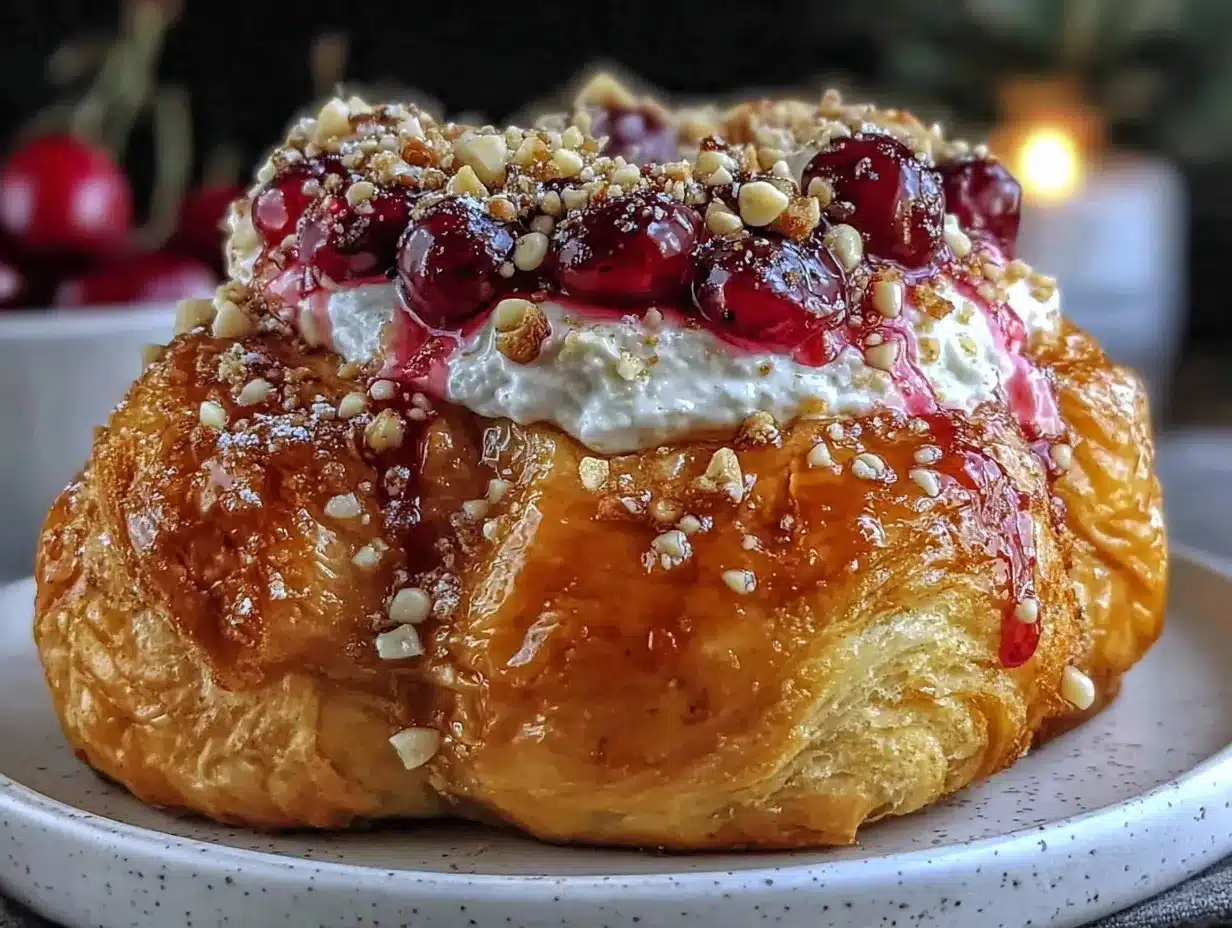
- Preheat and Prepare: Preheat your oven to 350°F (175°C). Line two large baking sheets with parchment paper. This ensures even baking and easy removal.
- Prepare the Dough: If using refrigerated dough, let it sit at room temperature for 10 minutes to make it easier to handle. Separate the rolls. If making homemade dough, divide it into 12 equal pieces.
- Shape the Danishes: Take each piece of dough and flatten it slightly with your hands or a rolling pin. You want a small circle or square, about 3-4 inches wide. Don’t make them too thin, or they might tear.
- Add the Filling: Spoon about 1-2 tablespoons of cherry pie filling into the center of each dough circle. If using cream cheese, spread a thin layer on the dough first, then add the cherries. Be careful not to overfill, or it will leak out.
- Fold and Seal: Bring the edges of the dough up toward the center, pinching them together to seal the filling inside. You can leave them open-faced or fully sealed. I prefer a semi-open look for visual appeal. Place them on the prepared baking sheets, leaving space for expansion.
- Bake: Bake for 15-18 minutes, or until the tops are golden brown. Keep an eye on them after 12 minutes to prevent burning. The dough should be cooked through and no longer doughy in the center.
- Butter Brush: While they bake, melt the butter in the microwave or a small saucepan. Once the danishes are out of the oven, immediately brush the tops with melted butter. This step is crucial for flavor and texture.
- Cool and Dust: Let them cool on the baking sheet for 5 minutes. Then, sift powdered sugar over the tops. Serve warm or pack them for later.
Troubleshooting tip: If the filling leaks, don’t worry. It just caramelizes on the pan and adds a nice crunch. If the dough tears, just patch it with a small piece of leftover dough. The key is to handle the dough gently.
Cooking Tips & Techniques
After making these many times, I’ve learned a few tricks to ensure perfection. First, don’t skip the room temperature dough. Cold dough is harder to work with and can tear easily. If you’re in a hurry, microwave the dough for 10 seconds to soften it up.
Another tip is to not overfill the danishes. It’s tempting to add more cherries, but too much filling will cause them to burst during baking. A tablespoon or two is plenty. Also, brush the butter generously. The butter helps the powdered sugar stick and adds a rich flavor that dry danishes lack.
I once burned a batch because I was distracted by a phone call. So, set a timer! Ovens vary, so check them early. If the tops are browning too fast, cover them loosely with foil. Consistency comes with practice, but these tips will help you get it right the first time.
Variations & Adaptations
One of the best things about this recipe is how adaptable it is. Here are a few variations I’ve tried.
- Berry Blast: Swap the cherry filling for mixed berry or strawberry filling. It’s great for spring and summer.
- Apple Cinnamon: Use apple pie filling and add a dash of cinnamon to the butter. Perfect for fall.
- Peanut Butter Swirl: Add a teaspoon of peanut butter to the center before adding the cherries. The salty-sweet combo is addictive.
For dietary needs, you can use gluten-free sweet roll dough if available. For a lower-sugar option, use unsweetened applesauce mixed with cherry preserves, though the texture will be different. These variations keep the recipe fresh and exciting.
Serving & Storage Suggestions
These danishes are best served warm, straight out of the oven. But for meal prep, let them cool completely before packing. Store them in an airtight container in the fridge for up to 5 days. You can also freeze them for up to 3 months. To reheat, microwave for 15-20 seconds or warm in the oven at 300°F for 5 minutes. The flavors develop over time, so they taste even better on day two.
Nutritional Information & Benefits
Each danish contains approximately 250-300 calories, depending on size and filling. They provide carbohydrates for energy and a bit of sugar for a quick boost. While not a low-calorie snack, they are a reasonable treat when packed as part of a balanced lunch with protein and veggies. They are gluten-containing, so avoid if you have celiac disease. I view these as a mindful indulgence—something to enjoy without guilt, knowing they fuel my day.
Conclusion
These cherry Hawaiian danishes are more than just a recipe; they are a meal prep game-changer. They are easy, delicious, and perfect for packing ahead. I hope you try them and find them as useful in your weekly routine as they have been in mine. Customize them to your taste and enjoy the convenience of having a sweet treat ready to go. Let me know in the comments how you like to pack yours!
FAQs
Can I use homemade dough instead of canned?
Yes, absolutely. Use any sweet roll or brioche dough. Just ensure it is soft and pliable before shaping.
How do I prevent the filling from leaking?
Don’t overfill, and seal the edges well. If they do leak, it’s fine, just clean the pan afterward.
Can I freeze these danishes?
Yes, freeze them in an airtight container for up to 3 months. Reheat in the oven or microwave.
What can I use instead of cherry pie filling?
You can use any fruit pie filling, such as apple, berry, or peach. Adjust the sweetness as needed.
Are these suitable for kids?
Yes, they are sweet and soft, making them a hit with children. Just be mindful of sugar content.
Pin This Recipe!

Best Cherry Hawaiian Danishes: Easy Meal Prep Lunch
- Total Time: 28 minutes
- Yield: 12 servings 1x
Description
Soft, sweet, and easy-to-pack cherry Hawaiian danishes made with simple ingredients like sweet roll dough and cherry pie filling. Perfect for meal prep and grab-and-go lunches.
Ingredients
- 1 can Hawaiian Sweet Rolls (refrigerated dough)
- 1 can (21 oz) Cherry Pie Filling
- 1/4 cup Unsalted Butter, melted
- 1 cup Powdered Sugar
- 4 oz Cream Cheese, softened (optional)
Instructions
- Preheat oven to 350°F (175°C) and line two large baking sheets with parchment paper.
- Let refrigerated dough sit at room temperature for 10 minutes, then separate the rolls.
- Flatten each piece of dough into a small circle or square, about 3-4 inches wide.
- Spoon 1-2 tablespoons of cherry pie filling into the center of each dough circle. If using cream cheese, spread a thin layer on the dough first.
- Bring the edges of the dough up toward the center, pinching them together to seal the filling inside.
- Place danishes on prepared baking sheets, leaving space for expansion.
- Bake for 15-18 minutes, or until tops are golden brown.
- While baking, melt the butter in the microwave or a small saucepan.
- Immediately brush the tops of the hot danishes with melted butter.
- Let cool on the baking sheet for 5 minutes, then sift powdered sugar over the tops.
Notes
Do not overfill the danishes to prevent leaking. If the dough tears, patch it with leftover dough. For best results, use room temperature dough. Store in an airtight container in the fridge for up to 5 days or freeze for up to 3 months.
- Prep Time: 10 minutes
- Cook Time: 18 minutes
- Category: Breakfast
- Cuisine: American
Nutrition
- Serving Size: 1 danish
- Calories: 275
- Sugar: 28
- Sodium: 250
- Fat: 12
- Saturated Fat: 6
- Carbohydrates: 40
- Fiber: 1
- Protein: 3
Keywords: cherry danishes, hawaiian sweet rolls, meal prep lunch, easy breakfast, grab and go snack, cherry pie filling recipe


