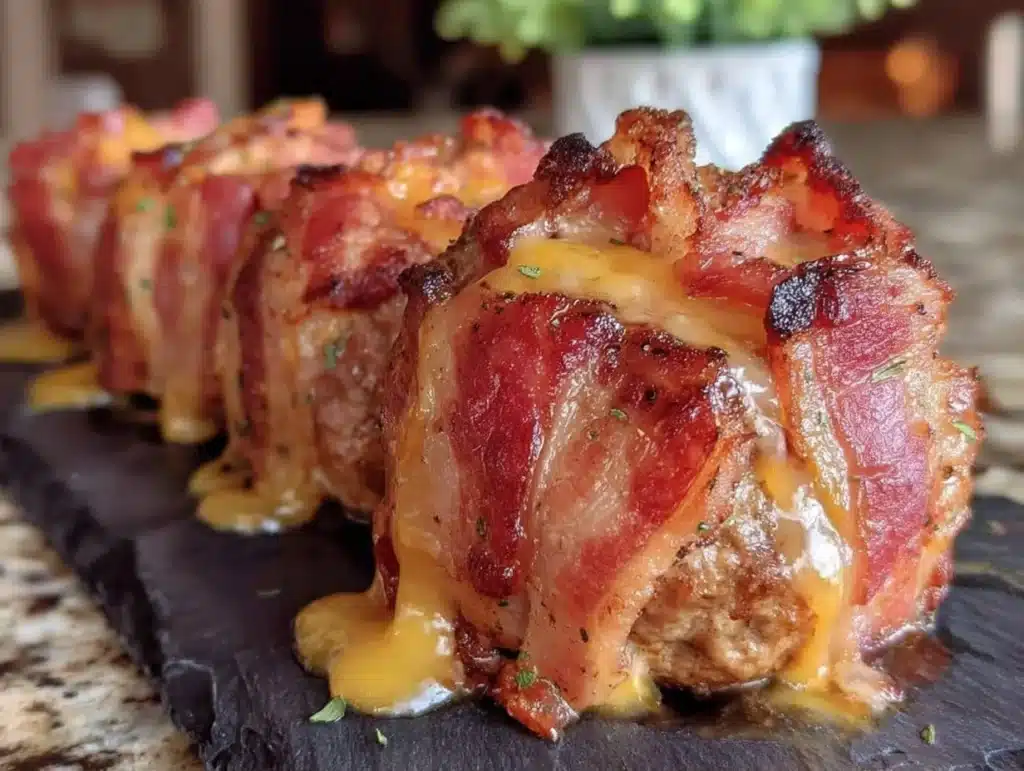
Let’s be honest for a second. The Sunday night dread is real. You stare at your calendar, then your fridge, and realize you have absolutely nothing planned for lunch for the next five days. You know you should be healthy, but you also know that by Wednesday afternoon, you are going to crave something salty, savory, and deeply satisfying. That is exactly where these Cheesy Bacon Cheeseburger Bombs come in to save your week.
I first stumbled onto this concept when I was trying to trick my picky eater into eating more protein. I had leftover ground beef, a block of cheddar, and some bacon that needed to be used up. I wrapped the beef around the cheese and bacon, tossed them in dough, and baked them. The result was so good that my kids actually asked for seconds. Now, I make a double batch every Sunday. It takes about an hour of prep time on the weekend, but it guarantees I have delicious, hot lunches ready to go all week long.
These bombs are not just a snack; they are a full meal component. They hold up surprisingly well in the fridge, meaning you can grab one from the container, microwave it for 90 seconds, and have a restaurant-quality burger experience at your desk or dining table. The combination of juicy beef, crispy bacon, and gooey cheese inside a fluffy bread pocket is comfort food elevated by convenience. Honestly, it’s the best way to ensure you don’t cave and order takeout during the busy workweek.
As someone who meal preps religiously to stay on track with my nutrition goals, I’ve tested dozens of lunch ideas. Most fall flat by Tuesday. These cheeseburger bombs, however, actually improve in flavor as the spices meld together over the days. They are hearty enough to keep you full until dinner but portable enough to eat on the go. If you are looking for a recipe that delivers on flavor, ease, and practicality, this is it. You will thank yourself every single time you open your lunchbox from Monday through Friday.
Why You’ll Love This Recipe
There are a few reasons why these Cheesy Bacon Cheeseburger Bombs have become a staple in my weekly rotation, and I think you’ll find they check all the boxes for a successful meal prep strategy.
- Quick & Easy Prep: While they look fancy, they come together in under an hour. The hardest part is probably waiting for the dough to rise, which is mostly hands-off time.
- Simple Ingredients: You likely have everything you need already. Ground beef, bacon, cheddar cheese, and basic pantry staples for the dough. No fancy grocery trips required.
- Perfect for Meal Prep: This recipe is designed specifically for batching. You make them once, and they provide lunch for five days. It turns that dreaded Sunday prep into a win.
- Crowd-Pleaser: Whether you are feeding a family or just treating yourself, these are universally loved. The flavor profile hits all the right notes for adults and kids alike.
- Unbelievably Delicious: The texture contrast between the soft dough, the crispy bacon, and the melted cheese is next-level. It’s comfort food that actually feels substantial.
What makes this recipe different from a standard burger or a simple wrap is the engineering of the bomb itself. By wrapping the filling tightly in dough, you create a sealed pocket that locks in moisture. This means the beef doesn’t dry out in the microwave like it often does when reheated. It stays juicy. Plus, the dough acts as a buffer, keeping the cheese from leaking out completely, which makes them much easier to handle and eat without making a mess.
I’ve made these for potlucks, for quick dinners, and specifically for my weekly lunch boxes. Every time, the feedback is the same: “How did you make this taste so fresh?” The secret is in the initial bake and the proper storage. When you reheat them, the dough stays soft rather than becoming tough or chewy. It’s the kind of recipe that makes you feel like a culinary genius, even though it’s actually quite simple. It’s about working smarter, not harder, and enjoying a meal that feels indulgent but fits into your busy schedule.
What Ingredients You Will Need
To make these Cheesy Bacon Cheeseburger Bombs, you need a mix of proteins, dairy, and dough basics. The beauty of this recipe is that it relies on high-quality, simple ingredients that you can find at any standard grocery store. Here is what you need to gather for your Sunday prep session.
For the Dough
- All-purpose flour: Two cups of all-purpose flour will give you the structure you need. I recommend King Arthur brand for its consistent protein content, which helps the dough rise properly.
- Active dry yeast: One packet (about 2 ¼ teaspoons). Make sure it’s fresh; old yeast won’t make the dough rise, and you want those bombs to be fluffy.
- Warm water: About ¾ cup of warm water. It should be around 110°F (43°C). If it’s too hot, it will kill the yeast; too cold, and it won’t activate.
- Sugar: One tablespoon to feed the yeast and add a slight sweetness to the dough.
- Salt: One teaspoon to balance the flavors.
- Unsalted butter: Two tablespoons, melted. This adds richness and helps keep the dough soft after reheating.
- Optional Flour: A little extra flour for dusting your surface so the dough doesn’t stick.
For the Filling
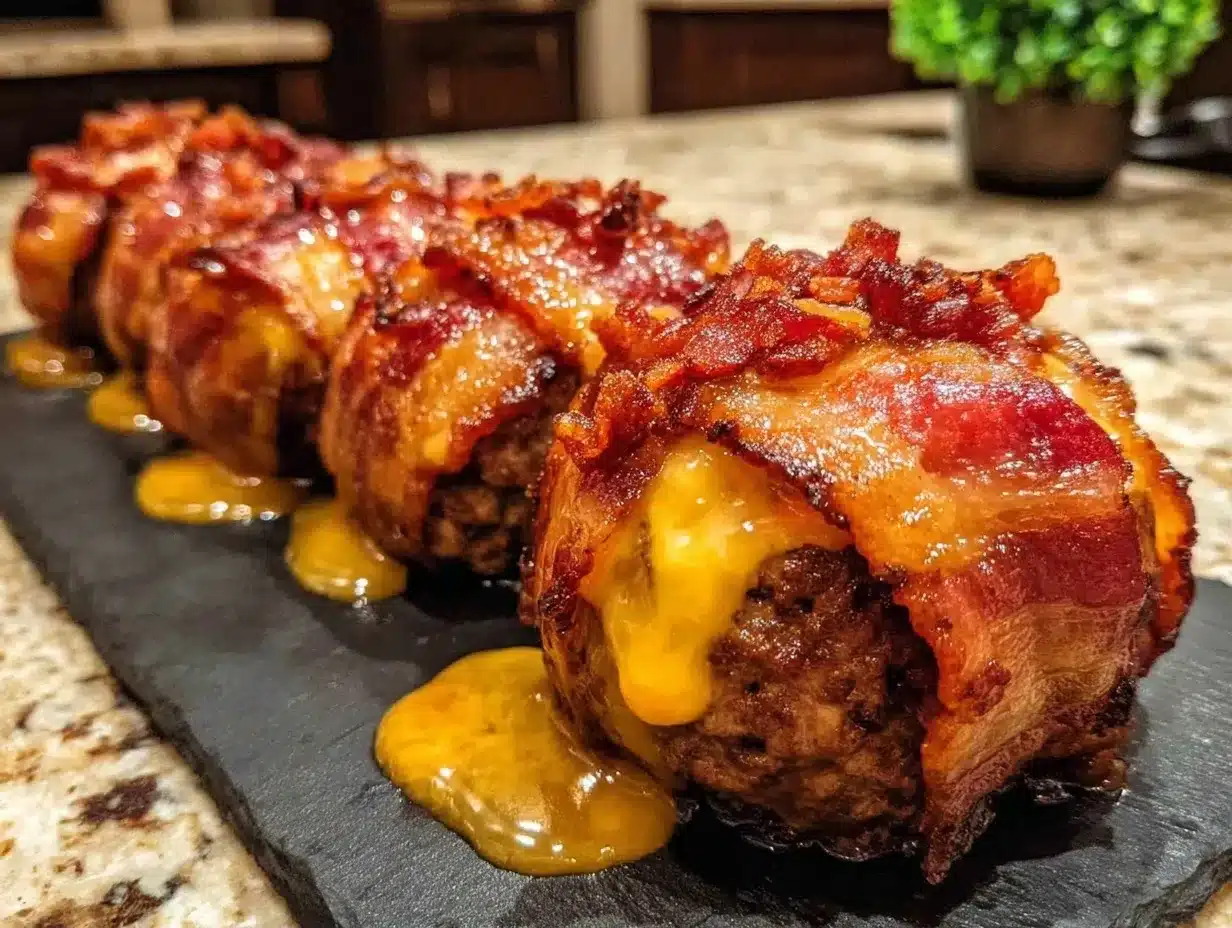
- Ground beef: One pound of 80/20 ground beef. The 20% fat content is crucial. Lean beef will result in dry bombs. You want juiciness.
- Cheddar cheese: One cup of sharp cheddar cheese, shredded. Sharp cheddar has more flavor and melts better than mild cheddar. Avoid pre-shredded cheese if possible, as the anti-caking agents can prevent smooth melting.
- Bacon: Eight slices of thick-cut bacon, cooked until crispy but still slightly pliable. Thick-cut bacon holds up better than thin bacon, which can burn or disappear entirely.
- Onion: One small yellow onion, finely diced. This adds sweetness and depth to the beef mixture.
- Garlic: Two cloves of garlic, minced. Fresh garlic is best here for that aromatic punch.
- Seasonings: One teaspoon of garlic powder, one teaspoon of onion powder, and half a teaspoon of black pepper. Salt is optional depending on how salty your bacon is.
For the Topping (Optional)
- Butter: Two tablespoons, melted, for brushing the tops before baking.
- Chives: One tablespoon of fresh chives, chopped. These add a nice pop of color and a mild onion flavor that complements the beef.
If you want to switch things up, you can use ground turkey or chicken, but you will need to add a bit more oil or fat to keep it moist. For a gluten-free option, you can use a 1:1 gluten-free flour blend, though the texture will be slightly denser.
Equipment Needed
You don’t need a professional kitchen to make these bombs. Just a few basic tools will get you through the process smoothly.
- Mixing Bowls: You will need two medium-sized bowls. One for mixing the dry ingredients and activating the yeast, and another for combining the dough.
- Stand Mixer or Hand Mixer: While you can knead by hand, a stand mixer with a dough hook makes the process much faster and less tiring. If you don’t have one, your hands work fine, just expect to knead for about 8-10 minutes.
- Skillet: A large non-stick skillet or cast iron pan is essential for cooking the beef and bacon filling. Cast iron is great for getting that nice crust on the meat.
- Baking Sheet: A standard 13×18 inch baking sheet. Line it with parchment paper for easy cleanup and to prevent sticking.
- Pastry Brush: For brushing the melted butter on top of the bombs. A silicone brush is easier to clean than a natural bristle one.
- Instant-Read Thermometer: This is helpful to ensure your water is the right temperature for the yeast and to check if the bombs are fully cooked.
If you don’t have a stand mixer, a wooden spoon and a clean countertop will suffice. Just make sure your surface is clean and lightly floured to prevent the dough from sticking.
Preparation Method
Making these Cheesy Bacon Cheeseburger Bombs is a step-by-step process. Take your time, and don’t rush the dough rising. Here is how to get it done.
- Activate the Yeast (5 minutes): In a small bowl, combine the warm water and sugar. Sprinkle the yeast over the top and let it sit for 5-10 minutes until it becomes foamy. This confirms your yeast is alive and ready to work.
- Make the Dough (10 minutes): In a large mixing bowl, combine the flour and salt. Add the foamy yeast mixture and the melted butter. Mix until a shaggy dough forms. If using a stand mixer, use the dough hook on medium-low speed. Knead for about 6-8 minutes until the dough is smooth and elastic. If kneading by hand, turn it out onto a floured surface and knead until it passes the windowpane test (you can stretch a small piece thin without it tearing).
- First Rise (45-60 minutes): Place the dough in a lightly oiled bowl, turning it once to coat. Cover with plastic wrap or a damp towel. Let it rise in a warm, draft-free area until it has doubled in size. This usually takes about an hour.
- Prepare the Filling (15 minutes): While the dough rises, cook the bacon in a skillet over medium heat until crispy. Remove and drain on paper towels, but leave about a tablespoon of bacon fat in the pan. Crumble the bacon and set aside. In the same pan, add the ground beef and diced onion. Cook over medium-high heat, breaking up the beef with a spoon, until browned. Add the minced garlic, garlic powder, onion powder, and pepper during the last minute of cooking. Drain any excess grease if there is too much, but leave some for flavor. Let the mixture cool completely. Warning: Do not add cheese to hot meat, or it will melt prematurely and make a mess.
- Assemble the Bombs (20 minutes): Once the dough has risen, punch it down to release air. Divide the dough into 8 equal pieces. Roll each piece into a circle about 4-5 inches wide. Place a heaping tablespoon of the beef mixture in the center. Add a small handful of shredded cheddar and a few pieces of crumbled bacon on top of the beef. Gather the edges of the dough and pinch them tightly at the top to seal the filling inside. Place the bombs seam-side down on the parchment-lined baking sheet.
- Second Rise (30 minutes): Cover the bombs loosely with plastic wrap or a towel. Let them rise again for about 30 minutes. They should look puffy and soft.
- Bake (15-18 minutes): Preheat your oven to 375°F (190°C). Brush the tops of the bombs with melted butter and sprinkle with chives. Bake for 15-18 minutes, or until they are golden brown and cooked through. The internal temperature should reach at least 165°F (74°C).
- Cool and Store: Let the bombs cool on the baking sheet for at least 10 minutes before handling. This allows the cheese to set slightly so it doesn’t leak out when you cut or eat them.
Cooking Tips & Techniques
Having made these dozens of times, I’ve learned a few tricks to ensure they turn out perfectly every time.
First, temperature control is key. When making the dough, if the water is too hot, it kills the yeast. If it’s too cold, the dough won’t rise. Use an instant-read thermometer to check the water temperature. It should be around 110°F (43°C).
Second, cool your filling completely. This is the most common mistake. If you add cheese to warm beef, the cheese will melt into a greasy mess that is hard to handle. Let the beef mixture cool to room temperature before assembling.
Third, seal them tightly. When you pinch the dough, make sure there are no air pockets or gaps. Use your fingers to press the seams firmly. If cheese leaks out during baking, it will burn and stick to your pan.
Fourth, don’t skip the second rise. This step ensures the bombs are light and fluffy rather than dense and bread-like. It’s worth the extra 30 minutes.
Finally, reheating technique. When reheating from the fridge, wrap the bomb in a damp paper towel and microwave for 90 seconds. The steam from the paper towel keeps the dough soft. If you microwave it dry, the dough can become tough and chewy.
Variations & Adaptations
These bombs are incredibly versatile. Here are a few ways to customize them for your taste or dietary needs.
- Spicy Version: Add diced jalapeños to the beef mixture and use pepper jack cheese instead of cheddar. You can also add a dash of cayenne pepper to the meat.
- Turkey or Chicken: Substitute ground beef with ground turkey or chicken. Add a tablespoon of olive oil to the pan to compensate for the lower fat content, and consider adding a splash of Worcestershire sauce for depth.
- Veggie Option: Use a plant-based ground meat alternative. Sauté mushrooms and spinach with the onions for extra moisture and flavor, as plant-based meats can dry out faster.
- Breakfast Bombs: Swap the beef for breakfast sausage. Use scrambled eggs in the filling (cooled completely) with cheddar and bacon. These are great for a high-protein breakfast on the go.
- Gluten-Free: Use a gluten-free flour blend that includes xanthan gum. You may need to add a little more liquid to the dough, as GF flour absorbs water differently.
I once tried making these with ground lamb and feta cheese. It was an interesting twist, though not quite as classic. The lamb was very flavorful, but the feta didn’t melt as smoothly as cheddar. Stick to cheddar for the best texture, but feel free to experiment with spices like cumin or paprika if you want a different profile.
Serving & Storage Suggestions
These Cheesy Bacon Cheeseburger Bombs are best served warm. They make a great standalone lunch, but you can also serve them with a side of pickles, coleslaw, or a simple green salad. A dip of thousand island dressing or spicy mustard pairs wonderfully with them.
For storage, let the bombs cool completely to room temperature before placing them in an airtight container. They will keep in the refrigerator for up to 5 days. This is why they are perfect for meal prep—by the time you get to Friday, they are still good.
You can also freeze them. After baking and cooling, place them in a freezer-safe bag or container. They will last for up to 3 months. To reheat from frozen, microwave for 2-3 minutes, or thaw in the fridge overnight and reheat as normal.
The flavors actually meld and improve over the first two days in the fridge. So, Monday might be good, but Tuesday and Wednesday are often the best tasting. Just make sure to reheat them properly to maintain the soft texture of the dough.
Nutritional Information & Benefits
These bombs are a great source of protein, thanks to the ground beef and cheese. Each bomb contains roughly 30-35 grams of protein, depending on the size and fat content of the meat. They are also rich in calcium from the cheddar cheese.
However, they are also relatively high in calories and saturated fat due to the beef, bacon, and cheese. A single bomb is approximately 450-550 calories. This makes them a hearty meal, but you should balance them with lighter sides like vegetables if you are watching your calorie intake.
For dietary considerations, these are not gluten-free or vegetarian. If you are looking for a lower-carb option, you could try wrapping the filling in low-carb tortillas or using a cauliflower crust, though the texture will be very different.
From a wellness perspective, I love these because they help me stay on track with my protein goals without feeling deprived. They satisfy the craving for fast food while providing real, whole-food ingredients. Just be mindful of portion sizes and balance your meals throughout the day.
Conclusion
These Cheesy Bacon Cheeseburger Bombs are more than just a recipe; they are a solution to the daily lunch dilemma. They combine the comfort of a cheeseburger with the convenience of meal prep. By spending just an hour on Sunday, you set yourself up for success all week long.
I encourage you to try this recipe and make it your own. Add your favorite pickles, swap the cheese, or tweak the spices. The beauty of meal prep is customization. I love these because they remind me of summer cookouts but are practical enough for the workweek.
Please let me know how they turn out for you! I’d love to hear your variations or any tips you might have. Share your creations on social media and tag me, or leave a comment below. Happy meal prepping, and enjoy your lunch all week!
Frequently Asked Questions
Can I freeze the unbaked bombs?
Yes, you can! After assembling the bombs and letting them do their second rise, place them on the baking sheet and freeze until solid. Then transfer them to a freezer bag. When you are ready to eat, thaw them in the fridge overnight and bake as directed, adding a few extra minutes to the baking time.
Do I have to use ground beef?
No, you can use ground turkey, chicken, or even a plant-based alternative. Just remember to adjust the cooking time and ensure the meat is fully cooked. Ground beef provides the best flavor and juiciness, but other proteins work well too.
How do I prevent the cheese from leaking out?
The key is to seal the dough tightly. Pinch the edges firmly and ensure there are no gaps. Also, make sure your filling is not too hot when you assemble the bombs. Cold cheese is easier to handle and less likely to melt into the dough prematurely.
Can I make these in an air fryer?
Air frying is a great option for a crispier exterior. Cook them at 350°F (175°C) for about 10-12 minutes. Keep an eye on them, as air fryers can vary in temperature. You may need to lower the heat slightly to prevent the dough from burning before the inside is cooked.
What is the best way to reheat them?
The best way is to microwave them with a damp paper towel for 90 seconds. This keeps the dough soft. If you prefer a crunchier texture, you can toast them in a skillet or air fryer for a few minutes, but the dough will be denser.
Pin This Recipe!
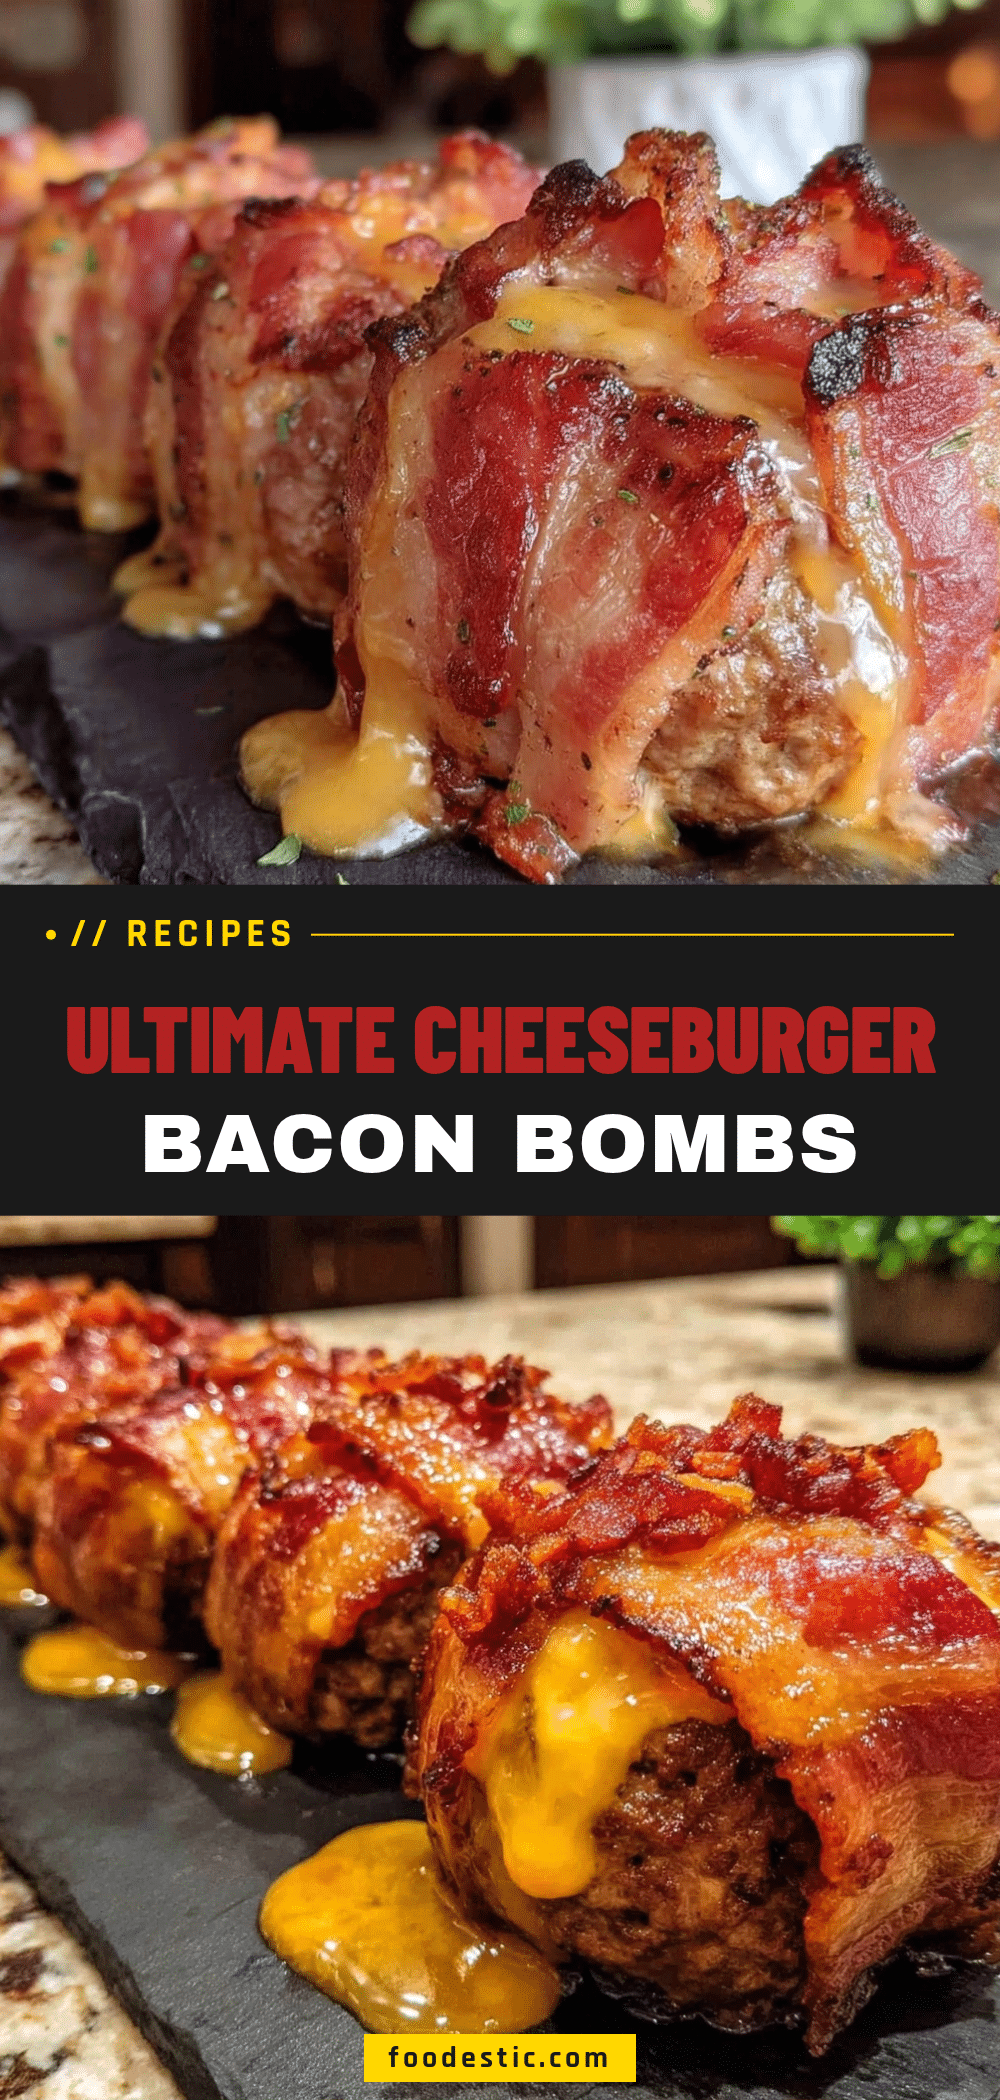
Cheesy Bacon Cheeseburger Bombs
- Total Time: 1 hour 15 minutes
- Yield: 8 servings 1x
Description
A meal-prep friendly recipe for savory dough pockets filled with seasoned ground beef, crispy bacon, and melted cheddar cheese. Designed to provide five days of delicious, microwaveable lunches.
Ingredients
- 2 cups all-purpose flour
- 1 packet (2 ¼ teaspoons) active dry yeast
- ¾ cup warm water (110°F/43°C)
- 1 tablespoon sugar
- 1 teaspoon salt
- 2 tablespoons unsalted butter, melted
- 1 pound 80/20 ground beef
- 1 cup sharp cheddar cheese, shredded
- 8 slices thick-cut bacon, cooked crispy
- 1 small yellow onion, finely diced
- 2 cloves garlic, minced
- 1 teaspoon garlic powder
- 1 teaspoon onion powder
- ½ teaspoon black pepper
- 2 tablespoons melted butter (for topping)
- 1 tablespoon fresh chives, chopped (optional)
Instructions
- Activate yeast: In a small bowl, combine warm water and sugar. Sprinkle yeast over the top and let sit for 5-10 minutes until foamy.
- Make dough: In a large bowl, combine flour and salt. Add yeast mixture and melted butter. Mix until a shaggy dough forms. Knead for 6-8 minutes until smooth and elastic.
- First rise: Place dough in an oiled bowl, cover, and let rise in a warm area for 45-60 minutes until doubled in size.
- Prepare filling: Cook bacon in a skillet until crispy; crumble and set aside. In the same pan, brown ground beef and diced onion. Add garlic, garlic powder, onion powder, and pepper. Drain excess grease and let mixture cool completely.
- Assemble: Punch down dough and divide into 8 equal pieces. Roll each into a 4-5 inch circle. Place a tablespoon of beef mixture, cheddar cheese, and bacon in the center. Pinch dough edges tightly to seal.
- Second rise: Place bombs seam-side down on a parchment-lined baking sheet. Cover and let rise for 30 minutes.
- Bake: Preheat oven to 375°F (190°C). Brush tops with melted butter and sprinkle with chives. Bake for 15-18 minutes until golden brown and internal temperature reaches 165°F.
- Cool: Let bombs cool on the baking sheet for 10 minutes before serving or storing.
Notes
Ensure the beef filling is completely cool before adding cheese to prevent premature melting. Seal the dough tightly to prevent cheese leakage. For reheating, wrap in a damp paper towel and microwave for 90 seconds to keep the dough soft.
- Prep Time: 1 hour
- Cook Time: 15-18 minutes
- Category: Main Course
- Cuisine: American
Nutrition
- Serving Size: 1 bomb
- Calories: 500
- Sugar: 4
- Sodium: 800
- Fat: 30
- Saturated Fat: 12
- Carbohydrates: 35
- Fiber: 2
- Protein: 32
Keywords: meal prep, lunch ideas, cheeseburger bombs, ground beef recipes, bacon recipes, comfort food, weekly meal prep


