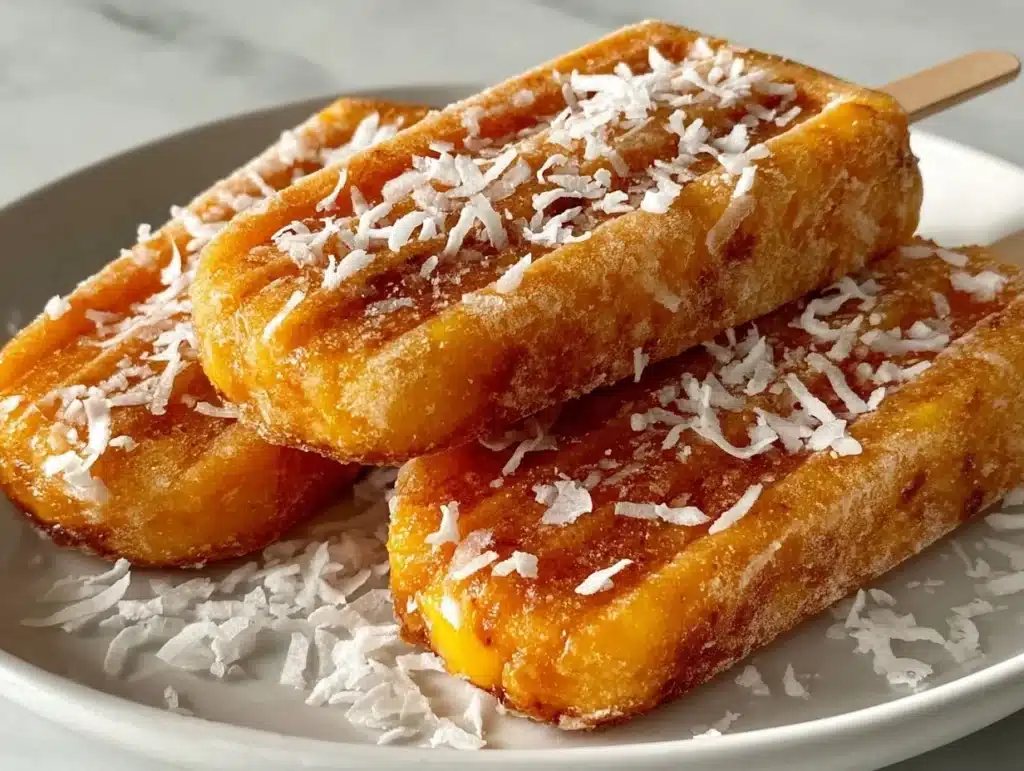
The first time I tasted this combination, I was standing on a sticky hot patio in Miami, trying to outrun a sudden tropical downpour. My friend handed me a bright orange pop, and the moment it hit my tongue, the humidity didn’t feel so oppressive anymore. It was pure, frozen sunshine. Honestly, if you have ever chased a summer craving that felt just out of reach, you know exactly what I mean. That specific memory is why I decided to recreate that magic at home, minus the rain and the sticky floors.
I’ve tested this creamy coconut mango popsicle recipe over a dozen times now. Some batches were too icy, others too sweet, but we finally hit the sweet spot. It’s that perfect balance where the rich coconut milk meets the tart, sweet punch of ripe mango. You know how it is when you try to make healthy treats and they end up tasting like cardboard? Well, this is the opposite. It’s lush, it’s smooth, and it melts in the best way possible.
Let’s face it, store-bought frozen treats often come with a laundry list of ingredients I can’t pronounce. This version is different. It uses real fruit and full-fat coconut milk for that velvety texture we all crave. I’ve made these for my kids, my husband, and even my picky eater neighbor who usually turns his nose up at anything “green” or “healthy.” They all came back for seconds.
This recipe is perfect for busy parents who want to avoid the sugar crash but still want to indulge their sweet tooth. It’s also a fantastic option for anyone looking to cool down without the heavy dairy load. The combination of mango and coconut is a classic for a reason, and putting it into a popsicle mold just makes it more fun. Plus, the vibrant color is absolutely stunning for your social media feeds.
I’ve been making these popsicles all summer long, and they’ve become my go-to solution for hot afternoons. Whether you are hosting a pool party or just need a quick pick-me-up during a work-from-home slump, these little gems deliver. They are naturally gluten-free, vegan, and free from refined sugars. That means you can enjoy them guilt-free.
The beauty of this recipe lies in its simplicity. You don’t need fancy equipment or hard-to-find ingredients. If you have a blender and some freezer space, you are good to go. I love that I can customize the sweetness based on how ripe my mangoes are. Sometimes I add a squeeze of lime for extra zing, but the core recipe stays true to that tropical vibe.
Creating these treats has become a little ritual for me. It’s a moment to slow down, blend the fruit, and pour the mixture into molds. It’s meditative, really. And the result? A refreshing snack that tastes like a vacation in every bite. I really believe that once you try these creamy coconut mango popsicles, you’ll never go back to the chalky, icy versions from the grocery store. They are that good.
Why You’ll Love This Recipe
There are plenty of frozen treats out there, but this specific combination of creamy coconut and sweet mango stands out for a few key reasons. I’ve spent years experimenting with fruit-based desserts, and this one has earned its spot in my regular rotation. Here is why these popsicles are worth your freezer space.
- Quick & Easy: This recipe comes together in under 10 minutes. You just blend, pour, and freeze. It is perfect for busy weeknights or last-minute cravings when you need something sweet fast.
- Simple Ingredients: No fancy grocery trips needed. You likely already have coconut milk and mangoes in your kitchen or local store. It relies on whole foods that you can recognize.
- Perfect for Summer Gatherings: Great for brunches, potlucks, or just a lazy Sunday afternoon. They are easy to grab and eat without making a mess, unlike ice cream bowls.
- Crowd-Pleaser: Always gets rave reviews from kids and adults alike. The texture is so smooth that even the pickiest eaters can’t tell it’s healthy.
- Unbelievably Delicious: The texture and flavor combo is next-level comfort food. The fat from the coconut milk creates a mouthfeel that rivals dairy ice cream.
What makes this recipe different from the rest is the quality of the coconut milk. I’ve tried low-fat versions, and the result is always icy and hard. Using full-fat, canned coconut milk is non-negotiable for that creamy texture. It coats the tongue and provides a luxurious mouthfeel that you just don’t get with water-based popsicles.
I also like to use fresh mango when it’s in season, but frozen mango chunks work beautifully too. This flexibility makes the recipe accessible year-round. The natural sweetness of the mango means I rarely need to add extra sugar. It’s a subtle sweetness that lets the fruit flavor shine through.
This recipe isn’t just good—it’s the kind that makes you close your eyes after the first bite. It’s comfort food reimagined, healthier and faster, but with the same soul-soothing satisfaction. It’s perfect for impressing guests without stress. You can prep them the night before, and they are ready to go whenever you are.
I remember making these for a friend’s baby shower. They were a huge hit. Everyone wanted the recipe because they looked so professional but tasted so simple. It’s a great way to turn a simple meal or snack into something memorable. Plus, knowing exactly what is in your food gives you peace of mind.
What Ingredients You Will Need
This recipe uses simple, wholesome ingredients to deliver bold flavor and satisfying texture without the fuss. The magic here is in the quality of the few items you use. Since there are only four main components, each one plays a crucial role in the final taste and texture.
- Ripe Mangoes (2 large or 3 cups chopped): The star of the show. Look for mangoes that are fragrant and yield slightly to pressure. I prefer Alphonso or Ataulfo mangoes for their sweet, non-fibrous flesh. If fresh mangoes aren’t in season, frozen unsweetened mango chunks work just as well. Just thaw them slightly before blending.
- Full-Fat Coconut Milk (1 can, 13.5 oz): This is essential for the creamy texture. Do not use the carton version meant for drinking; it is too watery. You need the thick, rich cream from the can. Shake the can well before opening to ensure the cream and liquid are combined. Brands like Native Forest or Thai Kitchen are reliable choices.
- Lime Juice (1 tablespoon): A splash of fresh lime juice brightens the flavor and balances the sweetness. It adds a necessary acidic note that prevents the popsicles from tasting flat. Use fresh-squeezed lime juice for the best flavor, not the bottled stuff.
- Honey or Agave Nectar (1-2 tablespoons, optional): Depending on how sweet your mangoes are, you might need a little extra sweetener. Taste the mixture before pouring it into molds. If it’s tart, add a drizzle of honey. For a vegan option, use agave nectar.
- Coconut Cream (2 tablespoons, optional): For an extra layer of richness, you can stir in a spoonful of thick coconut cream on top of each mold before freezing. This creates a beautiful swirl effect and adds a bit of luxury.
When selecting your mangoes, color isn’t always the best indicator of ripeness. Smell them! A ripe mango should have a sweet, floral aroma at the stem end. If it smells like nothing, it’s not ready yet. Overripe mangoes can be mushy, so aim for firm but yielding fruit.
For the coconut milk, look for cans that don’t contain guar gum if you can find them. While guar gum isn’t bad, it can sometimes make the texture a bit gelatinous. Pure coconut milk with just coconut and water is ideal.
If you are dairy-free or vegan, this recipe is naturally compliant. Just ensure your honey substitute is plant-based. I usually keep agave nectar in the pantry for this exact purpose. It dissolves easily and doesn’t alter the flavor profile.
These ingredients are pantry staples for many, but the mango might require a trip to a well-stocked produce section. Don’t skip the lime juice; it’s the secret weapon that makes the flavors pop. Trust me on this one.
Equipment Needed
You don’t need a lot of fancy gadgets to make these popsicles, but having the right tools makes the process much smoother. Here is what you will need to get started.
- Popsicle Molds: This is the most important piece of equipment. I recommend silicone molds over plastic ones. Silicone is easier to pop the popsicles out of, especially when they are frozen solid. Look for molds with wide bases for easy gripping. Brands like USA Pan or generic silicone sets on Amazon work well.
- High-Speed Blender: A good blender ensures a silky smooth texture. I use a Vitamix, but any blender that can crush frozen fruit will do. If you don’t have a powerful blender, you may need to let the mangoes thaw more.
- Measuring Cups and Spoons: Standard kitchen tools for accuracy. Having these on hand ensures your ratios are correct every time.
- Spatula: A silicone spatula is useful for scraping the blender jar clean and getting every bit of the mixture into the molds.
If you don’t have popsicle molds, you can use small paper cups or even ice cube trays for bite-sized versions. However, the texture might be harder to manage without sticks. You can insert chopsticks or coffee stirrers as handles if needed.
I’ve tried using ice cube trays in the past, and the result is more like sorbet cubes. They are great for smoothies, but not as satisfying to eat as a traditional popsicle. I always advise investing in a decent set of molds. They last for years and are very affordable.
When cleaning your molds, be gentle. Silicone can tear if you use sharp utensils to remove the popsicles. Let them sit at room temperature for a minute or two to loosen up first. This small step saves a lot of frustration.
Preparation Method
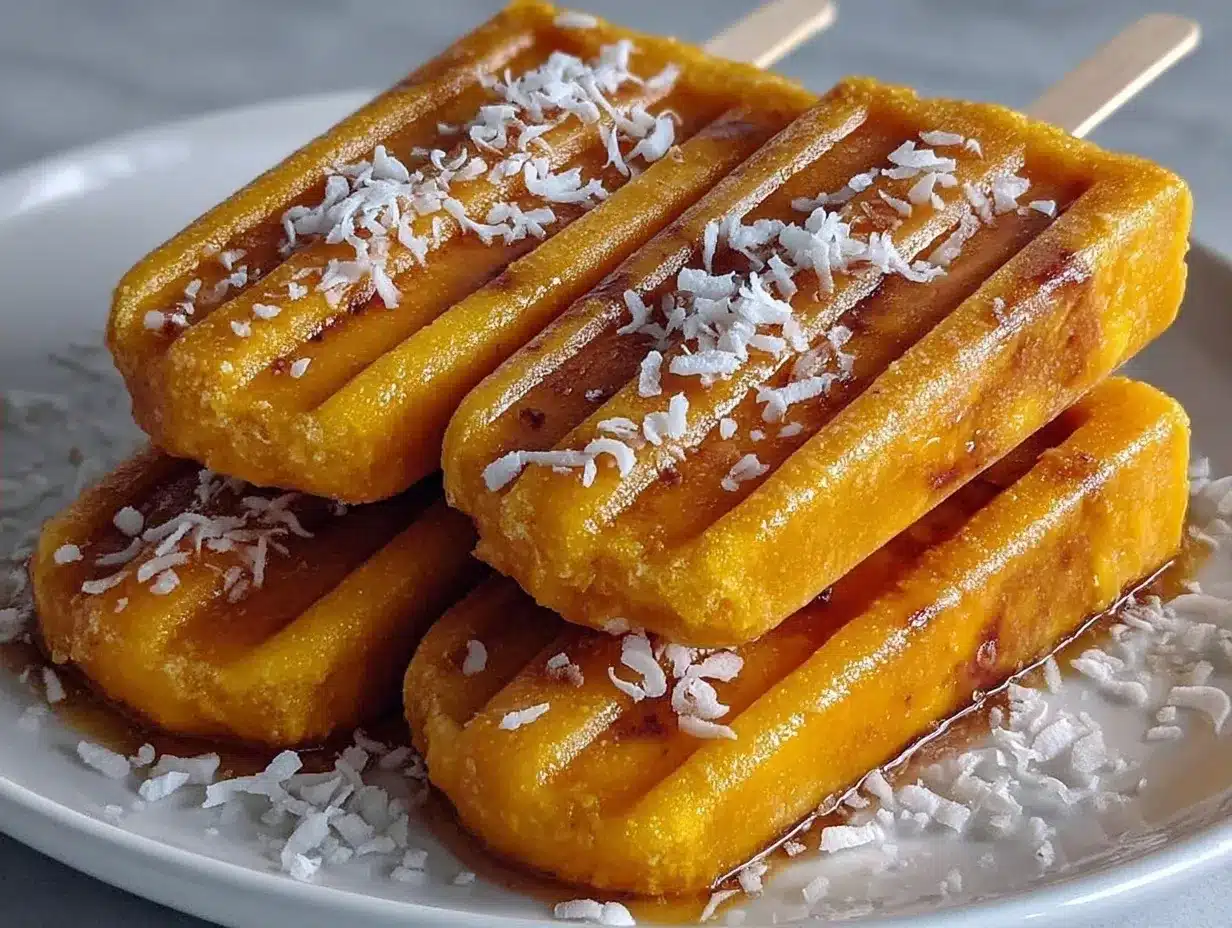
Making these creamy coconut mango popsicles is straightforward, but there are a few tricks to ensure the best result. Follow these steps closely for perfect, creamy treats every time.
- Prepare the Mangoes (5 minutes): If using fresh mangoes, peel and chop them into large chunks. You should have about 3 cups of fruit. If using frozen mango chunks, you can skip the peeling. Place the mango chunks into your blender. If the mangoes are very hard, let them sit out for 10 minutes to soften slightly.
- Add the Coconut Milk (2 minutes): Open the can of full-fat coconut milk and give it a good shake. Pour the entire contents into the blender with the mangoes. The goal is to create a homogeneous mixture. Add the lime juice and your chosen sweetener (if using) at this stage.
- Blend Until Smooth (1-2 minutes): Blend on high speed until the mixture is completely smooth and creamy. This usually takes about 60 to 90 seconds. Stop and scrape down the sides of the blender jar with a spatula if needed. The mixture should look like a thick smoothie, not watery. If it is too thick to blend, add a splash of water or more coconut milk, one tablespoon at a time.
- Taste and Adjust (1 minute): Taste the mixture. This is crucial. If it’s too tart, add more sweetener. If it’s too sweet, add a bit more lime juice. Remember that freezing dulls sweetness slightly, so it’s okay if it tastes a little sweer than you like.
- Pour into Molds (3 minutes): Place your popsicle molds on a flat, level surface. Carefully pour the mixture into each mold, leaving about 1/4 inch of space at the top for expansion. If you are using coconut cream for a swirl effect, dollop it on top now and gently swirl it with a toothpick.
- Insert Sticks and Freeze (4-6 hours): Insert the popsicle sticks into the center of each mold. If your molds don’t have lids, cover them with plastic wrap or foil to keep out freezer burn. Place the molds in the freezer. Let them freeze for at least 4 hours, but overnight is best for a firmer texture.
- Release the Popsicles (1 minute): When ready to eat, run the outside of the silicone molds under warm water for 10-15 seconds. This loosens the popsicles, allowing them to slide out easily. Gently pull the stick to remove the popsicle.
Pay attention to the blending step. If there are any chunks of mango left, the popsicles will be icy and hard to bite into. You want a completely emulsified mixture. The fat from the coconut milk helps bind the water content from the fruit, preventing large ice crystals from forming.
If you are making these for a party, you can prepare them up to a week in advance. They hold their shape well in the freezer. Just make sure they are stored in an airtight container or covered well to prevent freezer odors from affecting the flavor.
Cooking Tips & Techniques
There are a few professional tips that can make a big difference in the final quality of your popsicles. I’ve learned these through trial and error, and I hope they save you some time.
- Use Ripe Fruit: The riper the mango, the sweeter and more flavorful your popsicles will be. Unripe mangoes will result in a bland, tart treat that requires excessive sweetener.
- Don’t Skip the Lime: The acidity from the lime juice is not just for flavor. It helps prevent oxidation and keeps the mango color bright. It also cuts through the richness of the coconut milk.
- Chill the Molds: If you have time, put your empty popsicle molds in the freezer for 30 minutes before pouring in the mixture. This helps the outside freeze faster, locking in the texture.
- Avoid Over-Sweetening: It’s easy to add too much sugar. Start with a small amount and adjust to taste. You want the fruit flavor to shine, not be masked by sugar.
One common mistake is using too much water or juice as a base. This leads to icy, hard popsicles that are difficult to chew. The coconut milk provides the necessary fat and creaminess. Stick to that ratio.
I once tried making these with almond milk, and the result was watery and lacked body. The fat content is key. If you are dairy-free, coconut milk is your best friend here. It mimics the mouthfeel of dairy ice cream remarkably well.
Another tip is to blend the mixture in batches if you are making a large quantity. Overfilling the blender can result in uneven blending. You want every drop to be smooth.
Timing is also important. If you pull the popsicles out too early, they will be soft and messy. If you leave them in too long, they might become rock hard. Four to six hours is the sweet spot.
Variations & Adaptations
While the classic coconut mango flavor is unbeatable, there are plenty of ways to twist this recipe to suit your preferences or dietary needs. Here are a few ideas.
- Green Mango Twist: Use unripe green mangoes for a tart, tangy version. This is a popular flavor in Southeast Asia. You will need to add more sweetener to balance the tartness.
- Spicy Mango: Add a pinch of chili powder or Tajín seasoning to the mixture before pouring. The heat pairs beautifully with the sweet mango and creamy coconut.
- Berry Coconut: Swap the mango for mixed berries. Raspberries or strawberries work well. The color will be stunning, and the flavor will be slightly more tart.
- Turmeric Mango: Add a teaspoon of fresh turmeric for an anti-inflammatory boost. It adds a lovely golden color and an earthy note.
For a nut-free version, ensure your coconut milk is pure and doesn’t contain any cross-contamination warnings if you have severe allergies.
I once tried adding a layer of crushed pistachios on top of the mixture before freezing. It added a nice crunch and visual appeal. However, it can make the popsicles harder to eat if the nuts are too large. Finely chopped nuts are better.
If you are looking for a lower-calorie option, you can substitute half the coconut milk with coconut water. However, this will reduce the creaminess. It’s a trade-off between richness and lightness.
These variations allow you to keep the recipe fresh and exciting throughout the summer months. Experiment with different fruits and flavors to find your new favorite.
Serving & Storage Suggestions
How you serve and store these popsicles can impact your enjoyment. Here are some tips to keep them at their best.
- Serving Temperature: These popsicles are best served straight from the freezer. If they have been in the freezer for a long time, let them sit on the counter for 5 minutes to soften slightly.
- Complementary Dishes: They pair well with light, savory snacks like avocado toast or a fresh green salad. The sweetness provides a nice contrast.
- Storage: Store the popsicles in an airtight container or covered well with plastic wrap. They will keep in the freezer for up to 3 months.
- Reheating: You don’t need to reheat these, but if they are too hard, a quick warm water bath on the outside of the mold works wonders.
The flavors develop over time, becoming more integrated as they freeze. This is why overnight freezing is recommended. It allows the coconut and mango flavors to meld together.
Avoid storing them near strong-smelling foods like onions or garlic. Popsicles can absorb odors from the freezer. Keeping them covered helps prevent this.
I like to serve these with a small sprig of mint for a touch of elegance. It makes them look like something from a high-end dessert shop.
Nutritional Information & Benefits
These popsicles are not just a treat; they offer some genuine health benefits. Here is a breakdown of what makes them a smart choice.
- Vitamin C: Mangoes are packed with vitamin C, which supports immune health and skin elasticity.
- Healthy Fats: Coconut milk provides medium-chain triglycerides (MCTs), which are easily converted into energy by the body.
- Low Calorie: Compared to traditional ice cream, these popsicles are significantly lower in calories and sugar.
- Dairy-Free: Perfect for those with lactose intolerance or dairy sensitivities.
Each popsicle contains approximately 80-100 calories, depending on the size and sweetness. They are a guilt-free indulgence.
I often include these in my post-workout snack rotation. The natural sugars provide a quick energy boost, while the coconut milk offers some sustained energy from the fats.
They are also a great way to increase your fruit intake, especially for kids who might be picky about eating raw fruit. It’s a sneaky way to get them to enjoy healthy ingredients.
Conclusion
These creamy coconut mango popsicles are more than just a frozen snack; they are a taste of summer in every bite. I hope you try this recipe and enjoy it as much as I do. It’s simple, delicious, and healthy. Feel free to customize it with your favorite fruits or flavors.
I love making these because they bring back happy memories of tropical vacations. They are a great way to celebrate the season. If you make them, I’d love to hear how they turn out. Leave a comment below with your thoughts or variations you tried.
Share this recipe with your friends and family. They will love you for it. Enjoy your sunny days with a cool, creamy treat in hand.
FAQs
Can I use frozen mango instead of fresh?
Yes, frozen mango works perfectly. You may need to let them thaw slightly before blending to ensure a smooth consistency.
How long do these popsicles last in the freezer?
They can be stored for up to 3 months. Make sure they are covered well to prevent freezer burn.
Can I make these without coconut milk?
You can use almond milk or oat milk, but the texture will be less creamy. The fat from coconut milk is key for that rich mouthfeel.
Why are my popsicles icy?
This usually happens if there isn’t enough fat or if the mixture wasn’t blended smoothly. Ensure you use full-fat coconut milk and blend until completely smooth.
Can I add alcohol to these popsicles?
Yes, a splash of rum or tequila can add a fun twist. However, alcohol lowers the freezing point, so they may not freeze as solid.
Pin This Recipe!
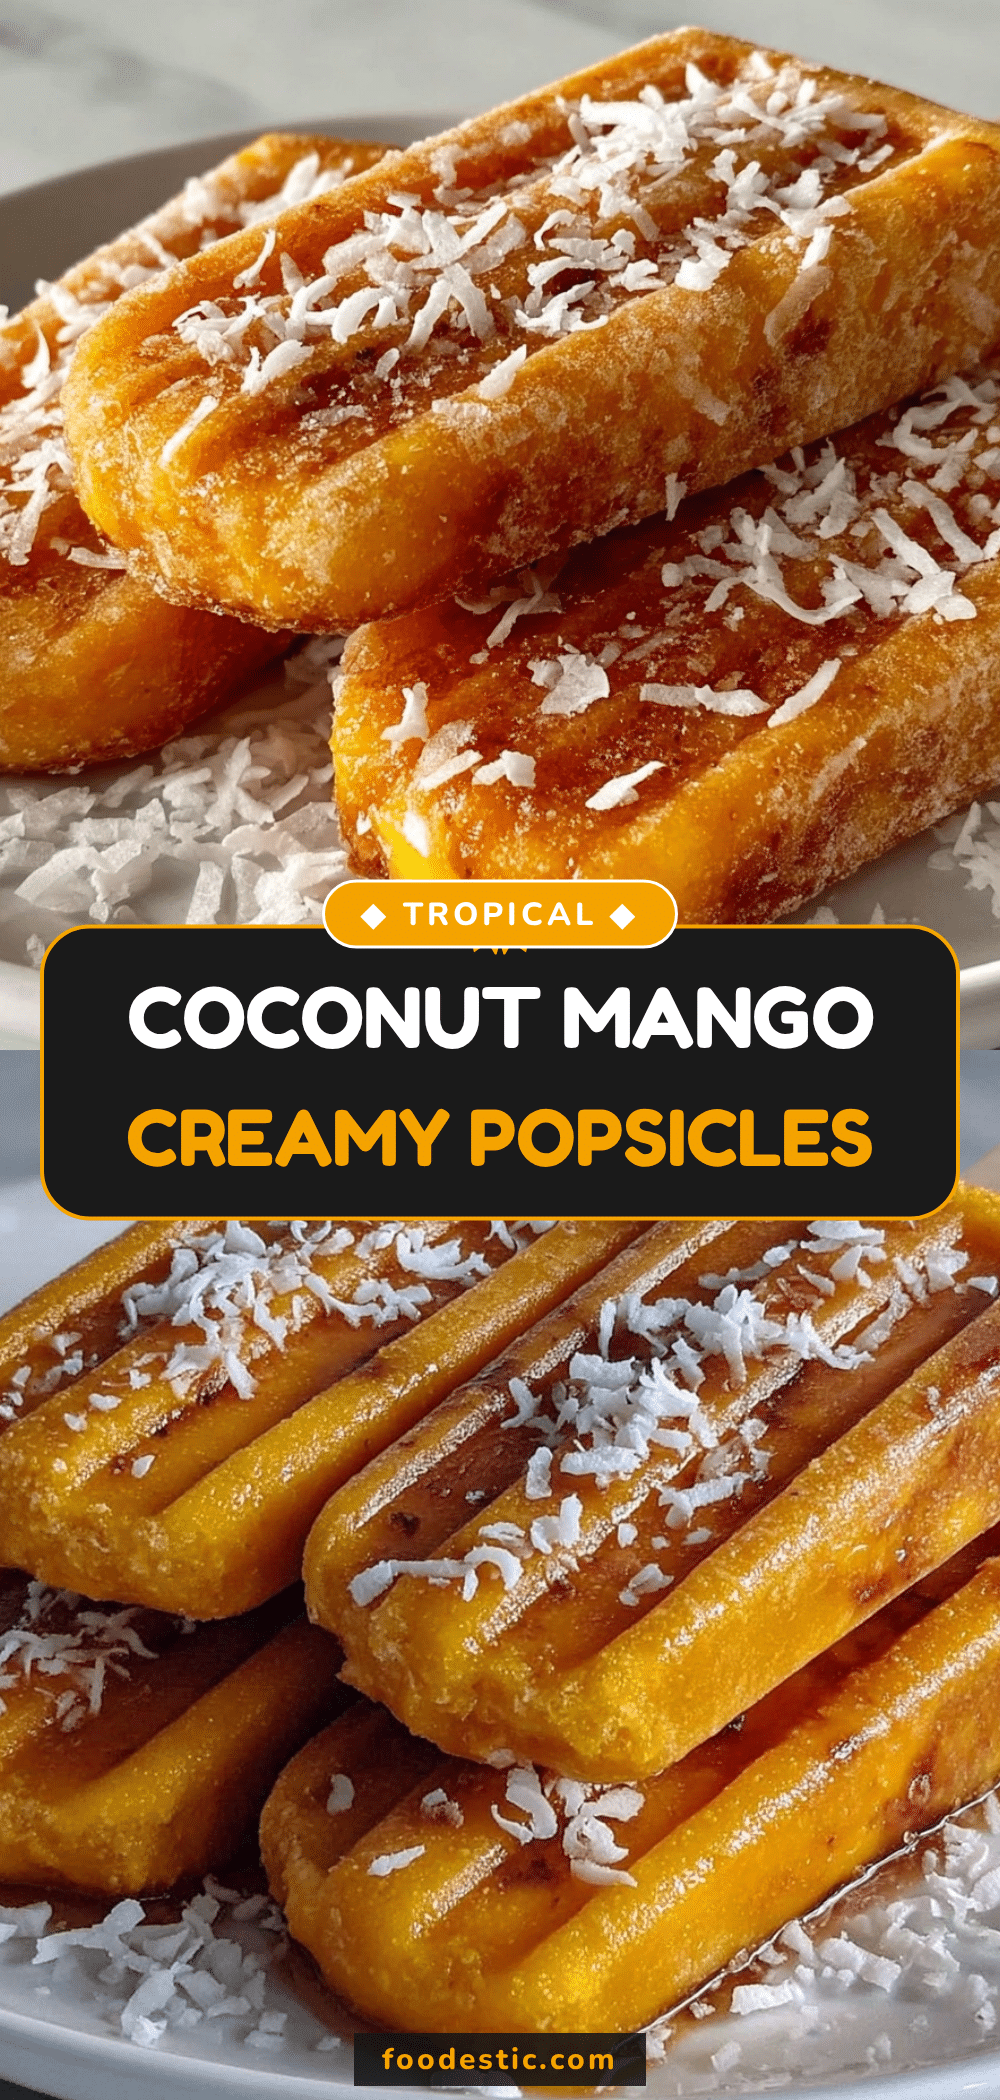
Creamy Coconut Mango Popsicles
- Total Time: 4 hours 10 minutes
- Yield: 4 servings 1x
Description
A lush, smooth, and naturally sweet frozen treat made with ripe mangoes and full-fat coconut milk. These dairy-free, vegan popsicles are easy to make and perfect for summer.
Ingredients
- 3 cups chopped ripe mangoes (fresh or frozen)
- 1 can (13.5 oz) full-fat coconut milk
- 1 tablespoon fresh lime juice
- 1–2 tablespoons honey or agave nectar (optional, to taste)
- 2 tablespoons coconut cream (optional, for swirl effect)
Instructions
- Prepare the mangoes by peeling and chopping fresh mangoes into large chunks, or use frozen mango chunks. Place them in a blender.
- Shake the can of full-fat coconut milk well and pour the entire contents into the blender with the mangoes.
- Add the lime juice and sweetener (if using) to the blender.
- Blend on high speed for 60-90 seconds until the mixture is completely smooth and creamy. Scrape down sides if necessary.
- Taste the mixture and adjust sweetness or acidity as needed. Remember that freezing dulls sweetness slightly.
- Pour the mixture into popsicle molds, leaving about 1/4 inch of space at the top for expansion.
- If using coconut cream, dollop it on top and swirl gently with a toothpick.
- Insert popsicle sticks into the molds. Cover with lids or plastic wrap to prevent freezer burn.
- Freeze for at least 4 hours, or overnight for best results.
- To serve, run the outside of the molds under warm water for 10-15 seconds to loosen, then gently pull the sticks to remove.
Notes
Use full-fat canned coconut milk for a creamy texture; avoid carton milk which is too watery. If using frozen mango, let it thaw slightly before blending. For best results, freeze overnight. Store in an airtight container for up to 3 months.
- Prep Time: 10 minutes
- Cook Time: 0 minutes
- Category: Dessert
- Cuisine: Tropical
Nutrition
- Serving Size: 1 popsicle
- Calories: 90
- Sugar: 8
- Sodium: 10
- Fat: 6
- Saturated Fat: 5
- Carbohydrates: 10
- Fiber: 1
- Protein: 1
Keywords: coconut mango popsicles, vegan popsicles, dairy-free dessert, summer treats, healthy snacks, gluten-free, frozen fruit pops


