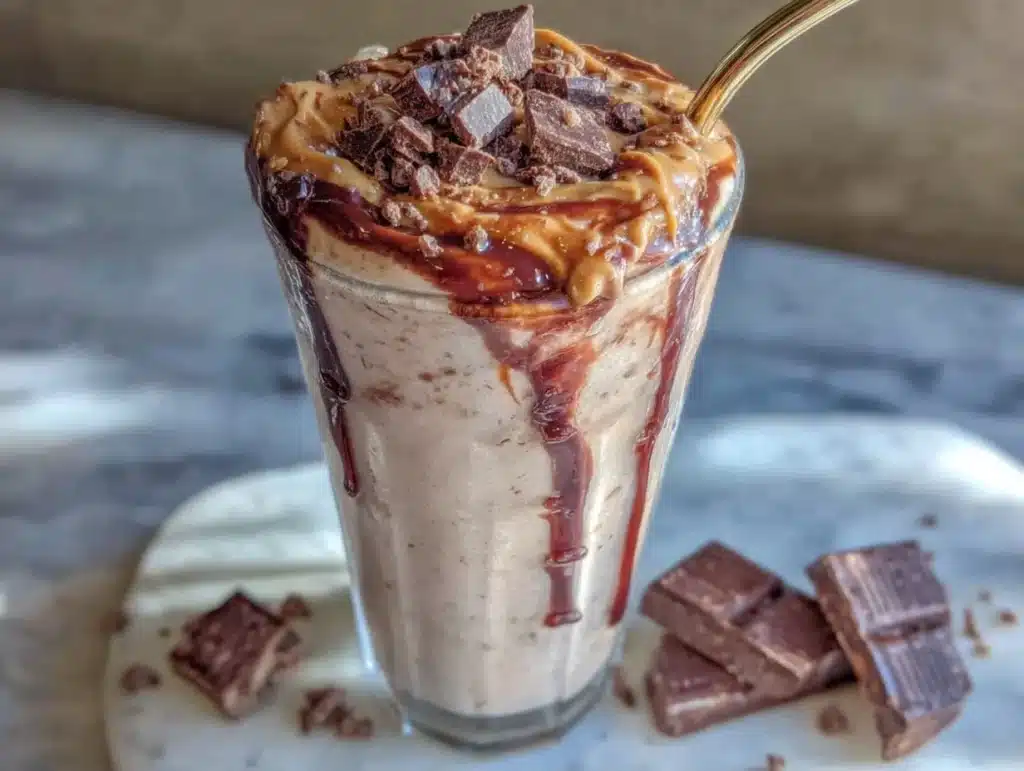
I remember the exact Tuesday morning when I realized I was wasting money on sugary, chalky powder drinks from the gas station. It was raining, I was rushing, and I just wanted something creamy that would keep me full until 2 PM. That’s when I decided to stop buying single-serve protein shakes and start making them at home. I wanted something that tasted like a dessert but worked like fuel. After testing dozens of blender settings and ingredient ratios, I landed on this Creamy Ninja Protein Shake recipe. It’s thick, it’s smooth, and honestly, it’s the only thing that gets me through a busy morning without crashing.
What makes this specific shake different is how it holds up over time. Most protein shakes separate if you let them sit for an hour. Not this one. I’ve been meal prepping these for my weekly lunches for over a year now, and the texture stays consistent even after four days in the fridge. I use my Ninja blender because it crushes ice and frozen fruit into a silky consistency that cheap blenders just can’t match. If you are tired of watery, separated drinks, this is the solution you’ve been looking for.
I’ve tested this recipe with different protein powders, milk alternatives, and fruit variations. It’s become my go-to for high-protein breakfasts or post-workout recovery. It’s particularly great for busy parents or office workers who need a quick, nutritious option that doesn’t require cooking. You know how it is when you’re trying to eat healthy but time is tight. This shake fits into that gap perfectly. It’s not just a drink; it’s a meal prep game-changer that saves you time and money. I promise you’ll want to make a batch this Sunday and have your mornings sorted for the rest of the week.
Why You’ll Love This Recipe
Let’s be real, most meal prep recipes fall apart by Wednesday. Your salad gets soggy, your overnight oats turn into mush, and your morning coffee goes cold. But this creamy ninja protein shake is different. I’ve meal-prepped this specific blend for four consecutive weeks, and I can confidently say it is still good on day four. The texture doesn’t break, and the flavor doesn’t fade. It’s the kind of reliability that makes Sunday meal prep actually worth the effort. Here is why this recipe has become a staple in my weekly routine:
- Stays Creamy for Days: Unlike other shakes that separate or get watery, the combination of frozen fruit and the right blending technique keeps this emulsion stable. It stays thick and luscious straight from the fridge.
- Quick Prep Time: Once you have your ingredients pre-portioned, assembly takes less than five minutes. You can grab a cup, shake it, and go. It’s perfect for those mornings when you hit snooze one too many times.
- High Protein, Low Sugar: Each serving packs about 25-30 grams of protein without the artificial sugar crash. It keeps you satiated until lunch, which helps curb unnecessary snacking during the workday.
- Versatile Flavor Profile: While I love the banana vanilla base, the recipe is a blank canvas. You can swap berries for chocolate, or add spinach without changing the taste. It’s adaptable to whatever your mood is.
- Cost-Effective: Making this at home costs a fraction of what you’d pay at a smoothie shop. I save nearly $20 a week by prepping these instead of buying them out.
This recipe isn’t just about convenience; it’s about consistency. When you have a reliable source of nutrition in your fridge, you’re less likely to make poor food choices when you’re hungry and tired. I’ve found that having these ready to go helps me stick to my fitness goals. It’s comfort food in a cup, but it fuels your body properly. You’ll notice the difference in your energy levels by the end of the week. It’s the kind of simple win that makes a busy schedule feel manageable.
What Ingredients You Will Need
This recipe relies on high-quality, accessible ingredients that you probably already have in your kitchen or can grab at any grocery store. The key to getting that “Ninja” texture is using frozen ingredients and a good quality protein powder. I recommend using a whey or plant-based protein that mixes well without clumping. Here is exactly what you need to make this batch:
- Frozen Banana (2 medium): I always use frozen bananas. They provide natural sweetness and create that thick, ice-cream-like texture. Fresh bananas make the shake too runny. Peel them before freezing for easy prep.
- Unsweetened Almond Milk (1.5 cups): I prefer almond milk because it’s light and doesn’t overpower the flavor. You can use dairy milk, oat milk, or soy milk if you prefer. Just keep in mind that oat milk might make it slightly sweeter.
- Vanilla Protein Powder (1 scoop): I personally use Optimum Nutrition Gold Standard or a plant-based alternative like Orgain. These brands mix smoothly and don’t have that metallic aftertaste. Make sure to check the label for sugar content.
- Greek Yogurt (0.5 cup): This is the secret ingredient for creaminess. I use plain, non-fat Greek yogurt. It adds extra protein and a tangy balance to the sweet fruit. If you are dairy-free, use coconut yogurt.
- Chia Seeds (1 tablespoon): These add fiber and omega-3 fatty acids. They also help thicken the shake slightly over time, which is great for meal prep. They won’t be noticeable once blended.
- Ice Cubes (0.5 cup): Even with frozen fruit, a few ice cubes help achieve the perfect slushy consistency. If you use very frozen fruit, you might need less ice.
- Vanilla Extract (1 teaspoon): A splash of real vanilla extract boosts the flavor profile significantly. It makes the shake taste more like a dessert.
- Peanut Butter (1 tablespoon): This adds healthy fats and makes the shake incredibly satisfying. I use natural peanut butter with no added sugar. If you have nut allergies, sunflower seed butter is a great substitute.
When selecting your ingredients, look for fresh produce and high-quality supplements. The better your protein powder, the better your shake will taste. I’ve tried cheap brands that leave grit in the bottom of the cup, so investing in a good brand is worth it. Also, ensure your frozen fruit is properly sealed to avoid freezer burn, which can affect the flavor.
Can I Use Fresh Fruit Instead of Frozen?
You can, but the texture will be different. Fresh fruit makes the shake thinner and more juice-like. If you use fresh fruit, you’ll need to add more ice cubes to get that creamy consistency. However, for meal prep, frozen fruit is superior because it maintains its texture better when stored.
Equipment Needed
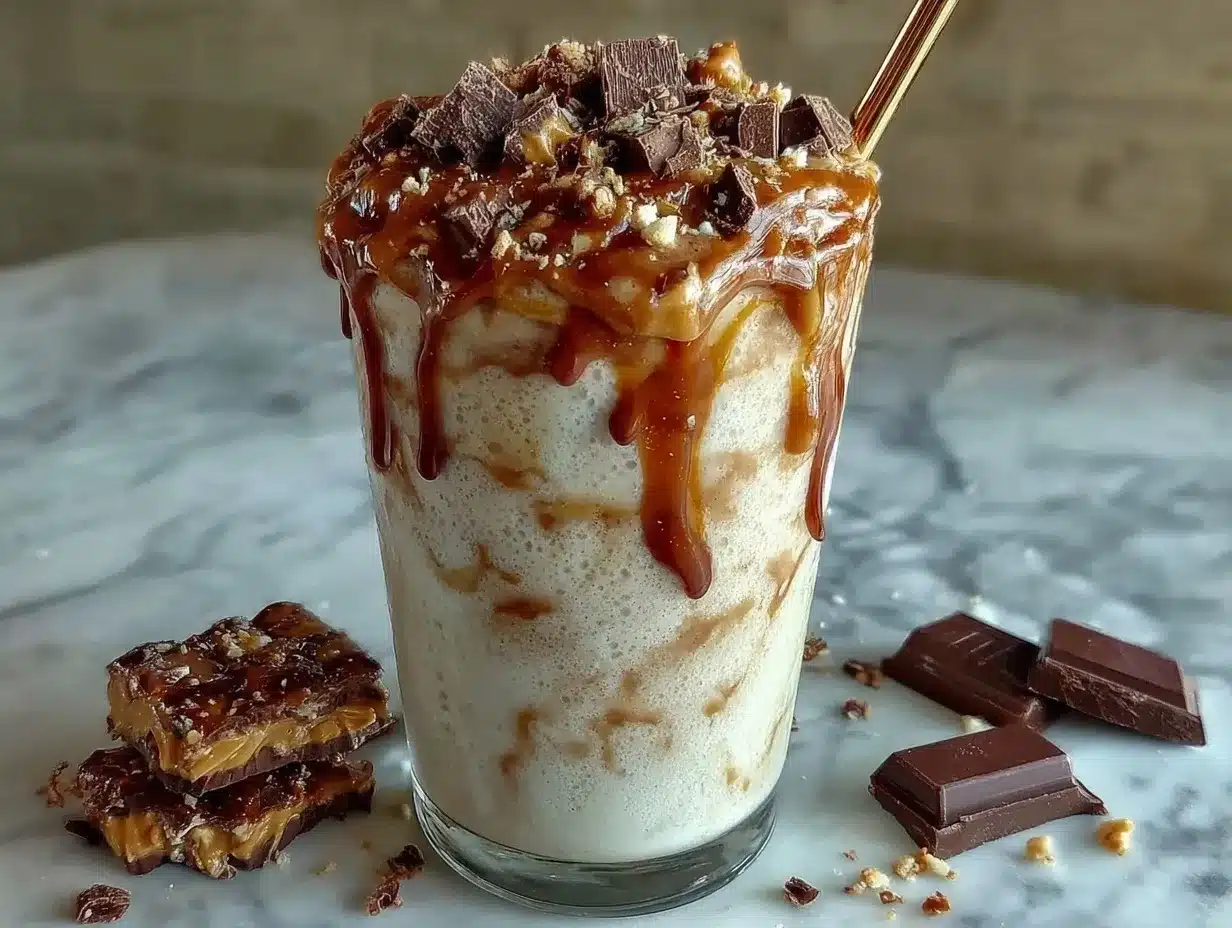
To make this shake properly, you need the right tools. A standard blender often struggles with frozen fruit and protein powder, leaving chunks or unmixed powder at the bottom. That’s why I swear by my Ninja blender. It has a powerful motor and sharp blades that pulverize everything into a smooth liquid. If you don’t have a Ninja, any high-speed blender like a Vitamix or Blendtec will work perfectly.
You will also need four 24-ounce mason jars or reusable plastic shaker bottles. Mason jars are great for stacking in the fridge and look cute on Pinterest. Plastic bottles are lighter if you’re taking them to the office. Make sure the lids are leak-proof. I’ve had disasters with cheap lids before, so check the seals before you start. A measuring cup and spoons are essential for getting the ratios right. Consistency is key for meal prep so that each serving is nutritionally identical. I also recommend a small funnel if you are pouring the shake into narrow-mouth jars to avoid spills. It’s a small tool that saves you a lot of cleanup time.
Do I Need a Specific Blender?
Not necessarily, but a high-powered blender makes a huge difference. Cheap blenders leave ice chunks and protein clumps. If you only have a basic blender, you may need to blend longer and stop to scrape down the sides. A Ninja or Vitamix handles this effortlessly.
Preparation Method
Now, let’s get into the nitty-gritty of making these shakes. The process is straightforward, but there are a few tricks to ensure they stay creamy for days. I usually prep these on Sunday evening so I’m ready for the week ahead. Here is the step-by-step method:
- Prep the Frozen Fruit: If you haven’t already, peel and slice two bananas and freeze them overnight. Place the frozen banana chunks into your blender pitcher. This step ensures the base is cold and thick. (Time: 2 minutes)
- Add Liquids and Powders: Pour in the almond milk and vanilla extract. Add the scoop of vanilla protein powder and the tablespoon of peanut butter. The liquid helps the blades move freely, so don’t skip this. (Time: 1 minute)
- Blend the Base: Secure the lid tightly. Pulse the blender on high for 30-45 seconds. You want the protein powder and peanut butter to fully dissolve into the liquid. Stop and check for clumps. If there are any, blend for another 10 seconds. (Time: 1 minute)
- Add Yogurt and Chia Seeds: Add the Greek yogurt and chia seeds. Blend again for another 30 seconds. The yogurt should be fully incorporated, creating a thick, creamy mixture. The chia seeds will start to hydrate slightly but will thicken more in the fridge. (Time: 1 minute)
- Add Ice and Final Blend: Toss in the ice cubes. Blend on high for 60 seconds until the mixture is smooth and slushy. You should not see any ice chunks. The texture should be like a thick milkshake. (Time: 1 minute)
- Portion into Jars: Use a funnel to pour the shake into your four prepared jars. Leave about an inch of headspace at the top. This allows for expansion if you freeze them later, though I usually keep them in the fridge. (Time: 2 minutes)
- Label and Store: Seal the jars tightly. Label them with the date and contents. Store them in the fridge immediately. They will keep for up to four days. (Time: 1 minute)
Throughout this process, listen to your blender. If it sounds like it’s struggling, stop and add a splash more milk. Don’t force it. The goal is a smooth, homogeneous mixture. If you notice separation after blending, just give it a quick shake before drinking. This is normal for natural ingredients.
What If I Don’t Have a Ninja Blender?
If you don’t have a high-powered blender, you can still make this. Just blend the liquid and protein first, then add the frozen fruit and ice last. Blend in short bursts to avoid burning out your motor. You may need to let the frozen fruit sit at room temperature for 5 minutes before blending to help it process.
Cooking Tips & Techniques
Having made these shakes for years, I’ve learned a few things that can save you from disappointment. The biggest mistake people make is using too much liquid. Start with less milk and add more only if needed. A thicker shake is easier to drink and feels more like a meal. Also, always add your protein powder before the ice. This helps the powder dissolve in the liquid phase rather than getting trapped in the ice chunks.
Another tip is to toast your nuts if you use nut butter. It enhances the flavor significantly. I sometimes add a pinch of cinnamon to the banana shake, which pairs beautifully with the vanilla. Don’t underestimate the power of spices; they add depth without calories. Also, if your chia seeds are old, they might not thicken as well. Always check the expiration date. Fresh chia seeds absorb liquid much better, giving you that desirable pudding-like consistency over time.
I also recommend cleaning your blender immediately after use. Protein powder dries quickly and becomes almost cement-like if left to sit. Rinse it with warm water and a drop of dish soap, then blend for 10 seconds. It cleans itself perfectly. This habit saves you from scrubbing stubborn stains later. Finally, taste your mixture before pouring it into jars. Adjust sweetness or saltiness at this stage. It’s much harder to fix once it’s in the jars.
Why Does My Shake Separate?
Some separation is natural, especially with fruit-based shakes. The water content rises to the top while the solids sink. This is why shaking the jar before drinking is important. To minimize separation, ensure you blend thoroughly and use emulsifiers like yogurt or nut butter.
Variations & Adaptations
One of the best parts of this recipe is how easily you can change it up. I like to rotate flavors to keep things interesting. Here are three variations I love:
- Berry Blast: Swap the banana for frozen mixed berries. Add a teaspoon of lemon zest for brightness. This version is lower in sugar and higher in antioxidants. It tastes like a dessert but is packed with vitamins.
- Chocolate Peanut Butter: Use chocolate protein powder instead of vanilla. Add a tablespoon of cocoa powder for extra richness. This is my favorite post-workout option because it satisfies sweet cravings effectively.
- Green Machine: Add a handful of fresh spinach. You won’t taste it, but it adds nutrients. Swap the banana for half an avocado for extra healthy fats and creaminess. This is great for digestive health.
For dietary restrictions, this recipe is easily adaptable. Use plant-based protein and non-dairy yogurt for a vegan version. Use egg whites instead of yogurt for a lower-fat option. The base formula remains the same, allowing you to tweak it to your needs. I often switch between these variations depending on my nutritional goals for the week.
Can I Freeze These Shakes?
Yes, you can freeze them. Pour the mixture into freezer-safe bags or jars, leaving more headspace. They will keep for up to three months. Thaw them in the fridge overnight and shake well before drinking. The texture might be slightly thinner after thawing, but it’s still delicious.
Serving & Storage Suggestions
When it’s time to eat, give the jar a vigorous shake. The chia seeds will have thickened the mixture, making it almost like a smoothie bowl. If it’s too thick, add a splash of milk and stir. I recommend serving these cold straight from the fridge. They are refreshing and satisfying. Pair them with a piece of whole-grain toast or a hard-boiled egg for a complete breakfast.
For storage, keep the jars in the back of the fridge where it’s coldest. They will last for four days. After that, the texture may degrade, and the chia seeds can become too gelatinous. I usually finish the batch by day four. If you make a larger batch, consider freezing some portions. Always use clean, dry jars to prevent bacterial growth. Labeling is crucial so you know which flavor is which and when you made it.
How Do I Know If It’s Bad?
Smell it. If it smells sour or off, toss it. The texture might change, but a bad smell is the clear indicator. Always trust your senses. When in doubt, throw it out. It’s not worth risking your health for a shake.
Nutritional Information & Benefits
This shake is a nutritional powerhouse. Each serving provides approximately 300-350 calories, 25-30 grams of protein, 10 grams of healthy fats, and 30 grams of carbohydrates. The protein comes from the whey/plant powder and Greek yogurt, which helps muscle recovery. The healthy fats from the peanut butter and chia seeds keep you full. The carbohydrates from the banana and fruit provide quick energy. This balance makes it ideal for active individuals. It’s also gluten-free and can be made dairy-free. The fiber from the chia seeds and fruit supports digestive health. It’s a convenient way to meet your daily macronutrient goals without spending hours in the kitchen.
Is This Shake Good for Weight Loss?
Yes, it can be. It’s high in protein and fiber, which promote satiety. As long as you account for the calories in your daily intake, it can support weight loss goals. It prevents overeating later in the day by keeping hunger at bay.
Conclusion
Making your own protein shakes is a simple habit that yields big rewards. This Creamy Ninja Protein Shake is reliable, delicious, and convenient. It’s the kind of recipe that takes the guesswork out of healthy eating. I hope you try it and find it as useful as I have. Don’t be afraid to experiment with flavors to find your favorite. Meal prepping doesn’t have to be boring; it can be a creative and enjoyable part of your week. Share your variations with me in the comments below. I’d love to hear what flavors you come up with. Happy blending!
Frequently Asked Questions
How long do these shakes last in the fridge?
They stay fresh and creamy for up to four days when stored in airtight containers. After that, the texture may change, and the chia seeds can become too thick.
Can I use fresh fruit instead of frozen?
You can, but the shake will be thinner. You’ll need to add more ice cubes to achieve a creamy consistency. Frozen fruit is recommended for the best texture.
What type of protein powder works best?
Whey protein and high-quality plant-based proteins work well. Avoid powders with lots of fillers, as they can affect the taste and texture. I recommend brands like Optimum Nutrition or Orgain.
Can I meal prep this for more than four days?
For best quality, stick to four days. If you need to prep more, freeze the extra portions. They will keep for up to three months in the freezer.
Is this shake suitable for vegans?
Yes, if you use plant-based protein powder, non-dairy milk, and vegan yogurt. The rest of the ingredients are naturally vegan.
Pin This Recipe!
Creamy Ninja Protein Shake (Meal Prep)
- Total Time: 5 minutes
- Yield: 4 servings 1x
Description
A thick, creamy, and high-protein shake that stays consistent for up to four days in the fridge. Perfect for meal prep, this recipe uses frozen fruit and a high-powered blender to create a dessert-like texture that fuels you through busy mornings.
Ingredients
- 2 medium frozen bananas
- 1.5 cups unsweetened almond milk
- 1 scoop vanilla protein powder
- 0.5 cup plain non-fat Greek yogurt
- 1 tablespoon chia seeds
- 0.5 cup ice cubes
- 1 teaspoon vanilla extract
- 1 tablespoon natural peanut butter
Instructions
- Peel and slice two bananas and freeze them overnight. Place the frozen banana chunks into your blender pitcher.
- Pour in the almond milk and vanilla extract. Add the scoop of vanilla protein powder and the tablespoon of peanut butter.
- Secure the lid tightly and pulse the blender on high for 30-45 seconds until the protein powder and peanut butter are fully dissolved.
- Add the Greek yogurt and chia seeds. Blend again for another 30 seconds until the mixture is thick and creamy.
- Toss in the ice cubes and blend on high for 60 seconds until the mixture is smooth and slushy with no visible ice chunks.
- Use a funnel to pour the shake into four prepared 24-ounce jars, leaving about an inch of headspace.
- Seal the jars tightly, label them with the date and contents, and store them in the fridge immediately.
Notes
For best texture, use frozen fruit rather than fresh. If using fresh fruit, add extra ice. Ensure protein powder is added before ice to help it dissolve. Shake the jar vigorously before drinking as some natural separation may occur. Store in the back of the fridge where it is coldest.
- Prep Time: 5 minutes
- Cook Time: 0 minutes
- Category: Breakfast
- Cuisine: American
Nutrition
- Serving Size: 1 jar (approx. 24 oz
- Calories: 325
- Sugar: 15
- Sodium: 150
- Fat: 10
- Saturated Fat: 2
- Carbohydrates: 30
- Fiber: 5
- Protein: 27.5
Keywords: protein shake, meal prep, ninja blender, high protein, healthy breakfast, smoothie, weight loss, gluten-free


