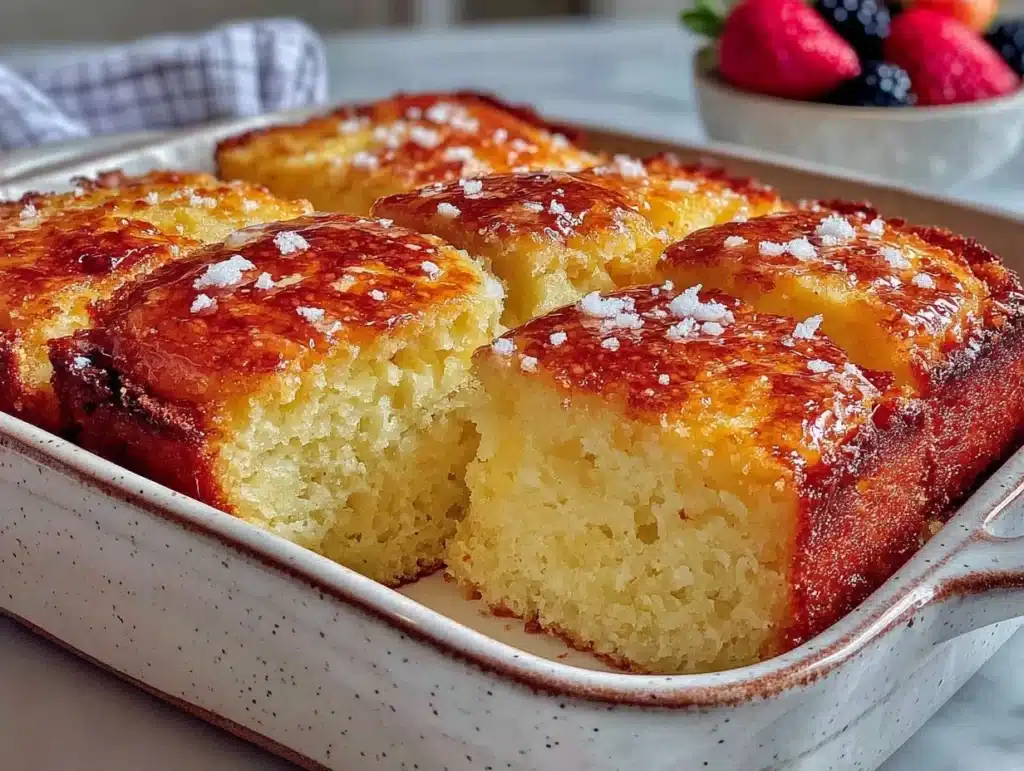
Let’s be honest for a second. The idea of baking a delicate, buttery cake on a Tuesday evening after a long day at the office sounds exhausting, doesn’t it? I used to think that homemade desserts were only for weekends or special occasions. That changed three years ago when I discovered the magic of making ahead. Now, my workweek survival kit isn’t just coffee and a to-do list; it’s slices of this homemade French butter cake.
I first stumbled onto this recipe during a particularly chaotic month when I was trying to meal prep lunches for my family of four. I needed something that wouldn’t get soggy in the fridge, something that tasted better the next day, and something that didn’t require last-minute fuss. This French butter cake became my secret weapon. It’s dense enough to hold its structure but light enough to feel like a treat rather than a chore.
What makes this homemade French butter cake so special is its texture. It’s not airy and fragile like a sponge cake. It has a crumb that is tight, moist, and incredibly buttery. When I slice it on Wednesday morning, it’s still perfect. The flavors actually meld together overnight, becoming richer and more complex. It’s the kind of cake that makes you pause in the middle of your workday and just smile.
If you are someone who values organization and hates waste, this recipe is for you. You bake it once, slice it, and you have five days of delicious, high-quality lunch companions. It’s not just a dessert; it’s a strategy. And honestly, once you taste it, you’ll never go back to buying dry, mass-produced slices from the supermarket again.
Why You’ll Love This Make-Ahead Recipe
After testing this homemade French butter cake over a dozen times, I’ve realized why it has become such a staple in my kitchen routine. It’s not just about the taste, though that is undeniable. It’s about the reliability. You know exactly what you’re getting every single time. There is no guesswork, no last-minute panic, and no disappointment.
Here is why this recipe stands out from the crowd:
- Zero Day-Of Stress: The entire baking process happens on your day off. By the time Monday morning rolls around, the cake is already baked, cooled, and sliced. You just grab a piece and go. This is the ultimate time-saver for busy professionals.
- Simple Pantry Staples: You don’t need fancy French ingredients or expensive gadgets. Flour, butter, sugar, eggs, and a little milk are all you need. If you have these in your kitchen, you can make this. It’s that simple.
- Texture That Improves: Many cakes dry out in the fridge. This one doesn’t. The butter and sugar mixture creates a moisture barrier that keeps the crumb tender. In fact, most people tell me they prefer the flavor on day two or three.
- Perfect Portion Control: Because it is dense and rich, one slice is incredibly satisfying. It’s the perfect size for a lunch break or a small afternoon snack without leaving you feeling overly stuffed or sluggish.
- Versatile Pairing: It pairs beautifully with black coffee, tea, or even a glass of cold milk. It’s neutral enough to not clash with savory lunch items if you eat the cake alongside a salad.
What really makes this homemade French butter cake different is the technique. We use a method that ensures the butter is fully incorporated without being overmixed. This results in a cake that is tender but sturdy. It holds up to being boxed up and taken to the office. It’s comfort food that respects your schedule.
It’s also incredibly forgiving. If you run out of time in the morning, the cake is ready to eat. If you have extra time, you can frost it. But even unfrosted, it is delicious. It’s the kind of recipe that brings a sense of calm to your chaotic week. You know that no matter how stressful the day is, you have a sweet, buttery reward waiting for you.
What Ingredients You Will Need
This homemade French butter cake relies on high-quality, simple ingredients. The beauty of this recipe is that there are no hidden chemicals or weird additives. Just real food. The flavor comes from the butter and the eggs, so choosing the best quality you can afford makes a big difference.
The Dry Ingredients
- All-Purpose Flour: I use standard all-purpose flour for this. It provides the right amount of structure. If you need gluten-free, a 1:1 gluten-free flour blend works well, though the texture might be slightly crumblier.
- Baking Powder: Just one teaspoon. This gives it a tiny lift. We aren’t trying to make it rise like a cloud. We want a dense, rich crumb.
- Salt: A half-teaspoon of fine sea salt. This is crucial. It balances the sweetness and brings out the buttery flavor. Don’t skip it.
The Wet Ingredients
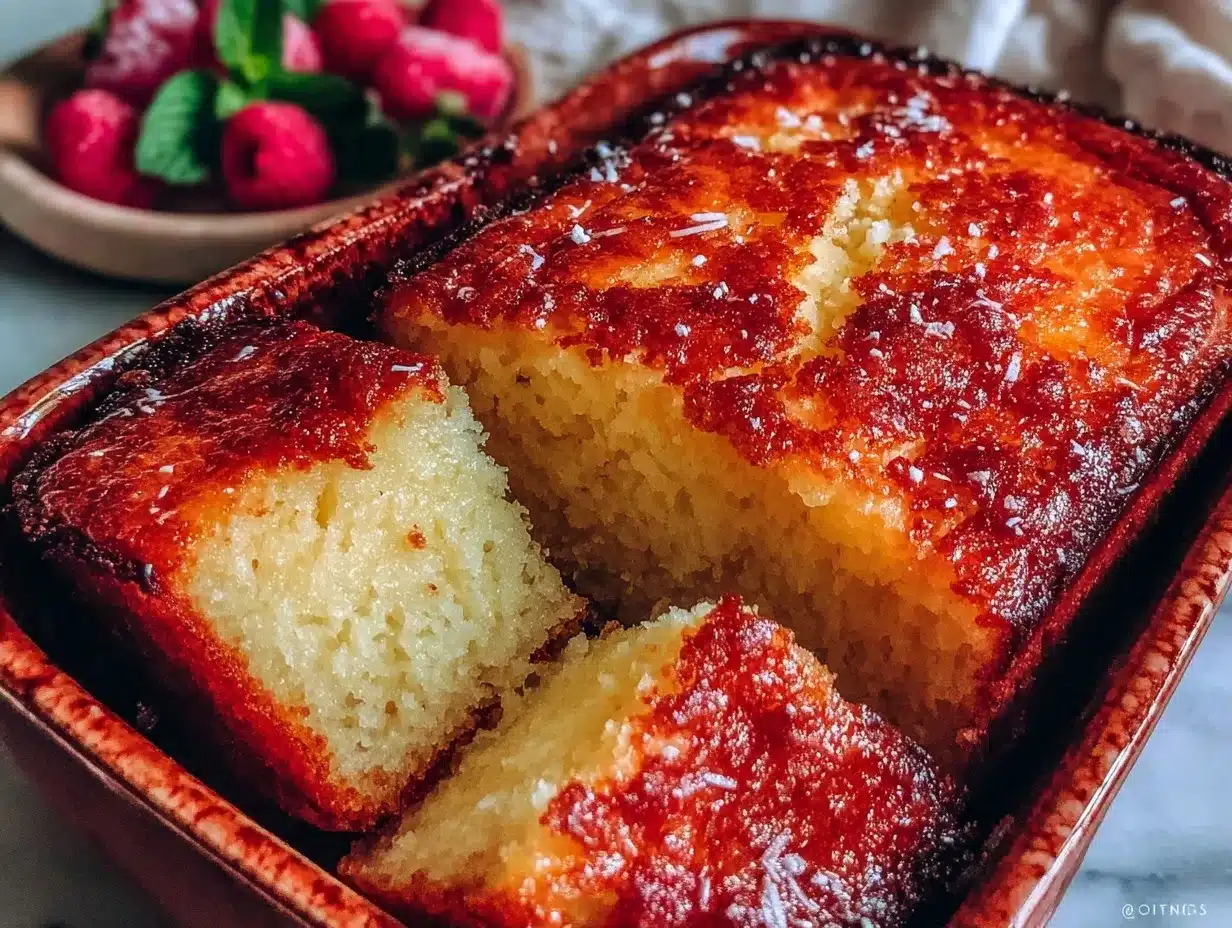
- Unsalted Butter: This is the star. Use high-quality European-style butter if you can find it. Brands like Plugrá or Kerrygold have a higher fat content, which means more flavor and a better texture. Soften it to room temperature.
- Granulated Sugar: One cup of white sugar. This provides sweetness and helps with the moisture retention. You can substitute half with brown sugar for a deeper flavor, but pure white sugar keeps the classic French taste.
- Eggs: Four large eggs, room temperature. This is important for emulsification. Cold eggs can cause the butter to seize up. Let them sit out for 30 minutes before you start.
- Milk: Half a cup of whole milk. Room temperature is best. This adds moisture and helps blend the ingredients smoothly.
- Vanilla Extract: One teaspoon of pure vanilla. It adds warmth and depth. Avoid imitation vanilla if you want the best taste.
I usually buy my butter in blocks rather than pre-wrapped sticks. It’s cheaper and often fresher. For the eggs, I always check the date on the carton. Fresh eggs make a richer cake. If you are making this for a gluten-free friend, just swap the flour and you are good to go. The rest of the recipe is naturally gluten-free.
Equipment Needed
You don’t need a lot of fancy gear to make this homemade French butter cake. A few basic tools are all that’s required.
- 9×5 Inch Loaf Pan: This is the standard size. I recommend a light-colored metal pan. Dark pans can cause the bottom to burn. If you only have glass, lower the oven temperature by 25 degrees.
- Mixer: An electric hand mixer or a stand mixer with a paddle attachment works best. You need to cream the butter and sugar thoroughly. Doing this by hand is possible but takes a lot of arm strength.
- Whisk: For mixing the dry ingredients. A simple balloon whisk is fine.
- Spatula: A rubber spatula is essential for scraping down the sides of the bowl. You want to get every bit of batter.
- Cooling Rack: Essential for letting the cake cool evenly. Placing it directly on a counter can trap steam and make the bottom soggy.
I’ve tried using silicone loaf pans, but I don’t recommend them for this recipe. The batter is heavy, and silicone doesn’t conduct heat well. The result is a cake that doesn’t brown properly on the sides. Stick to metal. Also, don’t forget parchment paper. Lining the pan makes cleanup a breeze and ensures the cake doesn’t stick.
Preparation Method
Let’s walk through the process. It’s straightforward, but precision matters.
- Prep the Pan (5 minutes): Preheat your oven to 350°F (175°C). Grease your 9×5 loaf pan with butter. Then, line the bottom and sides with parchment paper, leaving an overhang on the long sides. This overhang is your handle for lifting the cake out later. Dust the pan with a little flour and tap out the excess.
- Mix Dry Ingredients (2 minutes): In a medium bowl, whisk together the flour, baking powder, and salt. Set this aside. This ensures there are no lumps of baking powder in your final cake.
- Cream Butter and Sugar (4 minutes): In a large bowl, beat the softened butter and sugar together on medium-high speed. This is the most important step. Beat until the mixture is pale yellow and fluffy. This usually takes about 3 to 4 minutes. You want to incorporate air into the butter. This will give the cake its structure.
- Add Eggs (3 minutes): Add the eggs one at a time, beating well after each addition. Scrape down the sides of the bowl with your spatula. If the mixture looks curdled, don’t worry. It will come together when you add the flour.
- Combine Wet and Dry (2 minutes): Reduce the mixer speed to low. Add the flour mixture in three parts, alternating with the milk. Start and end with the flour. Mix just until combined. Do not overmix! Overmixing develops gluten and makes the cake tough. Stop as soon as you see no more white streaks of flour.
- Add Vanilla (1 minute): Stir in the vanilla extract with the spatula. Fold it in gently.
- Bake (50-60 minutes): Pour the batter into the prepared loaf pan. Smooth the top with a spatula. Bake for 50 to 60 minutes. Check at the 50-minute mark. The top should be golden brown, and a toothpick inserted into the center should come out clean or with a few moist crumbs. If the top is browning too quickly, tent it with foil.
- Cool Completely (2 hours): Let the cake cool in the pan for 10 minutes. Then, use the parchment paper overhang to lift it out. Place it on a cooling rack. Let it cool completely before slicing. This can take up to two hours. Slicing it warm will cause it to crumble.
Patience is key here. I know it’s tempting to slice it right away, but the structure needs to set. If you rush this step, you’ll end up with a mushy mess. Trust the process.
Cooking Tips & Techniques
Here are some tricks I’ve learned along the way to make this homemade French butter cake perfect.
Room Temperature is Non-Negotiable: I cannot stress this enough. Cold butter and cold eggs will not emulsify properly. Your batter will look split, and your cake will be dense and heavy. Take your butter and eggs out of the fridge at least an hour before you start. If you forget, you can warm the butter in the microwave for 10-second bursts, but be careful not to melt it.
Don’t Overmix: Once you add the flour, mix until just combined. If you keep mixing, you develop gluten. Gluten gives bread its chew, but you don’t want that in a tender cake. You want a soft, melt-in-your-mouth texture.
Test for Doneness Correctly: Use a toothpick or a thin skewer. Insert it into the very center of the loaf. If it comes out with wet batter, it needs more time. If it comes out clean, it’s done. If it comes out with a few moist crumbs, that’s actually perfect for this type of cake. It means it’s still moist.
Let It Rest: I know it’s hard, but let the cake cool completely. The starches need to set. If you slice it warm, the crumbs will stick to your knife. If you slice it cold, it will slice cleanly.
Storage is Key: Once cooled, wrap the whole loaf tightly in plastic wrap. Then, place it in an airtight container or a ziplock bag. This prevents it from drying out. It will stay fresh in the fridge for up to five days.
Variations & Adaptations
This homemade French butter cake is a great base for many variations.
Lemon Zest: Add the zest of one large lemon to the butter and sugar mixture. It adds a bright, citrusy note that cuts through the richness. It’s fantastic with a cup of tea.
Almond Extract: Swap the vanilla for half a teaspoon of almond extract. This gives it a classic French bakery flavor. It pairs beautifully with the butter.
Blueberry Swirl: Fold in one cup of fresh or frozen blueberries at the end. Don’t overmix, or the berries will bleed into the batter. You’ll get little bursts of fruit in every bite.
Gluten-Free: Use a high-quality 1:1 gluten-free flour blend. Add a quarter teaspoon of xanthan gum if your blend doesn’t include it. The texture will be slightly more delicate, but still delicious.
Dairy-Free: Substitute the butter with a high-quality vegan butter stick. Use oat milk or soy milk instead of dairy milk. The results are surprisingly close to the original.
I often make the lemon version for spring lunches. It feels lighter and fresher. The almond version is my go-to for winter, as it feels warmer and more comforting. Try both and see which one you prefer.
Serving & Storage Suggestions
This homemade French butter cake is best served at room temperature. If you take it out of the fridge, let it sit for 15 minutes before eating. This allows the butter to soften slightly and the flavors to open up.
How to Store: Keep the cake in an airtight container in the refrigerator. It will stay fresh for up to five days. You can also freeze it. Wrap individual slices in plastic wrap and then place them in a freezer bag. They will keep for up to three months. Thaw overnight in the fridge.
Serving Ideas: This cake pairs well with black coffee, Earl Grey tea, or a glass of cold milk. It’s also great with a dollop of whipped cream or a slice of sharp cheddar cheese if you’re feeling adventurous.
Meal Prep Tip: Slice the cake immediately after it cools. Wrap each slice individually in plastic wrap. This makes it easy to grab one slice for your lunch box. You don’t have to worry about cutting it later. It’s ready to go.
The flavors actually improve after the first day. The butter and sugar meld together, creating a richer taste. By day three, it’s at its peak. After day five, it might start to dry out slightly, so try to eat it all within that window.
Nutritional Information & Benefits
While this is a treat, it’s made with simple ingredients. One slice (about 1/12th of the loaf) contains approximately 220 calories, 12g of fat, 24g of carbohydrates, and 3g of protein. It is a good source of energy for a mid-day snack.
The eggs provide high-quality protein and choline, which is good for brain health. The butter provides fat-soluble vitamins like A, D, E, and K. If you use organic butter, you get even more nutrients.
It is not low-carb or keto-friendly due to the sugar and flour content. However, it is naturally gluten-free if you use GF flour. It is dairy-free if you use vegan substitutes. Always check your specific ingredients for allergens.
I enjoy this cake as part of a balanced diet. It’s a small treat that satisfies a sweet tooth without derailing your health goals. It’s better than processed sweets because you know exactly what’s in it.
Conclusion
This homemade French butter cake is more than just a recipe. It’s a tool for a better, more organized week. It takes the stress out of lunch planning and gives you a delicious, homemade treat every day. The texture is perfect, the flavor is rich, and the make-ahead aspect is a game-changer.
I encourage you to try this recipe. Customize it with lemon or almond if you want. Experiment with different flours. Make it your own. Once you have it down, you’ll wonder how you ever survived without it.
Share your results in the comments! Let me know which variation you tried and how it held up in your lunch box. I love hearing from you. Happy baking!
Frequently Asked Questions
Can I freeze this cake?
Yes, absolutely. Wrap individual slices tightly in plastic wrap and place them in a freezer-safe bag. They will keep for up to three months. Thaw overnight in the fridge before eating.
Why did my cake sink in the middle?
This usually happens if the oven door was opened too early or if the cake was underbaked. Make sure you test for doneness with a toothpick and avoid opening the oven door for the first 40 minutes.
Can I use salted butter?
You can, but reduce the added salt in the recipe to a quarter teaspoon. This prevents the cake from becoming too salty.
How long does the cake last in the fridge?
It stays fresh for up to five days when stored in an airtight container. After that, it may start to dry out.
Can I make this in a bundt pan?
Yes, you can. Adjust the baking time to 45-55 minutes. Check for doneness with a skewer. The shape will be different, but the taste will be the same.
Pin This Recipe!


French Butter Cake: 5-Day Make Ahead Lunch Formula
- Total Time: 1 hour 15 minutes
- Yield: 12 servings 1x
Description
A dense, moist, and buttery homemade French butter cake designed for meal prep. This make-ahead recipe yields five days of delicious lunch slices with a texture that improves overnight.
Ingredients
- 2 cups All-Purpose Flour
- 1 teaspoon Baking Powder
- 1/2 teaspoon Fine Sea Salt
- 1 cup Unsalted Butter (softened to room temperature)
- 1 cup Granulated Sugar
- 4 Large Eggs (room temperature)
- 1/2 cup Whole Milk (room temperature)
- 1 teaspoon Pure Vanilla Extract
Instructions
- Preheat oven to 350°F (175°C). Grease a 9×5 inch loaf pan with butter, line with parchment paper leaving an overhang, and dust with flour.
- In a medium bowl, whisk together the flour, baking powder, and salt. Set aside.
- In a large bowl, beat the softened butter and sugar on medium-high speed for 3-4 minutes until pale yellow and fluffy.
- Add eggs one at a time, beating well after each addition. Scrape down the sides of the bowl.
- Reduce mixer speed to low. Add the flour mixture in three parts, alternating with the milk, starting and ending with the flour. Mix just until combined.
- Stir in the vanilla extract with a spatula.
- Pour batter into the prepared pan and smooth the top. Bake for 50-60 minutes until a toothpick inserted in the center comes out clean or with moist crumbs.
- Let the cake cool in the pan for 10 minutes, then lift out using the parchment overhang. Cool completely on a wire rack (about 2 hours) before slicing.
Notes
Ensure all ingredients are at room temperature for proper emulsification. Do not overmix the batter once flour is added to avoid a tough texture. The cake improves in flavor after sitting for a day. Store in an airtight container in the fridge for up to 5 days or freeze individual slices for up to 3 months.
- Prep Time: 15 minutes
- Cook Time: 50-60 minutes
- Category: Dessert
- Cuisine: French
Nutrition
- Serving Size: 1 slice (approx. 1/1
- Calories: 220
- Sugar: 18
- Sodium: 150
- Fat: 12
- Saturated Fat: 7
- Carbohydrates: 24
- Fiber: 1
- Protein: 3
Keywords: French butter cake, make ahead lunch, meal prep dessert, homemade cake, buttery cake, office lunch, gluten-free option


