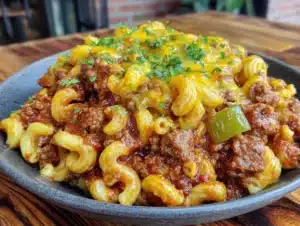
Let’s be honest for a second. Most mac and cheese recipes fail the lunch test. You pack it at 7am, open your Tupperware at noon, and by 2pm, you’re staring at a cold, congealed brick of pasta that tastes like regret. I used to be that person. I’d sacrifice my sanity for a bland chicken breast because I was terrified of leftovers smelling like dinner.
Then I discovered the magic of the queso mac and cheese combo. Honestly, it was an accident born out of a pantry raid and a desperate need for comfort during a particularly brutal week of meal prep. I had leftover cheddar, a jar of jarred queso dip that was about to expire, and a box of elbow macaroni. I mixed them in a pot, expecting disaster. Instead, I got something creamy, tangy, and impossibly satisfying.
This isn’t just pasta with cheese sauce. This is the hearty queso mac and cheese that has saved my afternoons for three years straight. It’s the kind of dish that doesn’t just survive the fridge; it thrives in it. The flavors actually meld together over 24 to 48 hours, becoming richer and more complex than when you first made it. If you’re tired of sad desk lunches, this recipe is your new best friend.
I’ve tested this batch enough times to know exactly what works. The key is balancing the sharpness of the cheddar with the smooth, creamy heat of the queso. It’s protein-packed enough to keep your blood sugar stable, yet indulgent enough to feel like a treat. Say goodbye to the 3pm slump. This lunch stays hot, tastes fresh, and keeps you full until you hit the couch on the weekend.
Why You’ll Love This Recipe for Meal Prep
There is a specific kind of joy in opening your lunchbox and smelling something warm and cheesy before you even take a bite. It changes the entire mood of your afternoon. I’ve spent years tweaking this hearty queso mac and cheese recipe to make sure it holds up perfectly in the fridge. Here is why this version is different from every other mac and cheese recipe you’ve tried:
- It’s Built for Batching: This recipe makes a large batch, but it doesn’t get mushy. The pasta is cooked al dente specifically so it absorbs the sauce without turning into porridge by Wednesday. It’s designed for the midday crunch, not just the immediate dinner plate.
- Creamy Without the Water Bath: Most meal-prep mac and cheese dries out. By using a combination of heavy cream and queso dip, we create an emulsion that stays moist. You won’t need to add water or milk when you reheat it. It just works.
- Flavor That Grows: Let’s face it, most leftovers taste bland by day two. Not this one. The spices in the queso dip penetrate the pasta starch over time. By day three, it’s actually better than day one. It’s a flavor time capsule.
- Protein-Packed Satisfaction: I add ground beef or turkey to this, but you can keep it vegetarian. The point is, the cheese and meat combo provides enough satiety to stop those vending machine cravings. It’s the hearty queso mac and cheese that replaces your afternoon snack.
- One-Pot (Mostly) Cleanup: I hate doing dishes after meal prep. This comes together in one large pot, with just a baking dish for the final touch. You spend less time scrubbing and more time enjoying your organized week.
This recipe isn’t just about convenience; it’s about reclaiming your lunch break. It’s the comfort food you deserve without the guilt or the effort. It’s reliable, delicious, and completely kid-approved too.
What Ingredients You Will Need
Building the perfect hearty queso mac and cheese for meal prep requires a balance of ingredients that resist drying out. You don’t need fancy, hard-to-find items. In fact, the magic lies in using accessible pantry staples and combining them in a specific way. I like to group these by their function in the pot to keep things simple.
For the Base and Pasta
- Elbow Macaroni: 1 pound (450g). I stick to elbows because they hold the sauce in the curve. Whole wheat works if you want extra fiber, but it changes the texture slightly.
- Unsalted Butter: 4 tablespoons. This forms the fat base for your roux. Room temperature is easier to work with, but cold is fine if you’re in a rush.
- All-Purpose Flour: 1/4 cup. This thickens the sauce so it coats the pasta evenly. Don’t skip this, or you’ll have a soupy mess.
- Whole Milk: 2 cups. The fat content here is crucial for creaminess. Skim milk will make this grainy and dry.
- Heavy Cream: 1/2 cup. This is the secret weapon for meal prep. The higher fat content prevents the sauce from separating in the fridge.
For the Cheese and Queso
- Sharp Cheddar Cheese: 2 cups, freshly grated. Please, do not use pre-shredded cheese. The anti-caking agents prevent it from melting smoothly. Buy a block and grate it yourself.
- Monterey Jack Cheese: 1 cup, shredded. This cheese has a higher melt point and adds a mild, buttery flavor that balances the sharp cheddar.
- Jarred Queso Dip: 1 cup (approx. 12oz). I recommend a mild or medium heat version. Brands like Pace or Herdez work well. This adds the authentic “queso” tang and keeps the texture silky.
For the Protein and Seasoning
- Ground Beef or Turkey: 1 pound. Browned and drained. Beef adds richness, while turkey makes it lighter. Both work beautifully in this hearty queso mac and cheese.
- Garlic Powder: 1 teaspoon. Adds depth without the risk of burning fresh garlic.
- Smoked Paprika: 1 teaspoon. This gives it that subtle smoky kick that mimics a restaurant-style dish.
- Cumin: 1/2 teaspoon. Just a touch to bridge the gap between mac and cheese and taco flavors.
- Salt and Black Pepper: To taste. Always season in layers.
If you want to swap things up, you can use gluten-free pasta, but cook it for two minutes less than the package says. For a vegetarian version, skip the meat and add a can of drained black beans for extra fiber and protein. The key is keeping the liquid-to-fat ratio high enough to survive the fridge.
What Equipment Do I Need?
You don’t need a fancy kitchen for this. A large 6-quart Dutch oven or stockpot is essential. I use mine for boiling the pasta and making the sauce, which saves a dish. You’ll also need a sturdy whisk for the roux—non-stick coatings can scratch if you’re not careful, so silicone is best.
A large baking dish (9×13 inch) is needed if you want to bake the top for a crispy finish, though it’s optional for meal prep. If you’re just mixing it for Tupperware, a large mixing bowl works fine. I also recommend investing in a good grater for your cheese blocks. Pre-shredded cheese is a meal prep killer because it doesn’t melt evenly, leading to clumpy leftovers.
If you don’t have a Dutch oven, a heavy-bottomed pot works too. Just be careful not to burn the milk on the bottom. For storage, you’ll need BPA-free plastic containers with tight-fitting lids. Glass is nice, but plastic is lighter for carrying to work. Keep your tools clean and dry to prevent any off-flavors from affecting your sauce.
Preparation Method

Let’s get into the nitty-gritty of making this hearty queso mac and cheese. I’ve broken this down into clear steps so you can meal prep like a pro. The total time is about 45 minutes, but most of that is passive cooking.
- Boil the Pasta (10 minutes): Bring a large pot of salted water to a boil. Add the elbows and cook them until they are very al dente. You want them to still have a bite because they will absorb sauce later. Drain immediately and rinse with cold water to stop the cooking. Toss with a tiny bit of oil to prevent sticking.
- Brown the Protein (5 minutes): In the same pot (or a separate skillet), brown the ground beef or turkey over medium-high heat. Break it up into small crumbles. Once cooked through, drain the excess fat. Leave about a tablespoon of fat if you want extra richness. Season with half the garlic powder, paprika, and cumin.
- Make the Roux (5 minutes): In your large pot, melt the butter over medium heat. Whisk in the flour and cook for 1-2 minutes, stirring constantly. It should look like wet sand. This cooks out the raw flour taste. Do not let it brown.
- Create the Sauce (10 minutes): Slowly pour in the milk and heavy cream while whisking vigorously. This prevents lumps. Continue whisking until the mixture thickens and coats the back of a spoon. This usually takes about 5 minutes. If it gets too thick, add a splash more milk.
- Melt the Cheese (5 minutes): Remove the pot from the heat. This is crucial. If you add cheese to high heat, it can break and become grainy. Stir in the cheddar and Monterey Jack until completely melted and smooth.
- Combine Everything (5 minutes): Stir in the jarred queso dip. Mix well. Then, fold in the cooked pasta and the browned meat. Taste and adjust seasoning. Add more salt or pepper if needed. The queso is salty, so taste before adding more.
- Cool and Portion (15 minutes): Let the mixture cool slightly before dividing it into your meal prep containers. This prevents condensation, which makes the pasta soggy. Seal tightly and refrigerate.
If you want a crispy top, transfer the mixture to a baking dish, sprinkle with extra cheese and breadcrumbs, and bake at 350°F (175°C) for 20 minutes. But for lunch boxes, the stovetop mix is perfect.
Pro Tips for Perfect Consistency
The biggest mistake people make with meal prep mac and cheese is drying out. Here is how to avoid it. First, undercook your pasta. If the box says 8 minutes, cook it for 6. It will finish cooking when you reheat it in the microwave.
Second, never skip the heavy cream. Water-based sauces separate in the fridge. The fat in the cream keeps the emulsion stable. Third, let it cool before sealing. Hot food in a sealed container creates steam, which turns into water droplets that drip back into your pasta. That’s how you get soup instead of creamy mac.
Also, stir your sauce constantly when adding the cheese. If you see separation, add a teaspoon of hot water and whisk hard. It will come back together. Trust me, I’ve learned this the hard way with a broken sauce disaster.
Variations and Adaptations
This hearty queso mac and cheese is a canvas. Once you master the base, you can tweak it to fit your diet or mood. Here are a few variations I love:
- Spicy Kick: Add diced jalapeños to the meat while browning, or use a hot queso dip. You can also add a dash of cayenne pepper to the roux for a slow burn.
- Vegetarian Boost: Swap the meat for sautéed mushrooms, bell peppers, and onions. Mushrooms add a meaty texture that works surprisingly well with the queso flavor.
- Chicken Version: Use shredded rotisserie chicken instead of ground meat. It’s faster and leaner. Toss the chicken in the sauce at the end just to warm it through.
- Gluten-Free: Use gluten-free elbow pasta. Note that GF pasta can get mushy faster, so rinse it well and eat it within 2 days.
I often make a half-batch with just cheese and veggies for my non-meat-eating friends. The flexibility is what makes this recipe a staple. It adapts to your pantry, not the other way around.
Serving and Storage Suggestions
When it’s time to eat, these containers are your best friend. Store them in the fridge for up to 4 days. The flavors peak on day 3, so plan accordingly. For freezing, this recipe freezes well for up to 2 months. Thaw it overnight in the fridge before reheating.
To reheat, add a splash of milk or water to the container. This reactivates the sauce. Microwave in 30-second intervals, stirring in between, until hot. If you bake it, you can add a few minutes to the time. Serve with a side of fresh salad or sliced avocado to cut through the richness. Avocado adds a nice creamy contrast without more dairy.
I like to garnish my own portion with fresh cilantro or a drizzle of hot sauce. It’s a personal touch that makes the leftovers feel fresh. The key is to keep the moisture level up. If it looks dry, add liquid. It’s that simple.
Nutritional Information and Benefits
While this is a comfort food, it’s balanced enough for a main meal. Each serving (roughly 1.5 cups) contains approximately 650 calories, 35g of protein, and 45g of carbs. The protein comes from the cheese and meat, keeping you full. The fats from the cheese and cream provide sustained energy.
It’s not a diet food, but it’s not junk food either. It’s real food. The calcium from the cheese supports bone health, and the beef provides iron. If you’re watching sodium, use low-sodium cheese and mild queso. The benefits of having a hot, home-cooked meal outweigh the occasional indulgence. It’s about balance and satisfaction.
Frequently Asked Questions
Can I use Velveeta instead of cheddar?
Yes, Velveeta melts very smoothly and is great for meal prep because it doesn’t separate. However, it lacks the sharp flavor of real cheese. I recommend mixing half Velveeta and half sharp cheddar for the best of both worlds.
Why is my mac and cheese dry after reheating?
Pasta absorbs liquid over time. When you reheat it, the sauce has been soaked up. Always add a tablespoon of milk or water before microwaving. Stir well to redistribute the moisture.
Can I make this ahead and freeze it?
Absolutely. This freezes beautifully. Portion it into freezer-safe containers and freeze for up to 2 months. Thaw in the fridge overnight and reheat with a splash of milk.
Is this recipe gluten-free?
Not as written, due to the flour in the roux and the pasta. You can easily make it gluten-free by using a gluten-free roux blend (like rice flour) and gluten-free pasta. The results are slightly different but still delicious.
What kind of queso dip should I use?
Use a jarred, shelf-stable queso dip. Avoid the “fresh” queso in the refrigerated section if you want it to last longer in the fridge, as the fresh ones can spoil faster in mixed dishes. Mild or medium heat is best for general appeal.
Final Thoughts on Your New Lunch Staple
This hearty queso mac and cheese is more than just a recipe. It’s a system for survival during busy weeks. It takes the stress out of lunch planning and replaces it with comfort and satisfaction. You won’t dread your midday break anymore. You’ll look forward to that first cheesy bite.
I encourage you to try it your way. Add your favorite veggies, swap the meat, or change the spice level. Make it yours. And when you do, let me know how it turned out. Share your variations in the comments below. I love seeing how you adapt this to your life.
Meal prep doesn’t have to be boring. It can be bold, creamy, and deeply satisfying. Give this a shot this week. Your future self, eating this at 2pm, will thank you. Happy cooking!
Pin This Recipe!


Hearty Queso Mac And Cheese: Easy Meal Prep for Lunch
- Total Time: 45 minutes
- Yield: 6 servings 1x
Description
A creamy, protein-packed mac and cheese with queso dip designed specifically for meal prep. This one-pot dish stays moist in the fridge, improves in flavor over time, and provides a satisfying lunch that avoids the typical ‘leftover slump’.
Ingredients
- 1 pound (450g) Elbow Macaroni
- 4 tablespoons Unsalted Butter
- 1/4 cup All-Purpose Flour
- 2 cups Whole Milk
- 1/2 cup Heavy Cream
- 2 cups Sharp Cheddar Cheese, freshly grated
- 1 cup Monterey Jack Cheese, shredded
- 1 cup Jarred Queso Dip (mild or medium)
- 1 pound Ground Beef or Turkey, browned and drained
- 1 teaspoon Garlic Powder
- 1 teaspoon Smoked Paprika
- 1/2 teaspoon Cumin
- Salt and Black Pepper to taste
Instructions
- Boil a large pot of salted water. Cook elbow macaroni until very al dente (about 6 minutes if box says 8). Drain immediately, rinse with cold water, and toss with a tiny bit of oil to prevent sticking.
- In a large pot or skillet, brown the ground beef or turkey over medium-high heat. Break into crumbles and drain excess fat, leaving about a tablespoon if desired. Season with half the garlic powder, paprika, and cumin.
- In the large pot, melt butter over medium heat. Whisk in flour and cook for 1-2 minutes until it resembles wet sand, stirring constantly to avoid browning.
- Slowly pour in milk and heavy cream while whisking vigorously to prevent lumps. Continue whisking until the mixture thickens and coats the back of a spoon (about 5 minutes).
- Remove the pot from heat. Stir in the cheddar and Monterey Jack cheeses until completely melted and smooth. Do not return to high heat to avoid breaking the sauce.
- Stir in the jarred queso dip. Fold in the cooked pasta and browned meat. Taste and adjust seasoning with salt and pepper, keeping in mind the queso is salty.
- Let the mixture cool slightly before dividing into meal prep containers to prevent condensation. Seal tightly and refrigerate.
Notes
For best results, undercook the pasta slightly as it will absorb sauce later. Never skip the heavy cream as it prevents the sauce from separating in the fridge. Let the dish cool before sealing containers to avoid sogginess. If reheating, add a splash of milk or water to reactivate the sauce. For a crispy top, bake at 350°F (175°C) for 20 minutes with extra cheese and breadcrumbs.
- Prep Time: 15 minutes
- Cook Time: 30 minutes
- Category: Main Course
- Cuisine: American
Nutrition
- Serving Size: 1.5 cups
- Calories: 650
- Sugar: 6
- Sodium: 800
- Fat: 35
- Saturated Fat: 18
- Carbohydrates: 45
- Fiber: 2
- Protein: 35
Keywords: meal prep, mac and cheese, queso, lunch ideas, comfort food, one pot, batch cooking, cheesy pasta