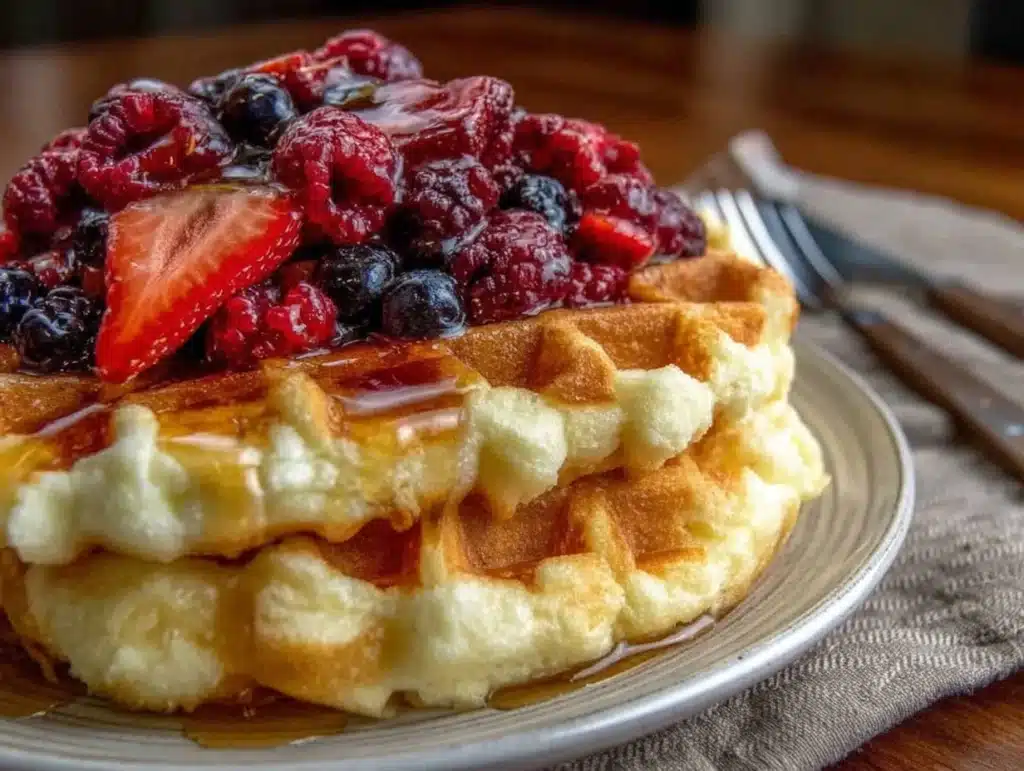
There is a specific kind of magic that happens when you pour batter onto a hot iron and the smell of toasted wheat fills the kitchen. For years, I stuck to frozen waffles. Let’s face it, they are convenient. But honestly? They never quite delivered that crunch I craved. It wasn’t until a rainy Sunday in Chicago, when I was trying to salvage a carton of buttermilk that was about to expire, that I decided to make waffles from scratch. I wasn’t planning a culinary revolution. I just wanted something warm.
What I got instead was the best breakfast of my life. The exterior was shatteringly crisp, while the inside remained incredibly fluffy and tender. The tang of the buttermilk cut through the richness of the butter in a way I hadn’t experienced before. That single batch of homemade buttermilk waffles broke my habit with frozen packs forever. I’ve since tested this recipe over a dozen times, tweaking the ratio of flour to liquid and experimenting with different leavening agents. This version is the winner. It’s reliable, forgiving, and tastes like a cozy hug on a plate.
If you are looking for a weekend brunch that feels special without requiring you to be in the kitchen all day, this is it. You don’t need fancy ingredients or a degree in pastry arts. You just need a little patience and a reliable waffle iron. Whether you are feeding a hungry family or treating yourself to a lazy morning, these waffles deliver comfort and flavor in every bite. It’s the kind of recipe that makes you want to clear your schedule and just enjoy the process.
Why You’ll Love This Recipe
Let me tell you why this specific approach to waffle making stands out from the hundreds of other recipes floating around the internet. After years of trial and error, I’ve found that the secret isn’t just in the ingredients—it’s in the technique. This recipe is designed to be foolproof, even if you’ve never made waffles before. I’ve tested this with my picky eaters, my coffee-loving friends, and even my skeptical mother-in-law. Everyone comes back for seconds.
- Quick & Easy: You can have breakfast on the table in under 20 minutes. The batter comes together in one bowl, and the cooking time is short. It’s perfect for busy weeknights when you want something better than toast, or for those slow Saturday mornings where you want to relax a bit.
- Simple Ingredients: You likely have everything you need right now. Flour, sugar, baking powder, salt, eggs, milk, buttermilk, butter, and vanilla. No obscure pantry items or expensive specialty flours. This is accessible cooking at its finest.
- Perfect for Brunch: These waffles are the centerpiece of any brunch spread. They hold up well under a stack of berries, a drizzle of maple syrup, or a dollop of whipped cream. They are versatile enough to be sweet or savory depending on your mood.
- Crowd-Pleaser: Kids love the fluffy texture, and adults appreciate the sophisticated tang of the buttermilk. It’s a dish that bridges the gap between comfort food and gourmet breakfast.
- Unbelievably Delicious: The texture is next-level. We are talking about a crisp exterior that gives way to a soft, airy interior. The flavor is rich and buttery with a subtle tang that keeps you wanting more.
What makes this recipe different is the emphasis on the buttermilk. Many recipes skip it or use milk with a splash of vinegar. But real buttermilk changes the game. It tenderizes the gluten in the flour, resulting in a waffle that isn’t tough or chewy. It adds a depth of flavor that plain milk just can’t match. I remember the first time I tasted the difference, I was surprised by how much more “waffle-like” it tasted. It’s that soul-soothing satisfaction that makes you close your eyes and just enjoy the moment.
What Ingredients You Will Need
This recipe relies on wholesome, simple ingredients to deliver bold flavor and satisfying texture without the fuss. The beauty of homemade buttermilk waffles lies in its simplicity. You don’t need to run to three different stores to find exotic items. Most of these are pantry staples, and the buttermilk is easy to find in any grocery store. If you can’t find buttermilk, you can easily make a substitute, which I’ll mention later.
Here is what you need to gather before you start cooking:
- All-Purpose Flour: The foundation of the waffle. I prefer a standard brand like Gold Medal or King Arthur for consistent results. Don’t swap this for cake flour unless you want a much more delicate, fragile waffle.
- Granulated Sugar: Just a tablespoon or two helps with browning and adds a hint of sweetness. You can reduce this if you plan to serve the waffles with very sweet toppings.
- Baking Powder: This is your leavening agent. Make sure it’s fresh! Old baking powder won’t give you that rise you’re looking for. I always keep a fresh can in my pantry.
- Salt: Essential for balancing the sweetness and enhancing the overall flavor profile. Don’t skip it.
- Large Eggs: Room temperature eggs incorporate better into the batter. They provide structure and richness.
- Buttermilk: The star of the show. Use full-fat buttermilk for the best flavor and texture. If you must use low-fat, it will still work, but the waffles might be slightly less tender.
- Unsalted Butter: Melted and cooled slightly. This adds richness and helps with the crispiness. You can use vegetable oil if you need a dairy-free option, but the flavor won’t be as rich.
- Vanilla Extract: A teaspoon adds a warm, aromatic note that pairs perfectly with the buttery flavor.
If you are making this for a large group, you might want to double the recipe. Just be careful not to overmix the batter. Also, if you are gluten-sensitive, you can use a 1:1 gluten-free flour blend, though the texture may vary slightly.
How do I make buttermilk if I don’t have any?
You can make a quick substitute by adding one tablespoon of white vinegar or lemon juice to a cup of regular milk. Let it sit for five minutes until it curdles slightly. It won’t be exactly the same as cultured buttermilk, but it works in a pinch.
Equipment Needed
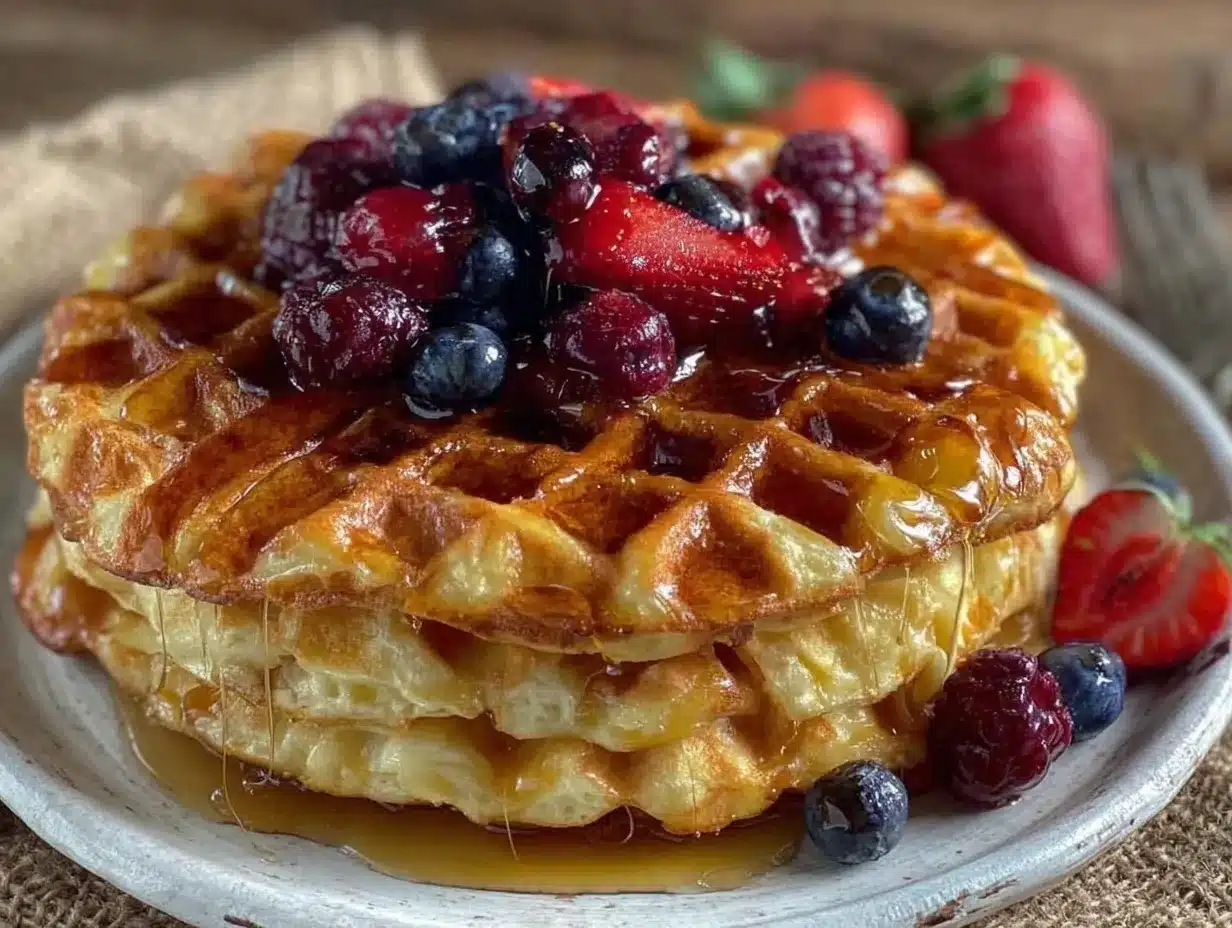
You don’t need a lot of fancy gear to make great waffles, but having the right tools helps. The most important piece of equipment is, of course, a waffle iron. I recommend a standard Belgian-style waffle iron for thicker, fluffier waffles. If you have a thin, crispy waffle maker, you can use that too, but you may need to adjust the batter amount.
A large mixing bowl is necessary for combining the dry and wet ingredients. I like to use a glass bowl because it’s easy to see what’s happening. You’ll also need a whisk to aerate the dry ingredients and ensure the baking powder is evenly distributed. A spatula is useful for scraping the batter into the iron and cleaning up any spills.
For storage, I keep a cooling rack and a baking sheet in the oven set to low heat. This keeps the waffles warm while you cook the rest of the batch. It’s a simple trick that makes a huge difference in the final result. Avoid stacking hot waffles on top of each other, as the steam will make them soggy.
If you are on a budget, a basic electric waffle iron works just fine. You don’t need the most expensive model. Just make sure it heats evenly. I’ve used waffle irons that cost $20 and ones that cost $100, and the difference in the final product is minimal if you follow the recipe correctly.
Preparation Method
Making these waffles is straightforward, but there are a few key steps to ensure success. Let’s walk through the process together.
Step 1: Prepare the Dry Ingredients. In a large bowl, whisk together the flour, sugar, baking powder, and salt. Do this for about 30 seconds to ensure everything is well combined. This step is crucial because it distributes the leavening agent evenly, which prevents dense spots in the waffles.
Step 2: Mix the Wet Ingredients. In a separate bowl or measuring cup, whisk the eggs, buttermilk, melted butter, and vanilla extract. The butter should be melted but not hot, or you might cook the eggs. Whisk until the mixture is smooth and uniform. You want a pale yellow color.
Step 3: Combine Wet and Dry. Pour the wet ingredients into the dry ingredients. Use a spatula or spoon to gently fold them together. Stop mixing as soon as the flour is moistened. The batter will be lumpy. This is intentional. Overmixing develops gluten, which makes waffles tough and chewy instead of light and fluffy. A few lumps are perfectly fine.
Step 4: Preheat the Waffle Iron. While the batter rests for 5 minutes, preheat your waffle iron. This usually takes 5-10 minutes depending on the model. You want it to be fully hot before you add the batter. Lightly grease the iron with non-stick cooking spray or brush it with a little oil, even if it’s non-stick. This ensures easy release.
Step 5: Cook the Waffles. Pour the batter onto the center of the iron. Use about 1/2 to 3/4 cup of batter, depending on the size of your iron. Close the lid and cook for 3-5 minutes. You’ll know they are done when the steam stops escaping and the waffles are golden brown. Do not open the lid too early, or you’ll tear the waffle.
Step 6: Keep Warm. Transfer the cooked waffle to a cooling rack placed on a baking sheet. Put the sheet in a 200°F (95°C) oven to keep warm. Repeat with the remaining batter. This method keeps all your waffles hot and ready to serve.
Cooking Tips & Techniques
After making hundreds of batches of waffles, I’ve learned a few tricks that can save you from disaster. First, never overmix the batter. I know it’s tempting to stir until it’s smooth, but resist the urge. Lumpy batter means fluffy waffles. Smooth batter means dense waffles. It’s a simple rule, but it’s the most important one.
Second, make sure your waffle iron is hot enough. If the waffles are pale and soggy, your iron wasn’t hot enough. If they burn before cooking through, it was too hot. Adjust your temperature or cooking time accordingly. Every iron is different, so you may need to experiment with the first few waffles to find the sweet spot.
Another common mistake is using cold ingredients. If your eggs and buttermilk are straight from the fridge, they can lower the temperature of the batter, affecting the rise. Let them sit out for 15-20 minutes before you start. This small step makes a noticeable difference in texture.
Finally, don’t stack the waffles. Steam is the enemy of crispiness. By placing them on a wire rack, air circulates around the waffle, keeping the exterior crisp. If you stack them on a plate, they will become soggy within minutes. This is a pro tip that elevates the entire dining experience.
Variations & Adaptations
While the classic version is my favorite, there are many ways to customize these waffles. You can add blueberries, chocolate chips, or sliced bananas to the batter. Just fold them in gently after the wet and dry ingredients are combined. Be careful not to crush the berries.
For a savory twist, omit the sugar and add shredded cheddar cheese, chopped chives, and cooked bacon to the batter. These savory waffles are delicious with a fried egg on top. It’s a great way to use up leftover bacon.
If you want a gluten-free option, use a high-quality gluten-free flour blend. You may need to add a bit more liquid, as gluten-free flours absorb moisture differently. Test a small batch first to get the consistency right.
I also like to add a teaspoon of cinnamon to the dry ingredients for a cozy, autumnal flavor. It pairs beautifully with maple syrup and roasted apples. The possibilities are endless, so feel free to experiment and find your own favorite combination.
Serving & Storage Suggestions
Serve these waffles hot, right off the iron. They are best enjoyed immediately while the exterior is still crisp. Top them with fresh berries, whipped cream, or a generous drizzle of pure maple syrup. For a protein boost, add some sliced almonds or a dollop of Greek yogurt.
If you have leftovers, let them cool completely before storing. Place them in an airtight container in the refrigerator for up to three days. To reheat, pop them in the toaster or an oven at 350°F (175°C) for a few minutes. This restores the crispiness better than a microwave, which can make them chewy.
You can also freeze the waffles. Lay them in a single layer on a baking sheet and freeze until solid. Then transfer them to a freezer bag. They will last for up to two months. To reheat, toast them directly from frozen. They taste almost as good as fresh.
Nutritional Information & Benefits
These waffles are a good source of carbohydrates for energy, and the buttermilk provides calcium and protein. Each waffle contains approximately 250-300 calories, depending on the size and toppings. The buttermilk is lower in fat than whole milk, making it a slightly lighter option for your breakfast.
However, keep in mind that waffles are a treat. They are best enjoyed in moderation as part of a balanced diet. The key is to focus on whole-food toppings like fresh fruit instead of sugary syrups. This adds fiber and vitamins to your meal.
For those with dietary restrictions, you can swap the butter for coconut oil and the milk for almond milk. Just be aware that the flavor and texture will change slightly. The waffles may be less rich but still delicious.
Conclusion
Making homemade buttermilk waffles is a rewarding experience that transforms a simple breakfast into a special occasion. The combination of crispy exterior and fluffy interior is unmatched by any frozen option. I hope this recipe brings joy to your kitchen and your table. Don’t be afraid to experiment with different toppings and variations. Make it your own.
I’d love to hear how your waffles turn out. Share your creations on social media or leave a comment below. Did you add chocolate chips? Did you serve them with bacon? Let me know! Happy cooking, and enjoy every bite.
Frequently Asked Questions
Can I make the batter ahead of time?
It’s best to make the batter fresh. If you let it sit too long, the baking powder loses its effectiveness, and the waffles won’t rise properly. However, you can mix the dry ingredients and store them in an airtight container, then add the wet ingredients just before cooking.
Why are my waffles not crispy?
This usually happens if the waffle iron isn’t hot enough or if you open the lid too early. Make sure to preheat your iron thoroughly and wait until the steam stops before opening. Also, avoid stacking the waffles, as steam will make them soggy.
Can I use self-rising flour instead of all-purpose flour?
Yes, but you need to adjust the recipe. Self-rising flour already contains baking powder and salt. You should omit the baking powder and reduce the salt in the recipe to avoid over-leavening or overly salty waffles.
How do I store leftover waffles?
Let them cool completely, then store them in an airtight container in the refrigerator for up to three days. You can also freeze them for up to two months. Reheat in a toaster or oven to restore crispiness.
What is the best topping for these waffles?
Classic maple syrup and fresh berries are always a winner. For a richer option, try whipped cream and chocolate chips. For a savory twist, add bacon and cheddar cheese. The choice is yours!
Pin This Recipe!
Homemade Buttermilk Waffles: Easy Crispy Best Recipe
- Total Time: 20 minutes
- Yield: 4 servings 1x
Description
These homemade buttermilk waffles feature a shatteringly crisp exterior and an incredibly fluffy, tender interior. Made with simple pantry staples, this foolproof recipe delivers a cozy, gourmet breakfast experience in under 20 minutes.
Ingredients
- 1 1/2 cups All-Purpose Flour
- 2 tablespoons Granulated Sugar
- 1 tablespoon Baking Powder
- 1/2 teaspoon Salt
- 2 Large Eggs, room temperature
- 1 1/4 cups Buttermilk, full-fat preferred
- 1/4 cup Unsalted Butter, melted and cooled
- 1 teaspoon Vanilla Extract
Instructions
- In a large bowl, whisk together the flour, sugar, baking powder, and salt for about 30 seconds to ensure even distribution.
- In a separate bowl or measuring cup, whisk the eggs, buttermilk, melted butter, and vanilla extract until smooth and uniform.
- Pour the wet ingredients into the dry ingredients. Gently fold them together with a spatula or spoon until just moistened. Stop mixing immediately; the batter should remain lumpy to ensure fluffy waffles.
- Let the batter rest for 5 minutes while you preheat your waffle iron.
- Preheat the waffle iron for 5-10 minutes until fully hot. Lightly grease the iron with non-stick cooking spray or oil.
- Pour 1/2 to 3/4 cup of batter onto the center of the hot iron. Close the lid and cook for 3-5 minutes, or until the steam stops escaping and the waffles are golden brown.
- Transfer cooked waffles to a cooling rack placed on a baking sheet. Keep warm in a 200°F (95°C) oven while cooking the remaining batches.
- Serve immediately with desired toppings such as maple syrup, fresh berries, or whipped cream.
Notes
Do not overmix the batter; lumps are intentional and prevent tough waffles. Ensure your waffle iron is fully preheated for maximum crispiness. Do not stack hot waffles, as steam will make them soggy. If you don’t have buttermilk, substitute 1 cup milk with 1 tablespoon white vinegar or lemon juice and let sit for 5 minutes.
- Prep Time: 10 minutes
- Cook Time: 10 minutes
- Category: Breakfast
- Cuisine: American
Nutrition
- Serving Size: 1 large waffle
- Calories: 275
- Sugar: 6
- Sodium: 350
- Fat: 12
- Saturated Fat: 7
- Carbohydrates: 32
- Fiber: 1
- Protein: 8
Keywords: buttermilk waffles, homemade waffles, crispy waffles, easy breakfast, weekend brunch, fluffy waffles, from scratch waffles


