
The smell of warm cinnamon and brown sugar filling the kitchen is basically the best alarm clock I’ve ever had. I remember the first time I made this homemade cinnamon roll cake, it was a rainy Sunday in November. I was feeling lazy, but I desperately wanted that sticky, gooey comfort of a bakery pastry without the hassle of kneading dough for an hour. Honestly, I almost gave up on the idea until I realized that a cake batter could mimic the swirl perfectly. It was a total game-changer for my breakfast routine.
Since then, I’ve tested this recipe dozens of times. I’ve tweaked the glaze ratios and adjusted the baking times to get that perfect tender crumb. As someone who meal preps for the entire week, I needed something that held up in the fridge and tasted just as good on Wednesday morning as it did on Sunday. This recipe delivers. It’s fluffy, it’s sweet, and it’s incredibly easy to batch.
You know how some recipes look good but fall flat? This one doesn’t. It has that rich, yeasty flavor profile without the yeast work. It’s perfect for busy families, or anyone who wants a grab-and-go treat. I’ve found that having this homemade cinnamon roll cake ready to go means I’m not rushing out for coffee pastries on weekdays. It’s a small win that makes the whole week feel a bit more organized and sweet.
Why You’ll Love This Recipe
Let’s be real, making actual cinnamon rolls is a lot of work. You have to proof the dough, roll it out, cut it, and hope it doesn’t stick to the pan. With this cake version, you skip all that stress. I’ve spent years refining this method, and I can tell you it’s the smartest shortcut in the baking world. It’s not just a hack; it’s a delicious evolution of a classic treat. Here is why this specific recipe stands out from the crowd:
- Quick & Easy: You can have this in the oven in under 15 minutes of prep time. It’s perfect for those chaotic mornings when you need something fast but still want to feel like a hero.
- Simple Ingredients: You likely have everything you need in your pantry right now. Flour, sugar, butter, cinnamon—nothing fancy or hard to find. No specialty stores required.
- Perfect for Meal Prep: This is the main reason I love it. It stores beautifully in airtight containers. You can slice it up on Sunday and have five days of breakfast sorted before you even think about lunch.
- Crowd-Pleaser: Kids love the sweetness, and adults appreciate the convenience. It’s a hit at potlucks and family brunches alike. Everyone asks for the recipe.
- Unbelievably Delicious: The texture is soft and cake-like, but the cinnamon swirl adds pockets of intense flavor. It’s comfort food reimagined for the modern, busy home cook.
This isn’t just another cake recipe. It’s the kind of dish that makes you close your eyes after the first bite. It captures the soul-soothing satisfaction of a bakery pastry but fits into a healthy, organized lifestyle. It’s great for impressing guests without the stress, or just treating yourself to something special on a Tuesday.
What Ingredients You Will Need
This recipe relies on humble, wholesome ingredients to create a bold, comforting flavor. You don’t need exotic spices or expensive creams. The magic happens in how these simple items come together. I like to keep my ingredient list short so I can focus on the technique. Here is exactly what you need to get started, along with a few pro tips I’ve learned over time.
- All-Purpose Flour (2 1/4 cups / 280g): This is your base. I recommend a reliable brand like King Arthur or Gold Medal for consistent results. Don’t use self-rising flour unless you adjust the leavening agents.
- Granulated Sugar (3/4 cup / 150g): This adds sweetness and helps with the browning. You can reduce this slightly if you prefer a less sweet cake, but I suggest sticking to the recipe for the right texture.
- Baking Powder (1 tablespoon): Essential for that light, fluffy rise. Make sure it’s fresh; old baking powder will leave your cake dense and flat.
- Salt (1/2 teaspoon): A pinch of salt balances the sweetness and brings out the cinnamon flavor. It’s non-negotiable.
- Unsalted Butter, Melted (1/2 cup / 115g): Melted butter makes the batter rich and tender. Let it cool slightly before adding it to the mix so you don’t cook the eggs.
- Eggs, Large (2 large): Room temperature eggs incorporate better into the batter. If you’re in a rush, just run them under warm water for a minute.
- Vanilla Extract (1 teaspoon): Use real vanilla, not imitation. It adds a depth of flavor that makes the cake taste homemade and premium.
- Milk or Buttermilk (1/2 cup / 120ml): Buttermilk adds a nice tang and tenderness, but regular milk works fine. If using milk, a splash of lemon juice can mimic buttermilk.
- For the Swirl: Brown Sugar (1/2 cup / 100g): This gives that classic caramel-like depth. Dark brown sugar is even better for a molasses-rich flavor.
- For the Swirl: Ground Cinnamon (2 teaspoons): Use fresh cinnamon for the best aroma. Old cinnamon loses its punch quickly.
- For the Glaze: Powdered Sugar (1 cup / 120g): Sift this to avoid lumps in your glaze. It dissolves easily into the liquid.
- For the Glaze: Milk (2-3 tablespoons): Add slowly to get your desired consistency. You want it thick enough to coat the back of a spoon.
I always recommend buying your spices in small quantities and storing them in a cool, dark place. Fresh spices make a huge difference in the final taste. Also, if you are dairy-free, you can swap the butter for coconut oil and the milk for almond milk. The texture will be slightly different, but still delicious.
Equipment Needed
You don’t need a fancy kitchen to make this. A few basic tools are all you need. A 9×13 inch baking dish is standard, but a round springform pan works too if you want slices that look like individual cakes. I use a medium mixing bowl for the dry ingredients and a larger one for the wet. A whisk is better than a spoon here because it aerates the batter. For the swirl, a small bowl and a fork are perfect. I also recommend a sharp knife or pizza cutter for slicing. Keep your equipment clean and ready before you start mixing. It makes the process smoother and less stressful. If you don’t have a springform pan, a regular pan works fine, just grease it well to prevent sticking.
Preparation Method
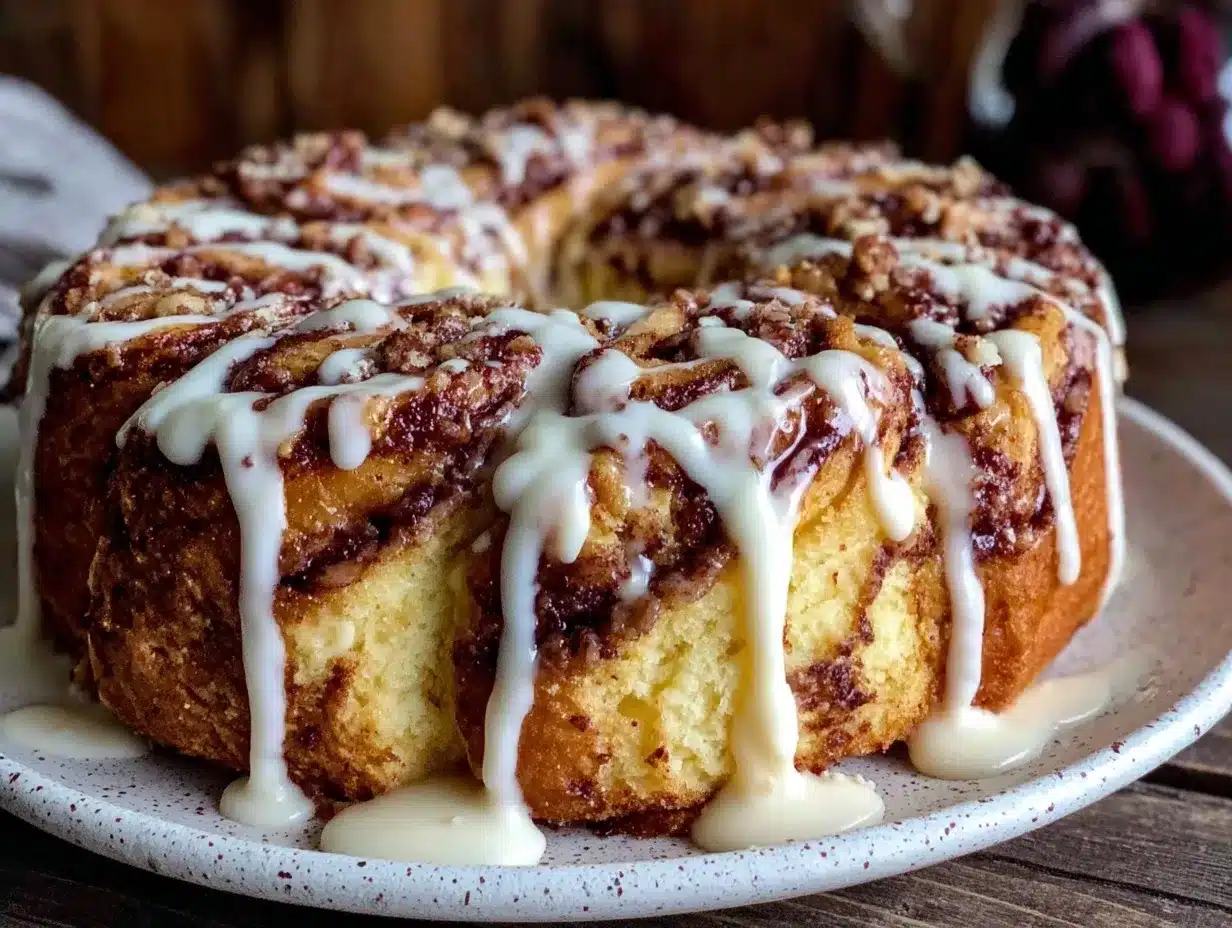
Let’s walk through the steps. This part is straightforward, but paying attention to details ensures success. I’ve broken it down so you can follow along easily.
- Preheat and Prep: Preheat your oven to 350°F (175°C). Grease your 9×13 inch baking dish with butter or non-stick spray. Dust it lightly with flour if you want extra insurance against sticking. This takes about 2 minutes.
- Mix Dry Ingredients: In a large bowl, whisk together the flour, granulated sugar, baking powder, and salt. Make sure there are no clumps of baking powder. Set this aside for now.
- Mix Wet Ingredients: In a separate bowl, beat the eggs lightly. Add the melted butter, vanilla extract, and milk. Whisk until everything is smooth and combined. This should take about 1 minute.
- Combine Batter: Pour the wet mixture into the dry ingredients. Stir gently with a spatula or wooden spoon until just combined. Do not overmix! The batter should be thick and slightly lumpy. Overmixing makes the cake tough. This takes about 2 minutes.
- Prepare the Swirl: In a small bowl, mix the brown sugar and cinnamon. It should look like wet sand. If it’s too dry, add a teaspoon of melted butter or water. This takes 1 minute.
- Layer the Cake: Pour half of the batter into the prepared pan. Spread it out evenly. Sprinkle half of the cinnamon-sugar mixture over the batter. Add the rest of the batter on top. Spread it out. Sprinkle the remaining cinnamon-sugar on top. Use a knife to gently swirl the top layer into the batter. You don’t need to mix it deeply; just create a marbled effect. This takes about 3 minutes.
- Bake: Place the pan in the oven. Bake for 35-40 minutes. Check it at 35 minutes. A toothpick inserted into the center should come out clean or with a few moist crumbs. Do not overbake, or it will dry out. This takes 35-40 minutes.
- Cool and Glaze: Let the cake cool in the pan for 10 minutes. While it cools, mix the powdered sugar and milk for the glaze. Drizzle the glaze over the warm cake. Let it set for 5 minutes before slicing. This takes 15 minutes total.
Personal tip: If you like a gooier center, add an extra tablespoon of butter to the cinnamon sugar mixture before sprinkling. It melts into the cake and creates little pockets of caramel.
Cooking Tips & Techniques
Here are some secrets I’ve picked up along the way. First, room temperature ingredients are key. If your eggs or milk are cold, the batter might not emulsify properly. Second, don’t skip the resting time. Letting the cake cool slightly allows the structure to set, making it easier to slice without crumbling. I once tried to slice it hot, and it was a mess. Lesson learned!
Another common mistake is overmixing the batter. Remember, lumps are okay. You want a tender crumb, not a chewy bread. Also, keep an eye on your oven. Every oven runs differently. If your cake is browning too fast on top, cover it loosely with foil after 20 minutes. Finally, when making the glaze, add the milk one tablespoon at a time. It’s easier to thin it out than to fix a glaze that is too runny.
Variations & Adaptations
This recipe is a blank canvas. Here are some ways to tweak it. For a cream cheese swirl, mix 2 ounces of softened cream cheese with 1 tablespoon of sugar and swirl it in with the cinnamon layer. It adds a tangy richness. For a maple version, swap the vanilla extract for maple syrup and use maple syrup instead of milk in the glaze. It tastes like autumn in a bite. If you want to make it gluten-free, use a 1:1 gluten-free flour blend. The texture might be slightly denser, but it still works. For a dairy-free option, use coconut oil instead of butter and almond milk. These variations keep the recipe exciting and adaptable to different dietary needs.
Serving & Storage Suggestions
This cake is best served at room temperature, but it’s also delicious chilled. For meal prep, let it cool completely before covering. Store it in an airtight container in the fridge for up to 5 days. I slice it into squares for easy grabbing. To reheat, microwave a slice for 20-30 seconds. It restores that soft, fresh-baked texture. The flavors actually meld together over the first day, making it even better on Monday morning. Pair it with a hot cup of coffee or a glass of cold milk for the perfect breakfast.
Nutritional Information & Benefits
While this is a treat, it’s balanced with simple ingredients. Each slice contains approximately 250 calories, with 30g of carbs, 4g of protein, and 12g of fat. It provides a good source of energy for your morning. The cinnamon offers anti-inflammatory benefits, and the cake is a comforting source of carbohydrates. It’s not a low-calorie diet food, but it’s a wholesome option compared to processed pastries. If you are watching sugar intake, reduce the sugar in the batter and skip the glaze. It’s still delicious that way. Always listen to your body and enjoy in moderation.
Conclusion
This homemade cinnamon roll cake is a staple in my meal prep routine. It’s easy, delicious, and saves me so much time during the week. I hope you try it and find it as useful as I do. Feel free to customize it with your favorite add-ins or glazes. I’d love to hear how you make it your own. Leave a comment below with your variations. Happy baking, and enjoy your sweet start to the week!
Frequently Asked Questions
Can I freeze this cinnamon roll cake?
Yes, you can freeze it. Wrap individual slices tightly in plastic wrap and place them in a freezer-safe bag. They will last for up to 3 months. Thaw them in the fridge overnight or microwave them briefly.
Can I use self-rising flour?
You can, but you need to adjust the recipe. If you use self-rising flour, omit the baking powder and salt. However, the texture might be slightly different. I recommend sticking to all-purpose flour for the best results.
Why is my cake dense?
This usually happens if you overmix the batter or use old baking powder. Make sure to mix until just combined and check the expiration date on your leavening agents.
Can I make this in a muffin tin?
Yes! Divide the batter into a greased muffin tin. Bake for 18-22 minutes. This is a great option for individual portions and easy lunchbox packing.
What if I don’t have a 9×13 pan?
You can use an 8×8 pan, but the baking time will be shorter. Check it at 25 minutes. The cake will be thicker, so keep an eye on the top to prevent burning.
Pin This Recipe!


Homemade Cinnamon Roll Cake: 5 Easy Meal Prep Days
- Total Time: 55 minutes
- Yield: 9 servings 1x
Description
A fluffy, cake-style cinnamon roll that captures the taste of bakery pastries without the hassle of kneading dough. Perfect for meal prep, this easy recipe yields five days of grab-and-go breakfasts.
Ingredients
- 2 1/4 cups all-purpose flour
- 3/4 cup granulated sugar
- 1 tablespoon baking powder
- 1/2 teaspoon salt
- 1/2 cup unsalted butter, melted
- 2 large eggs, room temperature
- 1 teaspoon vanilla extract
- 1/2 cup milk or buttermilk
- 1/2 cup brown sugar (for swirl)
- 2 teaspoons ground cinnamon (for swirl)
- 1 cup powdered sugar (for glaze)
- 2–3 tablespoons milk (for glaze)
Instructions
- Preheat oven to 350°F (175°C). Grease a 9×13 inch baking dish and dust lightly with flour.
- In a large bowl, whisk together flour, granulated sugar, baking powder, and salt.
- In a separate bowl, beat eggs lightly. Add melted butter, vanilla extract, and milk; whisk until smooth.
- Pour wet mixture into dry ingredients. Stir gently until just combined; do not overmix.
- In a small bowl, mix brown sugar and cinnamon until it resembles wet sand.
- Pour half the batter into the pan. Sprinkle with half the cinnamon-sugar mixture. Add remaining batter, then remaining cinnamon-sugar.
- Use a knife to gently swirl the top layer into the batter for a marbled effect.
- Bake for 35-40 minutes, or until a toothpick inserted in the center comes out clean.
- Cool in the pan for 10 minutes. Whisk powdered sugar and milk to make glaze, then drizzle over warm cake.
- Let glaze set for 5 minutes before slicing.
Notes
Room temperature ingredients help the batter emulsify properly. Do not overmix the batter to ensure a tender crumb. If the cake browns too quickly, cover loosely with foil after 20 minutes. For a gooier center, add an extra tablespoon of butter to the cinnamon sugar mixture. Can be frozen for up to 3 months.
- Prep Time: 15 minutes
- Cook Time: 40 minutes
- Category: Breakfast
- Cuisine: American
Nutrition
- Serving Size: 1 slice
- Calories: 250
- Sugar: 22
- Sodium: 200
- Fat: 12
- Saturated Fat: 6
- Carbohydrates: 30
- Fiber: 1
- Protein: 4
Keywords: cinnamon roll cake, meal prep breakfast, easy baking, homemade cinnamon rolls, quick breakfast, gluten-free option, dairy-free option


