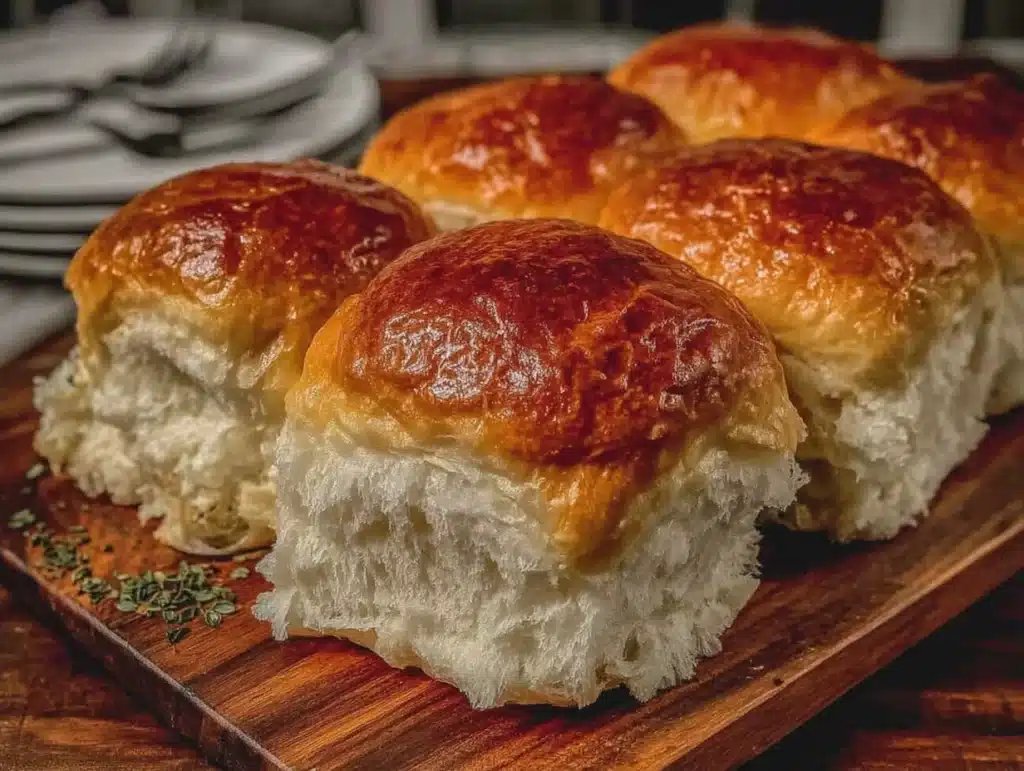
The smell of yeast blooming in warm water is basically the smell of comfort. It reminds me of Sunday mornings when I used to watch my dad make bread from scratch. Back then, it was a luxury. Now, it is a strategic advantage. I first perfected these hamburger buns during a particularly chaotic week of meal prep. I needed something that could withstand the fridge, survive the microwave, and still feel like a fresh-baked treat on Wednesday night. Honestly, most store-bought buns fall apart faster than my willpower on a diet. But these? These hold up. They are soft, slightly sweet, and sturdy enough to hold a juicy patty or a thick slice of turkey. I call them “Perfect Hamburger Buns For Meal Prep” because they actually live up to the hype. You know how frustrating it is to have your lunch get soggy by noon? Not with this recipe. The texture stays intact, the flavor doesn’t turn weird, and reheating them is as easy as a quick zap. I’ve tested this over a dozen times, tweaking the hydration and proofing times, to get it right for the busy home cook. Whether you are prepping lunches for the office or just want dinner ready in minutes, these buns are the secret weapon you didn’t know you needed. Let’s face it, nobody wants to chew on cardboard. These buns are pillowy, golden, and ready to go.
Why You’ll Love This Recipe
Let’s be real for a second. Baking bread from scratch usually feels like a lot of work. You need patience, space, and a lot of cleanup. But this recipe changes the game. It is designed for people who want homemade quality without the hours of labor. Here is why these buns have earned a permanent spot in my weekly rotation:
- Quick & Easy: You can have these from start to finish in under two hours. That is not a typo. With active dry yeast and a simple mix, you skip the long overnight rise. This is perfect for busy weeknights when you are tired after work.
- Simple Ingredients: No fancy grocery trips needed. You likely already have flour, yeast, sugar, salt, and milk in your pantry or fridge. It is four-ingredient magic plus an egg wash. No obscure flours or weird additives.
- Perfect for Meal Prep: This is the big one. Most bread stales in the fridge within a day. These buns? They reheat like they were just made. The crumb stays soft, and the crust stays slightly tender. It is the kind of consistency that makes meal prepping feel less like a chore and more like a win.
- Crowd-Pleaser: My kids, who are notoriously picky about bread texture, devour these. They are sweet enough to stand on their own but neutral enough to let the burger shine. Everyone from toddlers to teenagers approves.
- Unbelievably Delicious: The flavor combo is next-level comfort food. The milk powder adds a richness that water just can’t match. It gives a bakery-style taste that feels indulgent but is actually quite wholesome.
What makes this recipe different from the rest is the attention to detail in the hydration. I use a slightly higher moisture content than standard recipes. This creates an open, airy crumb that doesn’t collapse when sliced. It is not just another version of a dinner roll. It is your best version of a hamburger bun. It is the kind of bun that makes you close your eyes after the first bite. It is comfort food reimagined—healthier, faster, but with the same soul-soothing satisfaction. Perfect for impressing guests without stress, or turning a simple meal into something memorable.
What Ingredients You Will Need
This recipe uses simple, wholesome ingredients to deliver bold flavor and satisfying texture without the fuss. The beauty of this formula is its reliability. You do not need expensive specialty items. Just good, basic staples that you trust. Here is what you need to get started:
- All-Purpose Flour: Two cups (240g) of standard all-purpose flour is the base. I recommend King Arthur brand for its consistent protein content, which helps with structure. If you need gluten-free, a 1:1 gluten-free blend works, but the texture will be denser.
- Active Dry Yeast: One packet (2 ¼ tsp or 7g). This is the engine of the recipe. Make sure it is fresh. If your yeast is old, your buns will be flat. I always keep a backup packet in the fridge just in case.
- Milk Powder: Two tablespoons. This is the secret ingredient. It adds richness and helps the buns stay soft for days. If you do not have milk powder, you can use whole milk, but reduce the water slightly. It adds a subtle dairy sweetness that pairs perfectly with burgers.
- Warm Water: Three-quarters of a cup (180ml). The water needs to be warm to the touch, not hot. Think bathwater temperature. Too hot, and you kill the yeast. Too cold, and it takes forever to rise.
- Sugar: Two tablespoons. This feeds the yeast and helps with browning. You can substitute with honey or maple syrup for a natural sweetener, but white sugar gives that classic bakery crust.
- Salt: One teaspoon. Essential for flavor balance. It cuts through the sweetness and strengthens the gluten.
- Unsalted Butter: Two tablespoons, melted. This adds tenderness. You can swap this for coconut oil if you are dairy-free, though the flavor will change slightly.
- Egg: One large egg, beaten. Used for the wash to get that beautiful golden shine. You can skip this for an egg-free version, but the color won’t be as vibrant.
Keep this section scannable. You do not need to memorize it. Just grab your stuff, preheat your oven, and let’s get baking. The ingredients are forgiving, so do not stress if you are slightly off on measurements. It is still going to taste great.
Equipment Needed
You do not need a fancy kitchen to make these buns. Here is what you will need:
- Mixing Bowl: A large bowl, preferably glass or stainless steel. I use a 4-quart bowl because the dough doubles in size.
- Measuring Cups and Spoons: Accurate measurements are key in baking. I prefer metal measuring spoons for dry ingredients.
- Stand Mixer or Hand Mixer: Optional but helpful. Kneading by hand takes about 10 minutes. A mixer takes 5. I use my stand mixer with a dough hook for consistency.
- Baking Sheet: A standard half-sheet pan. Line it with parchment paper for easy cleanup and even browning.
- Pastry Brush: For applying the egg wash. A silicone brush is easier to clean.
- Cooling Rack: Essential for letting the buns cool completely before storing. This prevents condensation and sogginess.
If you do not have a stand mixer, do not worry. Your hands work just fine. Just be prepared to get a little flour on your arms. For budget-friendly options, a basic glass bowl and a wooden spoon are all you really need. The key is having a clean, flat surface for kneading. A granite countertop is ideal, but a large cutting board works too.
Preparation Method
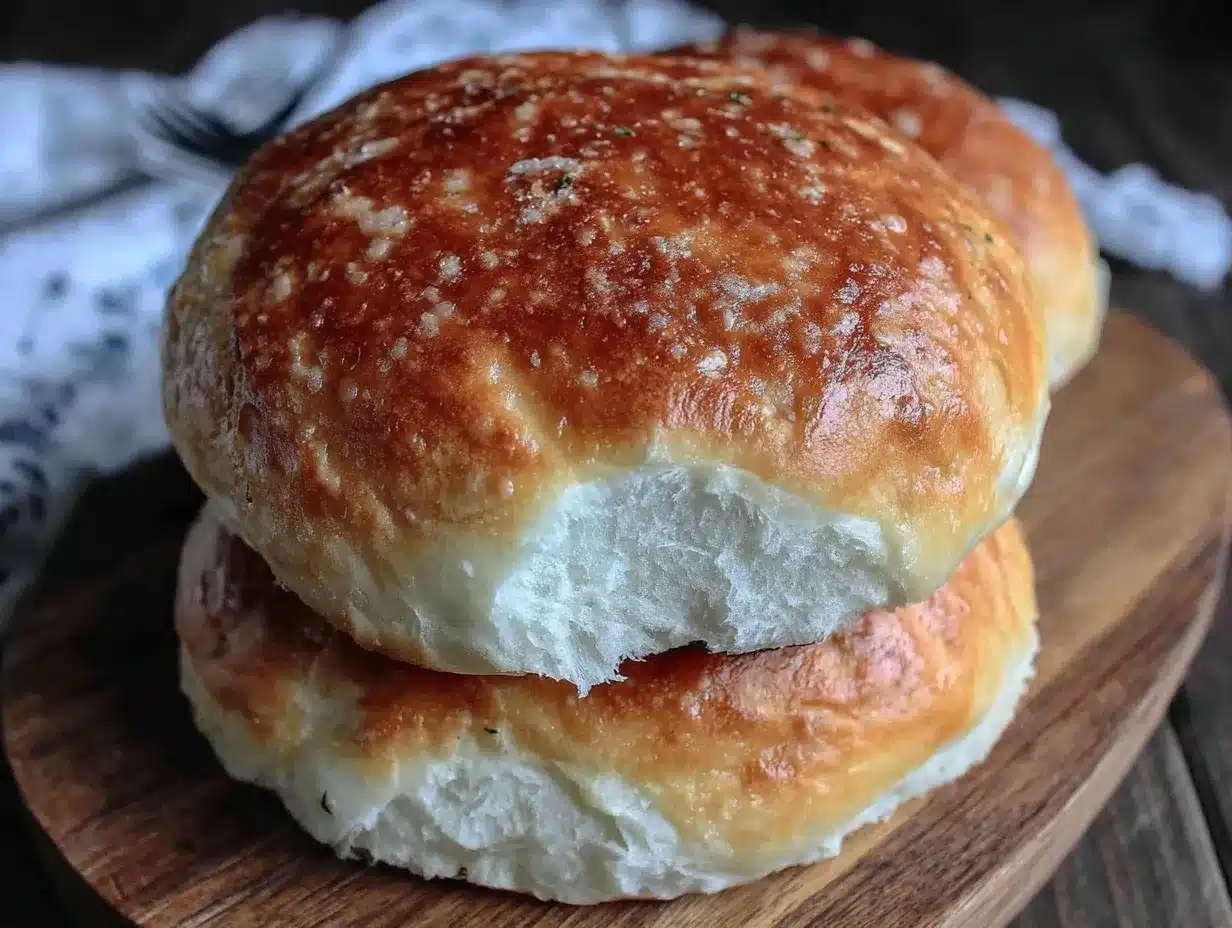
Let’s walk through the steps. This is where the magic happens. Follow these carefully for the best results.
- Activate the Yeast: In a small bowl, combine the warm water (180ml) and sugar. Sprinkle the yeast on top. Stir gently and let it sit for 5-10 minutes. You should see bubbles forming. If nothing happens, your yeast is dead. Start over. This step takes about 10 minutes total.
- Mix the Dry Ingredients: In your large mixing bowl, whisk together the flour and salt. If using milk powder, add it here. Make a well in the center. This ensures even distribution.
- Combine Wet and Dry: Pour the yeast mixture into the well. Add the melted butter. Mix with a wooden spoon or your mixer on low speed until a shaggy dough forms. This takes about 2 minutes. Do not worry if it looks messy.
- Knead the Dough: Turn the dough out onto a lightly floured surface. Knead for 8-10 minutes. Push the dough away with the heel of your hand, fold it over, and turn. Add flour only if it sticks badly. The dough should be soft and slightly tacky, not sticky. If it is too sticky, add flour one tablespoon at a time. If it is too dry, add water one teaspoon at a time. This step takes about 10 minutes.
- First Rise: Place the dough in a lightly oiled bowl. Cover with a damp towel or plastic wrap. Let it rise in a warm spot for 45-60 minutes. It should double in size. Poke it with a finger; if the indent stays, it is ready.
- Shape the Buns: Punch down the dough gently. Divide it into 8 equal pieces. Roll each piece into a smooth ball. Place them on the parchment-lined baking sheet, spacing them 2 inches apart. This takes about 10 minutes.
- Second Rise: Cover the shaped buns loosely with a towel. Let them rise again for 20-30 minutes. They should look puffy and soft. Preheat your oven to 375°F (190°C) during the last 10 minutes of this rise.
- Bake: Brush the tops with the beaten egg. Bake for 15-18 minutes. They should be golden brown. If they brown too fast, tent with foil. Rotate the pan halfway through for even baking.
- Cool: Remove from the oven. Brush with a little melted butter if you want extra softness. Let them cool on the rack for at least 30 minutes before slicing or storing. This is crucial for texture.
Troubleshooting tip: If your buns are dense, you likely over-proofed or under-proofed them. Use the finger test to check readiness. If they are too hard, you used too much flour during kneading. Trust your hands, not just the clock.
Cooking Tips & Techniques
Here are some pro tips I have learned over the years to ensure success.
- Temperature Matters: Your kitchen should be warm. If it is cold, place the dough near the oven or on top of the fridge. Heat helps yeast activity.
- Don’t Over-Knead: Over-kneading develops too much gluten, making the buns tough. Stop when the dough is smooth and elastic. It should pass the “windowpane test” – stretch a small piece thinly without tearing.
- Watch the Rise: Do not let the dough rise until it is bursting. It should be doubled. Over-proofing leads to collapse and a sour taste.
- Egg Wash Technique: Do not brush too heavily. A light coat gives shine. Heavy coating makes the crust hard.
- Cooling is Key: Cutting warm bread is a sin. The steam inside needs to escape. If you cut it hot, the crumb becomes gummy. Wait at least 30 minutes.
I once rushed the cooling process and ended up with a mushy mess. Never again. Patience pays off. Also, if you are baking in a humid environment, reduce the water by 1-2 tablespoons. Humidity adds moisture to the flour. Adjust accordingly.
Variations & Adaptations
This recipe is versatile. Here are some ways to tweak it:
- Whole Wheat: Substitute half the all-purpose flour with whole wheat flour. This adds nuttiness and fiber. The buns will be denser but healthier.
- Gluten-Free: Use a 1:1 gluten-free flour blend. Add ½ tsp xanthan gum if your blend does not include it. The dough will be stickier, so handle with wet hands.
- Vegan: Swap butter for coconut oil and skip the egg wash. Use a flax egg or just water for brushing. The texture will be slightly less soft but still delicious.
- Savory Twist: Reduce sugar to 1 tsp and add garlic powder and rosemary. Great for sliders or sandwiches.
I often make a batch of savory buns for my husband’s lunch. He loves the garlic kick. It is a nice change from the sweet version.
Serving & Storage Suggestions
These buns are best served fresh out of the oven. But let’s talk about meal prep.
- Storage: Once completely cool, store in an airtight container or freezer bag. They last 3 days in the fridge or 3 months in the freezer.
- Reheating: This is the magic moment. To reheat, wrap the bun in a damp paper towel. Microwave for 20-30 seconds. Or, toast in a toaster oven for 3-5 minutes. They reheat like they were just made. The texture is restored perfectly.
- Serving: Serve with burgers, chicken sandwiches, or even as dinner rolls with soup. They pair well with anything savory.
The flavor actually improves after a day or two in the freezer. The moisture redistributes. I often freeze half the batch for later. It is a game-changer for busy weeks.
Nutritional Information & Benefits
Each bun contains approximately:
- Calories: 180
- Carbs: 30g
- Protein: 5g
- Fat: 3g
- Fiber: 1g
These buns are a good source of carbohydrates for energy. Using whole wheat flour adds fiber. They are free from preservatives, unlike store-bought versions. I appreciate knowing exactly what is in my food. It makes meal prepping feel more intentional and healthy.
Conclusion
These Perfect Hamburger Buns For Meal Prep are a game-changer. They are easy, delicious, and reliable. I love that I can bake a batch on Sunday and have fresh buns all week. It saves time and money. Plus, they taste better than anything from the store. I encourage you to try this recipe. Customize it to your taste. Maybe add seeds or spices. Share your results in the comments. I love hearing how others adapt the recipe. Baking is about experimentation. Enjoy the process and the results. These buns are worth the effort. Trust me.
Frequently Asked Questions
Can I freeze these buns?
Yes, absolutely. Let them cool completely, then wrap tightly in plastic wrap and foil. They last up to 3 months. Thaw at room temperature or reheat directly from frozen.
Why are my buns dense?
This usually happens from over-flouring or old yeast. Measure flour correctly (spoon and level), and ensure your yeast is fresh and bubbly.
Can I use instant yeast?
Yes. You can mix it directly with the flour. No need to activate in water first. The timing may be slightly faster, so check the dough earlier.
How do I keep them soft for meal prep?
Store them in an airtight container. Reheat with a damp paper towel in the microwave. This restores moisture instantly.
Can I make these ahead of time?
Yes. Shape the buns and refrigerate them overnight. Bake them in the morning. This is great for busy schedules.
Pin This Recipe!

Perfect Hamburger Buns For Meal Prep: 5-Ingredient Reheats Like Fresh
- Total Time: 2 hours
- Yield: 8 servings 1x
Description
Soft, slightly sweet, and sturdy homemade hamburger buns designed for meal prep. These buns withstand refrigeration and reheat like fresh-baked treats, offering a pillowy texture without the hassle of long rising times.
Ingredients
- 2 cups (240g) all-purpose flour
- 1 packet (2 ¼ tsp or 7g) active dry yeast
- 2 tablespoons milk powder
- 3/4 cup (180ml) warm water
- 2 tablespoons sugar
- 1 teaspoon salt
- 2 tablespoons unsalted butter, melted
- 1 large egg, beaten (for egg wash)
Instructions
- Activate the yeast: In a small bowl, combine warm water and sugar. Sprinkle yeast on top and let sit for 5-10 minutes until bubbly.
- Mix dry ingredients: In a large bowl, whisk together flour, salt, and milk powder. Make a well in the center.
- Combine wet and dry: Pour the yeast mixture into the well and add melted butter. Mix with a wooden spoon or mixer on low speed until a shaggy dough forms.
- Knead the dough: Turn dough onto a lightly floured surface and knead for 8-10 minutes until soft and slightly tacky. Add small amounts of flour or water if needed to adjust consistency.
- First rise: Place dough in a lightly oiled bowl, cover with a damp towel or plastic wrap, and let rise in a warm spot for 45-60 minutes until doubled in size.
- Shape the buns: Punch down the dough gently and divide into 8 equal pieces. Roll each into a smooth ball and place on a parchment-lined baking sheet, spacing them 2 inches apart.
- Second rise: Cover shaped buns loosely with a towel and let rise for 20-30 minutes until puffy. Preheat oven to 375°F (190°C) during the last 10 minutes.
- Bake: Brush tops with beaten egg and bake for 15-18 minutes until golden brown. Rotate pan halfway through for even baking.
- Cool: Remove from oven and optionally brush with melted butter. Let cool on a rack for at least 30 minutes before slicing or storing.
Notes
Ensure yeast is fresh and water is warm but not hot to avoid killing the yeast. Do not over-knead to prevent tough buns. Allow buns to cool completely before storing to prevent sogginess. For meal prep, store in an airtight container or freeze. Reheat in microwave with a damp paper towel for 20-30 seconds.
- Prep Time: 30 minutes
- Cook Time: 18 minutes
- Category: Side Dish
- Cuisine: American
Nutrition
- Serving Size: 1 bun
- Calories: 180
- Sugar: 6
- Sodium: 250
- Fat: 3
- Saturated Fat: 1.5
- Carbohydrates: 30
- Fiber: 1
- Protein: 5
Keywords: hamburger buns, meal prep, homemade bread, yeast rolls, quick bread, reheatable buns, soft buns


