
There is nothing quite like the smell of fresh cinnamon rolls wafting through the air to signal that the weekend has officially begun. I remember one specific Saturday last spring when I tried to lug a tray of piping hot, gooey cinnamon rolls to a park picnic. Let’s just say it didn’t go as planned. The rolls went cold, the icing hardened into a sugary shell, and we ended up eating them with our hands like messy teenagers. It was a disaster, but it taught me something valuable. You can’t just throw a standard bakery recipe into a cooler and expect magic. You need a strategy. That’s exactly why I developed this soft cinnamon rolls for outdoor brunch formula. It’s not just about the taste, though they are incredibly delicious. It’s about the logistics of feeding a crowd in an uncontrolled environment.
When I first started meal prepping for weekend gatherings, I realized that most brunch recipes fail the “transport test.” They get soggy, dry out, or lose their structural integrity. But these cinnamon rolls? They are different. I’ve tested this dough over a dozen times, adjusting the hydration and the cooling method to ensure they stay soft even after sitting in a insulated bag for two hours. The key is in the dough composition and the way you handle the icing. You want something that can withstand a bit of travel without falling apart. Honestly, it’s a game-changer for anyone who loves the idea of a homemade brunch but hates the stress of last-minute cooking.
This recipe is perfect for busy families, outdoor enthusiasts, or anyone who wants to impress friends without spending their entire Saturday morning standing over a stove. I use this same dough base for my weekly meal prep, freezing half the batch so I always have breakfast ready to go. Whether you are heading to the beach, a campsite, or just a backyard hangout, these soft cinnamon rolls for outdoor brunch will be the star of the show. They are sturdy enough to handle a bit of jostling but tender enough to melt in your mouth. Plus, the scent alone will have everyone gathering around the picnic blanket within minutes. Let’s face it, if it smells good, it tastes good before you even take a bite.
Why You’ll Love This Recipe
After years of experimenting with yeast doughs and traveling with baked goods, I’ve found that the secret to a successful outdoor brunch item is balance. You need enough structure to hold up but enough moisture to stay soft. This recipe hits that sweet spot perfectly. I’ve shared this method with several friends who were skeptical about making yeast breads for picnics, and every single one of them was blown away by the results. It’s not just a recipe; it’s a reliable system for stress-free entertaining. Here is why this specific version of soft cinnamon rolls for outdoor brunch has become my go-to:
- Quick & Easy Assembly: While the dough needs time to rise, the active prep time is surprisingly low. You can mix, roll, and cut these in under thirty minutes. This is perfect for busy weeknights when you want to prep for the weekend ahead. Honestly, I usually mix the dough on Friday evening, let it rise in the fridge overnight, and then shape them on Saturday morning. It makes the whole process feel effortless.
- Simple Ingredients: You don’t need fancy flours or exotic spices. You likely already have everything in your kitchen. Flour, sugar, yeast, butter, milk, and cinnamon are pantry staples for most people. This means no frantic grocery trips right before your brunch event. It’s practical, accessible, and totally doable for beginner bakers.
- Perfect for Outdoor Occasions: These rolls are sturdy. They don’t crumble easily like some delicate pastries. They travel well in insulated containers and maintain their texture for hours. This makes them ideal for camping trips, beach days, or park picnics where you might not have a warm oven nearby until you arrive.
- Crowd-Pleaser: Everyone loves cinnamon rolls. Kids, adults, picky eaters—it’s a universal favorite. I’ve served these at everything from birthday parties to casual Sunday gatherings, and the tray always disappears quickly. There is rarely a single roll left over, which is a good sign.
- Unbelievably Delicious: The texture is what really sets these apart. The dough is pillowy soft, and the filling is rich and gooey. When you take that first bite, you get a mix of warm dough, sweet cinnamon, and creamy icing. It’s comfort food at its finest. It’s the kind of treat that makes you close your eyes and just enjoy the moment.
- Meal Prep Friendly: This is the biggest reason I love this recipe. You can bake them fully and freeze them, or par-bake them and finish them on-site. This flexibility is huge for anyone planning ahead. You get the homemade taste without the last-minute rush. It’s essentially a breakfast hack that actually works.
What makes this recipe different from the rest is the specific hydration level of the dough. I use a slightly higher moisture content than standard recipes, which keeps the rolls soft for days. Most online recipes dry out after a few hours, especially in windy or sunny outdoor conditions. This version is engineered to resist drying out. It’s a small tweak that makes a massive difference. Plus, the icing is designed to set slightly so it doesn’t drip all over your picnic blanket, but it softens up again when you warm it up. It’s comfort food reimagined for the modern, on-the-go lifestyle.
What Ingredients You Will Need
This recipe uses simple, wholesome ingredients to deliver bold flavor and satisfying texture without the fuss. The beauty of this soft cinnamon rolls for outdoor brunch formula lies in its accessibility. You don’t need specialized baking equipment or hard-to-find items. Everything is designed to work together to create a dough that is forgiving and a filling that is irresistible. I’ve grouped the ingredients by function to help you understand how they contribute to the final product. This helps you make smarter substitutions if you are missing something or have dietary restrictions.
- For the Dough:
- All-purpose flour: 4 to 4.5 cups (500-550g). I recommend King Arthur Brand for its consistent protein content, which gives the dough the right structure. Bread flour can be used for a chewier texture, but all-purpose is more tender.
- Granulated sugar: 1/3 cup (75g). This feeds the yeast and adds sweetness to the dough itself. Don’t skip this, as it helps with browning.
- Instant yeast: 2 teaspoons (7g). Instant yeast is faster and more forgiving than active dry yeast. It doesn’t need to be proofed first, which saves time.
- Whole milk: 1 cup (240ml), warmed. Warm milk helps activate the yeast. If you are dairy-free, use oat milk, which has a similar fat content and works beautifully.
- Unsalted butter: 4 tablespoons (55g), melted. This adds richness and tenderness to the crumb. Softened butter can be used, but melted integrates easier into the wet ingredients.
- Large eggs: 2 eggs, room temperature. Eggs provide structure and richness. Room temperature ingredients mix better and create a more uniform dough.
- Salt: 1 teaspoon. Salt is crucial for flavor balance. It cuts through the sweetness of the sugar and icing.
- For the Filling:
- Unsalted butter: 1/2 cup (115g), softened to room temperature. This needs to be spreadable. If it’s too cold, it will tear the dough. If it’s too warm, it will melt into the dough.
- Granulated sugar: 1/2 cup (100g). This creates the caramelized base of the swirl.
- Brown sugar: 1/2 cup (100g). Brown sugar adds moisture and a deeper, molasses-like flavor. It keeps the filling gooey.
- Ground cinnamon: 2 tablespoons. Use a good quality cinnamon for the best flavor. Ceylon cinnamon is milder, while Cassia is spicier. I prefer Cassia for a strong kick.
- Optional: 1/4 cup chopped pecans or walnuts. Nuts add a nice crunch and richness. I often skip them for the kids, but add them for myself.
- For the Icing:
- Cream cheese: 4 ounces (115g), softened. Full-fat cream cheese is essential for the tangy flavor and smooth texture. Low-fat versions can be grainy.
- Butter: 2 tablespoons (28g), softened.
- Powdered sugar: 1.5 cups (180g). Sift this to avoid lumps. It dissolves easily into the cream cheese mixture.
- Milk: 1-2 tablespoons. Adjust this to get your desired consistency. For outdoor transport, a thicker icing is better so it doesn’t drip.
- Vanilla extract: 1 teaspoon. Enhances the overall flavor profile.
I always recommend using high-quality butter and cinnamon. Since these are the main flavor drivers, cheap ingredients will show in the final taste. Also, look for eggs that are at least a few days old rather than brand new, as older eggs whip better and have a stronger structure, though for this recipe, it’s not a huge factor. Just ensure they are room temperature for best incorporation.
Equipment Needed
You don’t need a lot of fancy gear to make these soft cinnamon rolls for outdoor brunch. In fact, keeping the equipment list simple is part of the appeal. Here is what you’ll need to get the job done right.
- Large mixing bowl: A sturdy bowl that can hold the dough as it doubles in size. Glass or ceramic bowls are great because they don’t retain heat, which helps control the rising process.
- Stand mixer or hand mixer: While you can knead by hand, a stand mixer with a dough hook saves a lot of arm fatigue. If you mix by hand, be prepared for about 10 minutes of kneading.
- 9×13 inch baking pan: A standard metal pan works best. Dark pans can cause the bottoms to burn, so keep an eye on them. Glass pans take longer to bake but give a softer crust.
- Parchment paper: Essential for easy cleanup and preventing sticking. It also helps with transport if you bake in batches.
- Rolling pin: A standard wooden rolling pin is fine. Just make sure it’s clean and dry.
- Dough scraper: This is a game-changer for transferring the dough and cleaning up flour. It’s a cheap tool that makes baking much easier.
- Wire cooling rack: Allows air to circulate underneath the rolls so they don’t get soggy on the bottom.
- Insulated carrier or cooler: For the outdoor aspect, you’ll need something to keep the rolls warm or at a safe temperature until you arrive at your destination.
If you don’t have a stand mixer, don’t worry. I’ve made this dough by hand many times. It just takes a bit more effort. Also, if you don’t have a 9×13 pan, you can use two 9-inch round pans, but you’ll need to adjust the baking time slightly. The key is to have enough surface area for the dough to rise properly without overcrowding.
Preparation Method
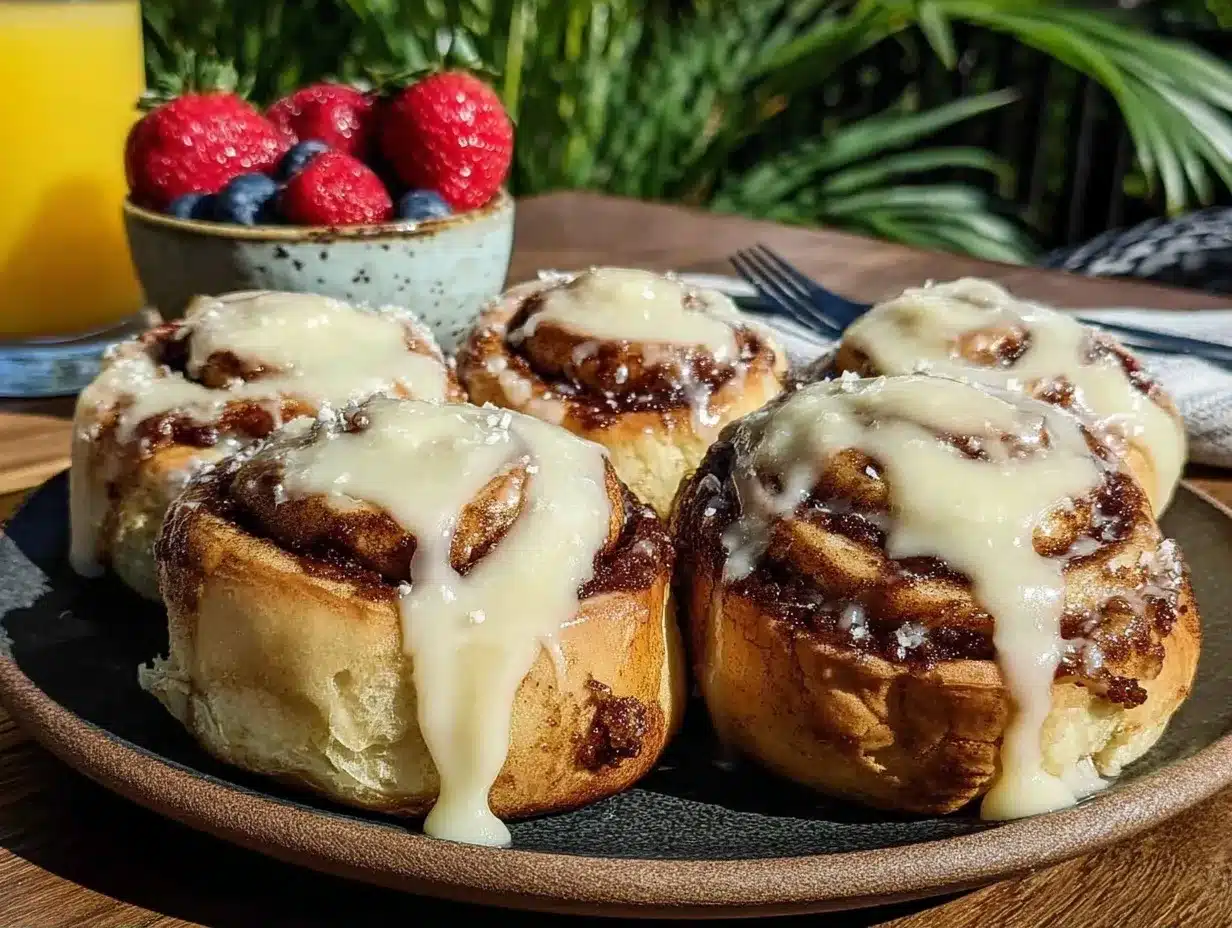
Making these soft cinnamon rolls for outdoor brunch is a straightforward process, but attention to detail is key. I’ve broken it down into clear steps so you can follow along without stress. Remember, patience is your best friend when working with yeast doughs. Rushing the rising process is the most common mistake people make.
- Make the Dough (15 minutes): In the bowl of a stand mixer fitted with a dough hook, combine the warm milk, melted butter, sugar, yeast, eggs, and salt. Mix on low speed until combined. Gradually add the flour, one cup at a time, mixing on low until the dough starts to come together. Increase speed to medium and knead for 5-7 minutes until the dough is smooth and elastic. It should be soft and slightly tacky but not sticky. If it’s too sticky, add a little more flour. If it’s too dry, add a splash of milk. Place the dough in a lightly greased bowl, cover with plastic wrap or a damp towel, and let it rise in a warm place for 1-2 hours, or until doubled in size. (Time estimate: 15 mins active, 1-2 hours rising)
- Prepare the Filling (5 minutes): While the dough is rising, mix the softened butter, brown sugar, granulated sugar, and cinnamon in a small bowl. Stir until it forms a thick, spreadable paste. If you are adding nuts, fold them in now. This mixture should be thick enough to stay on the dough without dripping. (Time estimate: 5 mins)
- Shape the Rolls (15 minutes): Punch down the risen dough to release air bubbles. Turn it out onto a lightly floured surface. Roll it out into a large rectangle, about 12×18 inches. The thickness should be even. Spread the butter-sugar mixture evenly over the dough, leaving a small border at the top edge. Starting from the long side, tightly roll the dough into a log. Use a sharp knife or dental floss to cut the log into 12 equal pieces. Place them cut-side down in a greased 9×13 inch baking pan. Make sure to leave a little space between them for expansion. (Time estimate: 15 mins)
- Second Rise (30-45 minutes): Cover the pan loosely with plastic wrap and let the rolls rise again for 30-45 minutes. They should look puffy and nearly double in size. This step is crucial for softness. Preheat your oven to 350°F (175°C) during the last 15 minutes of rising. (Time estimate: 30-45 mins)
- Bake (20-25 minutes): Bake the rolls in the preheated oven for 20-25 minutes, or until they are golden brown on top. If they start browning too quickly, tent them with foil. The internal temperature should reach 190°F (88°C) for doneness. Remove from the oven and let them cool in the pan for 10 minutes. (Time estimate: 25 mins baking + 10 mins cooling)
- Make the Icing (5 minutes): While the rolls cool, beat the softened cream cheese and butter until smooth. Add the powdered sugar, vanilla, and milk. Beat until creamy and spreadable. Adjust sweetness or consistency as needed. (Time estimate: 5 mins)
- Assemble and Transport (10 minutes): Spread the icing generously over the warm rolls. Let the icing set for a few minutes. If you are transporting them, let them cool completely in the pan before moving them to an insulated carrier. This prevents them from getting squished. If you are baking them on-site, you can ice them right after baking. (Time estimate: 10 mins)
One important note: if you are baking these ahead of time for an outdoor brunch, let them cool completely before covering. Trapped steam will make them soggy. Wrap them tightly in plastic wrap and then aluminum foil. They can be stored at room temperature for up to 24 hours or frozen for up to a month.
Cooking Tips & Techniques
After making hundreds of batches of cinnamon rolls, I’ve learned a few tricks that make a huge difference. The biggest issue people face is dry rolls. Here is how to avoid that. First, do not overbake. The rolls should be golden, not dark brown. Overbaking drives out moisture. Use an oven thermometer to ensure your oven is accurate, as many home ovens run hot. Second, the dough should be soft. If your dough feels stiff, your rolls will be dense. Add a little extra milk if needed. Third, when rolling the dough, keep the edges even. Uneven rolling leads to uneven baking. Use a ruler if you have to. Fourth, when cutting the rolls, use a sharp serrated knife. Sawing gently works best. Pressing down too hard can crush the dough. Finally, for the icing, don’t make it too runny. A thick icing holds up better during transport and doesn’t drip everywhere. If it’s too thick, add milk one teaspoon at a time. These small adjustments ensure your soft cinnamon rolls for outdoor brunch come out perfect every time.
Variations & Adaptations
One of the best things about this formula is how adaptable it is. You can tweak it to fit your taste or dietary needs. Here are a few variations I’ve tried that work well. For a gluten-free option, use a 1:1 gluten-free flour blend. You may need to add a bit more liquid as GF flour absorbs differently. For a dairy-free version, use coconut oil instead of butter and oat milk instead of dairy milk. The icing can be made with dairy-free cream cheese alternatives. For a different flavor profile, try adding orange zest to the dough or using lemon juice in the icing. You can also swap the cinnamon filling with a chocolate-hazelnut spread or a maple walnut mixture. I once tried adding apple cider to the dough for a fall twist, and it was delicious. The key is to keep the liquid ratios similar so the dough texture remains consistent. Don’t be afraid to experiment once you’ve mastered the base recipe.
Serving & Storage Suggestions
These soft cinnamon rolls for outdoor brunch are best served warm, but they are also great at room temperature. For the best presentation, drizzle extra icing over the top just before serving. They pair well with fresh fruit, coffee, or juice. For storage, keep them in an airtight container at room temperature for up to 2 days. In the fridge, they last up to 5 days, but they may dry out slightly. To reheat, wrap them in foil and warm them in the oven at 300°F for 10 minutes. For freezing, bake them, let them cool completely, and wrap them tightly in plastic and foil. They can be frozen for up to 3 months. To serve from frozen, thaw at room temperature and warm in the oven. The flavors actually develop and meld over time, so day-old rolls can be even better than fresh ones.
Nutritional Information & Benefits
While these are definitely a treat, they can fit into a balanced diet if enjoyed in moderation. Each roll contains approximately 350-400 calories, depending on the size and icing amount. The dough provides carbohydrates for energy, while the butter and cream cheese offer fat for satiety. The eggs add protein. For a healthier twist, you can reduce the sugar in the dough and filling by 25% without compromising texture. You can also use whole wheat flour for added fiber. These rolls are not gluten-free or dairy-free by default, but adaptations are easy. They are a great source of comfort and joy, which is a nutritional benefit in itself. Enjoy them as a special weekend breakfast or brunch item.
Conclusion
Making soft cinnamon rolls for outdoor brunch doesn’t have to be stressful. With this formula, you can enjoy homemade, gooey, delicious rolls anywhere. It’s a skill that pays off for years of picnics and gatherings. I hope you try this recipe and make it your own. Feel free to adjust the sweetness or add your favorite mix-ins. If you do, let me know how it turns out in the comments below. I love hearing about your adaptations. Share your photos online so I can see your creations. Happy baking, and enjoy your brunch!
Frequently Asked Questions
Can I make the dough ahead of time?
Yes, you can mix the dough and let it rise in the fridge overnight. This actually improves the flavor. Just let it come to room temperature before shaping and baking.
Why did my rolls turn out dense?
This usually happens if the dough is under-risen or if you use too much flour. Make sure to knead until smooth and let them rise until puffy. Measure flour correctly by spooning it into the cup.
Can I freeze the baked rolls?
Absolutely. Let them cool completely, wrap tightly in plastic and foil, and freeze for up to 3 months. Reheat in the oven when ready to serve.
What is the best way to transport them?
Use a rigid container or a baking pan with a lid. Line the bottom with parchment paper. Keep them in an insulated bag if it’s hot outside to prevent melting or spoilage.
Can I use active dry yeast instead of instant?
Yes, but you need to proof it in warm milk with a pinch of sugar for 5-10 minutes before adding it to the other ingredients. The ratio is the same.
Pin This Recipe!


Soft Cinnamon Rolls: The Meal Prep Brunch Formula
- Total Time: 3 hours 10 minutes
- Yield: 12 servings 1x
Description
A reliable, travel-friendly cinnamon roll recipe designed for outdoor brunches and meal prep. These rolls stay soft and sturdy during transport, making them perfect for picnics, camping, or busy weekends.
Ingredients
- 4 to 4.5 cups (500-550g) all-purpose flour
- 1/3 cup (75g) granulated sugar
- 2 teaspoons (7g) instant yeast
- 1 cup (240ml) whole milk, warmed
- 4 tablespoons (55g) unsalted butter, melted
- 2 large eggs, room temperature
- 1 teaspoon salt
- 1/2 cup (115g) unsalted butter, softened (for filling)
- 1/2 cup (100g) granulated sugar (for filling)
- 1/2 cup (100g) brown sugar (for filling)
- 2 tablespoons ground cinnamon (for filling)
- 1/4 cup chopped pecans or walnuts (optional)
- 4 ounces (115g) cream cheese, softened (for icing)
- 2 tablespoons (28g) butter, softened (for icing)
- 1.5 cups (180g) powdered sugar (for icing)
- 1–2 tablespoons milk (for icing)
- 1 teaspoon vanilla extract (for icing)
Instructions
- In a stand mixer fitted with a dough hook, combine warm milk, melted butter, sugar, yeast, eggs, and salt. Mix on low until combined.
- Gradually add flour, one cup at a time, mixing on low until the dough comes together. Increase speed to medium and knead for 5-7 minutes until smooth and elastic.
- Place dough in a greased bowl, cover, and let rise in a warm place for 1-2 hours until doubled in size.
- While dough rises, mix softened butter, brown sugar, granulated sugar, and cinnamon to form a spreadable paste. Fold in nuts if using.
- Punch down risen dough and roll out into a 12×18 inch rectangle on a floured surface.
- Spread the butter-sugar mixture evenly over the dough, leaving a border at the top edge.
- Tightly roll the dough into a log from the long side. Cut into 12 equal pieces using a sharp knife or dental floss.
- Place rolls cut-side down in a greased 9×13 inch baking pan, leaving space for expansion.
- Cover loosely and let rise again for 30-45 minutes until puffy. Preheat oven to 350°F (175°C) during the last 15 minutes.
- Bake for 20-25 minutes until golden brown. Internal temperature should reach 190°F (88°C). Cool in pan for 10 minutes.
- Beat cream cheese and butter until smooth. Add powdered sugar, vanilla, and milk. Beat until creamy and spreadable.
- Spread icing over warm rolls. Let set before transporting in an insulated carrier.
Notes
For best results, use high-quality butter and cinnamon. If baking ahead, cool completely before covering to prevent sogginess. Rolls can be frozen for up to 3 months. For gluten-free, use a 1:1 GF flour blend. For dairy-free, use coconut oil and oat milk.
- Prep Time: 45 minutes
- Cook Time: 25 minutes
- Category: Breakfast
- Cuisine: American
Nutrition
- Serving Size: 1 cinnamon roll
- Calories: 375
- Sugar: 28
- Sodium: 350
- Fat: 18
- Saturated Fat: 11
- Carbohydrates: 45
- Fiber: 1
- Protein: 6
Keywords: cinnamon rolls, outdoor brunch, meal prep, picnic food, yeast dough, travel friendly breakfast, homemade cinnamon rolls


