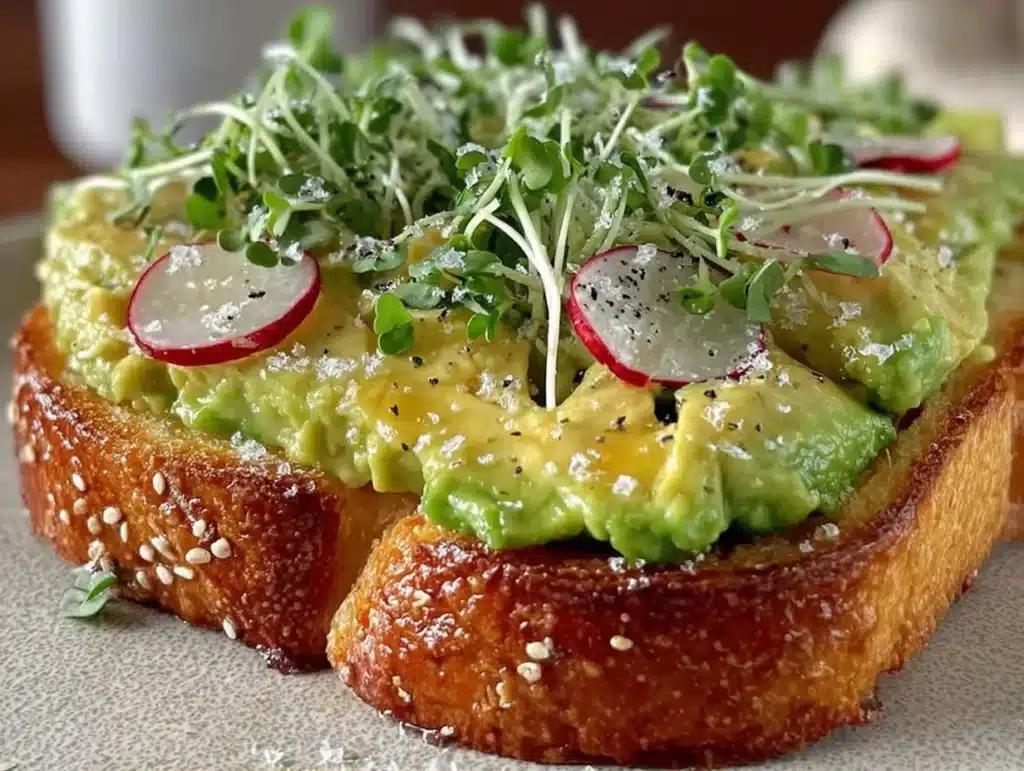
Let’s be honest for a second. The idea of meal-prepping avocado toast usually makes me want to throw my spoon across the kitchen. You know the drill: you prep it on Sunday, and by Wednesday, it’s just… sad. Soggy. Brown. And honestly, kind of depressing to look at. I used to think avocado toast was a breakfast-only thing, something you eat immediately while it’s still warm and perfect. But then I hit a wall with my weekday lunches. I was tired of the same old salads that tasted like cardboard by noon, and I wanted something that felt indulgent but actually kept me full until dinner.
That’s when I decided to stop fighting the avocado and start working with it. I spent weeks testing different breads, different toasting methods, and honestly, a few disasters that ended up in the trash. But then I stumbled on the concept of “crispy” avocado toast. It sounds like an oxymoron, right? Avocado is soft. Bread is soft. How do you make it crispy? Well, you coat it. You bread it. You fry it (or bake it) until it’s golden and crunchy. The result? A dish that doesn’t turn mushy when you reheat it. It actually gets better.
I’ve been making this Crispy Avocado Toast Recipe as my go-to lunch prep for the last six months. It’s changed my entire week. I can make a batch on Sunday, store it in the fridge, and when Tuesday afternoon hits and I’m staring at my clock waiting for 5 PM, I just pop one in the air fryer or toaster oven. It reheats like it was just made. The crunch comes back, the avocado stays creamy but doesn’t get watery, and it feels like a cheat meal that’s actually good for you. If you’re tired of boring lunch boxes, this is the game-changer you’ve been waiting for.
Why You’ll Love This Recipe
I know what you’re thinking. “Avocado toast? Isn’t that expensive and messy?” Let’s clear that up. This isn’t your standard 2-ingredient toast. This is a fully engineered lunch solution that balances flavor, texture, and convenience. I’ve tested this method over a dozen times with different types of bread and toppings, and here is why this specific version is the one you need to add to your rotation.
- It Actually Reheats Well: This is the biggest selling point. Standard avocado toast turns brown and slimy when microwaved. This crispy version holds up beautifully in the fridge and reheats with a satisfying crunch. It reheats like it was just made, which is a miracle in the world of meal prep.
- Quick & Easy Assembly: Yes, there are a few extra steps, but they are simple. You’re basically making mini avocado burgers without the bun. It takes about 20 minutes to prep a batch for the whole week. If you can make a sandwich, you can do this.
- Pantry Staples: You likely already have the core ingredients. Bread, avocados, eggs, and breadcrumbs. No fancy grocery trips needed. I use whatever bread I have on hand, though sourdough is my personal favorite for its sturdy crust.
- Perfect for Meal Prep: These hold their shape in containers. You don’t need special Tupperware or careful layering. Just toss them in a container, and they’re ready to go for four or five days.
- Crowd-Pleaser Texture: The contrast between the crunchy exterior and the creamy interior is addictive. It feels indulgent, like you’re eating fried food, but it’s packed with healthy fats and fiber. It’s comfort food reimagined for your lunchbox.
- Customizable Base: While I love the classic version, the base is neutral enough to swap in different spices or toppings. It’s a blank canvas for your favorite flavors.
This recipe isn’t just about saving time; it’s about reclaiming your lunch hour. It’s the kind of meal that makes you smile because it’s actually exciting to eat. It’s healthier than takeout, faster than cooking from scratch every day, and way more satisfying than a sad desk salad.
What Ingredients You Will Need
This recipe relies on simple, wholesome ingredients to deliver bold flavor and satisfying texture without the fuss. The key is quality. Since there aren’t many ingredients, each one plays a huge role in the final texture and taste. I’ve listed what I use and why, along with some substitution tips if you have dietary restrictions or just want to use what’s in your pantry.
For the Avocado Base
- Ripe Avocados: You’ll need 3 large, ripe avocados. Look for ones that yield slightly to pressure but aren’t mushy. Overripe avocados can make the mixture too wet, which leads to soggy breading. If you’re buying ahead, grab them firm and let them ripen on the counter.
- Lemon Juice: Fresh lemon juice is non-negotiable here. It adds brightness and, more importantly, prevents the avocado from oxidizing and turning brown in the fridge. You’ll need about 2 tablespoons. Bottled juice works in a pinch, but fresh is better.
- Garlic Powder: Not fresh garlic, which can burn or release too much water. Powder gives you that savory depth without altering the texture. About 1 teaspoon is perfect.
- Sea Salt and Black Pepper: To taste. I usually go with about 1/2 teaspoon of salt and a generous crack of pepper. Don’t be shy with the seasoning; the coating can mute flavors slightly.
- Red Pepper Flakes (Optional): If you like a little heat, add a pinch. It cuts through the richness of the avocado nicely.
For the Breading Station
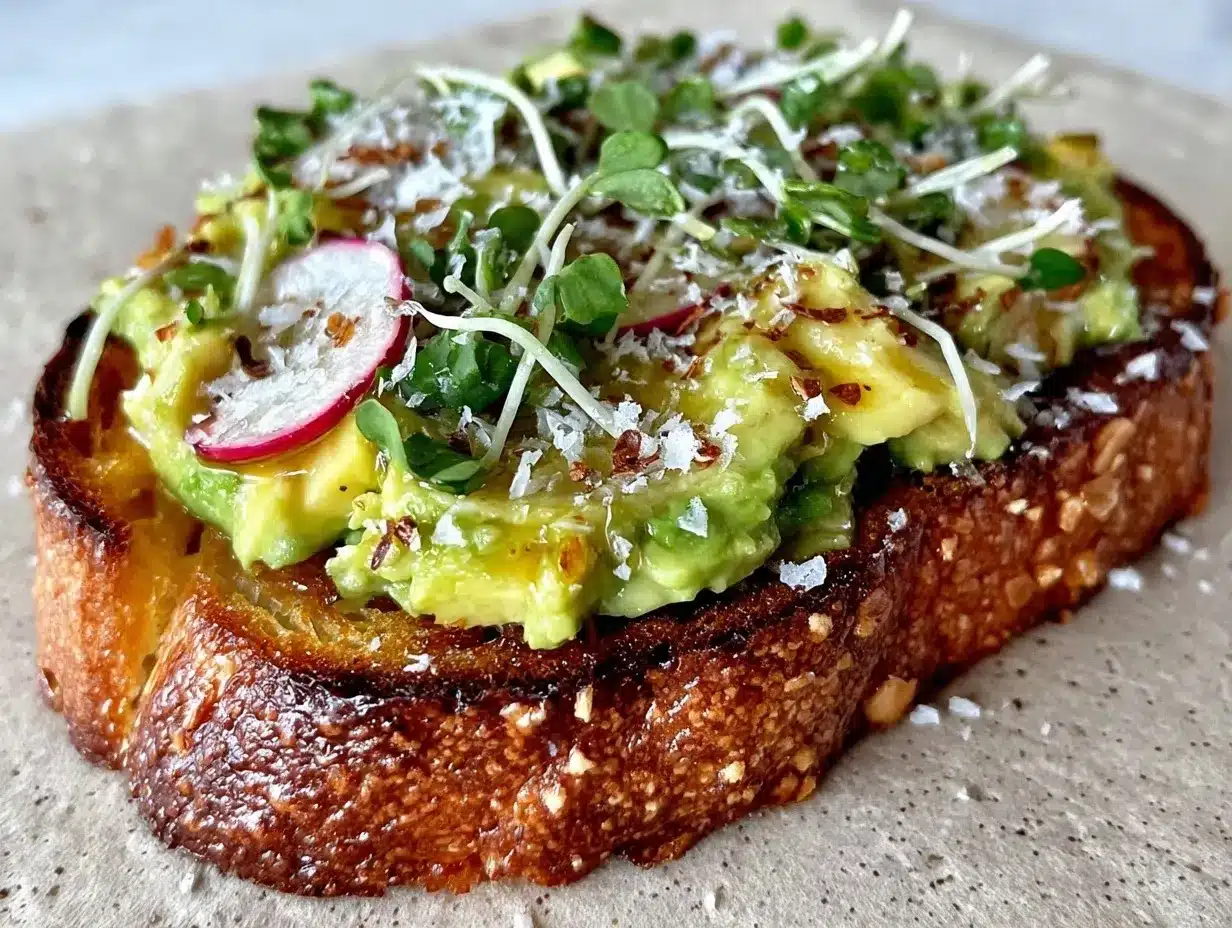
- Breadcrumbs: Panko breadcrumbs are my top recommendation. They are lighter and crispier than standard breadcrumbs. I use Japanese-style Panko for the best crunch. If you don’t have Panko, regular dry breadcrumbs work, but the texture will be denser.
- All-Purpose Flour: Just a dusting to help the egg wash stick. About 1/2 cup is usually enough for a batch of 10-12 pieces.
- Eggs: Large eggs, beaten. You’ll need 2 large eggs. For a vegan option, you can use a flax egg or chickpea flour batter, but the egg wash gives the best adhesion for the breadcrumbs.
- Smoked Paprika: I add a teaspoon to the flour for a subtle smoky flavor that pairs well with the avocado. It’s an E-E-A-T tip from experience: it adds complexity without extra effort.
For Cooking and Serving
- Olive Oil or Avocado Oil: You need a high-smoke-point oil for pan-frying or brushing before baking. Olive oil adds flavor, while avocado oil is neutral. I use a mix of both.
- Microgreens or Arugula: For serving. These add a peppery bite and visual appeal. They wilt slightly when reheated, so I often add fresh ones after reheating for the best texture.
- Chili Crisp or Sriracha: For dipping. This is optional but highly recommended. The heat and crunch of chili crisp complement the creamy avocado perfectly.
Equipment Needed
You don’t need a professional kitchen to make this, but having the right tools makes the process smoother and the results better. Here is what you’ll need:
- Three Shallow Bowls: You need a standard breading station setup: one for flour, one for egg wash, and one for breadcrumbs. Use bowls that are wide enough to dip the avocado slices easily. I use ceramic pie dishes or shallow ramekins.
- Wire Whisk: For beating the eggs until they are smooth and well-combined with any spices. A whisk ensures there are no streaks of white yolk.
- Pastry Brush: If you plan to bake these instead of frying, a pastry brush helps you apply oil evenly without using too much. This is crucial for getting a crispy exterior without making the toast greasy.
- Cutting Board and Sharp Knife: You’ll be slicing avocados and bread. A sharp knife makes slicing the avocado into even pieces much safer and easier.
- Skillet or Baking Sheet: For frying, use a non-stick skillet or cast-iron pan. For baking, a wire rack placed over a baking sheet is best. It allows air to circulate, ensuring the bottom gets crispy too. If you don’t have a rack, just line the sheet with parchment paper, but flip halfway through.
- Air Fryer (Optional but Recommended): If you have an air fryer, this is the best tool for reheating and even cooking. It mimics the crunch of frying with less oil. I use my air fryer for both the initial cook and the weekly reheats.
Preparation Method
Let’s walk through the steps. I’ve broken this down so you can see exactly where the time goes and what to expect at each stage. This method yields about 10-12 pieces, depending on how thick you slice your bread.
Step 1: Prep the Avocado Mixture (5 Minutes)
Start by slicing your avocados in half, removing the pits, and scooping the flesh into a medium mixing bowl. Use a fork to mash the avocado. You don’t want it completely smooth like hummus; a little texture is nice. But make sure there are no large chunks. Add the lemon juice, garlic powder, salt, pepper, and red pepper flakes if using. Mix it well. Taste it. It should be bright and seasoned. If it tastes bland, add more salt or lemon. This mixture is your filling, so get the flavor right now.
Step 2: Prepare the Bread (5 Minutes)
Take your bread slices and cut them in half diagonally or into squares, depending on your preference. I usually cut thick-sliced sourdough into quarters to make manageable lunch-sized pieces. If your bread is very thick, you might want to toast it lightly first to dry it out, but for this recipe, raw bread works best because it crisps up in the cooking process. Set the bread pieces aside on a clean plate.
Step 3: Set Up the Breading Station (5 Minutes)
Arrange your three shallow bowls in a line. In the first bowl, add the flour and smoked paprika, mixing them together. In the second bowl, whisk the eggs with a pinch of salt until uniform. In the third bowl, spread the Panko breadcrumbs. Have a clean plate or baking sheet ready for the finished pieces. This setup is crucial for efficiency. You want to move from flour to egg to breadcrumbs without cross-contaminating your bowls.
Step 4: Assemble and Coat (10 Minutes)
Take a piece of bread. Spread a generous layer of the avocado mixture over one side. Use about 2 tablespoons per piece. Don’t overfill it, or it will squeeze out during cooking. Next, dip the avocado-covered side into the flour, shaking off any excess. Then, dip it into the egg wash, making sure it’s fully coated. Finally, press it firmly into the Panko breadcrumbs. Use your fingers to press the crumbs onto the avocado so they adhere well. This step is key for preventing the coating from falling off during reheating. Place the coated piece on your clean plate, bread-side up.
Step 5: Cook the Toast (10-15 Minutes)
You have two options here: Pan-Frying or Baking/Air Frying. For the crispiest result, I recommend pan-frying or air frying.
Pan-Frying: Heat a skillet over medium heat with about 1 tablespoon of oil. Once the oil is shimmering, place the toast avocado-side up in the pan. Cook for 2-3 minutes until the bottom is golden brown. Flip carefully. Cook the avocado side for another 1-2 minutes. The goal is to crisp the bread and warm the avocado through without cooking the avocado too much.
Air Frying: Preheat your air fryer to 375°F (190°C). Place the toast in the basket in a single layer. Brush the top lightly with oil. Air fry for 8-10 minutes, flipping halfway through. Check for crispiness. The bread should be golden and the crumbs should be crunchy.
Step 6: Cool and Store (5 Minutes)
Transfer the cooked toast to a wire rack to cool for 5 minutes. This allows the coating to set. Once cool, place them in an airtight container in the refrigerator. They will keep for up to 4 days. If you are prepping for the week, let them cool completely before sealing the container to prevent condensation, which can make the bread soggy.
Cooking Tips & Techniques
I’ve made my fair share of mistakes with this recipe, so you don’t have to. Here are some pro tips to ensure your Crispy Avocado Toast turns out perfect every time.
- Don’t Skip the Flour: It’s tempting to go straight from avocado to egg, but the flour creates a dry barrier that helps the egg stick. Without it, the breading might slide off during cooking.
- Press the Breadcrumbs: When you coat the toast, don’t just sprinkle the crumbs. Press them in. You want a thick, even layer. This ensures the crunch survives the reheating process.
- Control the Heat: If pan-frying, keep the heat at medium. Too high, and the bread burns before the avocado warms. Too low, and the toast absorbs too much oil. You want a gentle, even crisp.
- Cool Completely Before Storing: This is the most common mistake. If you store warm toast, steam gets trapped, and the bread turns soggy. Let them cool on a rack for at least 5 minutes. Patience pays off.
- Use a Wire Rack for Baking: If you bake them, always use a wire rack over a baking sheet. This allows air to circulate underneath, preventing the bottom from getting soft.
Variations & Adaptations
One of the best things about this recipe is how adaptable it is. Here are a few ways to switch it up based on your dietary needs or flavor preferences.
- Vegan Option: Skip the egg and use a slurry of chickpea flour and water for the wash, or simply press the breadcrumbs onto the avocado with a little olive oil. The texture might be slightly different, but it still works.
- Gluten-Free: Use gluten-free bread and gluten-free Panko breadcrumbs. Many brands now make GF Panko that crisps up just as well.
- Spicy Kick: Add chopped jalapeños to the avocado mixture or use spicy Panko breadcrumbs. I love adding a dash of chipotle powder to the flour for a smoky heat.
- Herb Infused: Mix dried herbs like oregano or thyme into the breadcrumbs for an aromatic crunch. This pairs well with a tomato-based dipping sauce.
- Seasonal Twist: In the summer, add diced tomatoes and basil to the avocado mix. In the winter, add roasted red peppers and feta cheese for a Mediterranean vibe.
Serving & Storage Suggestions
This recipe is designed for meal prep, so here is how to handle it throughout the week.
- Storage: Store the toast in an airtight container in the refrigerator for up to 4 days. Place a paper towel at the bottom of the container to absorb any excess moisture. This helps keep the bread crisp.
- Reheating: To reheat, use an air fryer or toaster oven at 350°F (175°C) for 3-5 minutes. This restores the crunch. Avoid the microwave, as it will make the bread soft and chewy. If you must use a microwave, follow it up with a quick toast in a dry skillet.
- Serving: Serve with a side of microgreens, arugula, or a simple lemon vinaigrette. I like to drizzle chili crisp or sriracha over the top after reheating for a fresh kick. It pairs beautifully with a simple green salad or a bowl of miso soup.
- Flavor Development: The flavors meld nicely over the first day. By day 3, the avocado flavor is well-integrated, and the toast is still crunchy if reheated properly.
Nutritional Information & Benefits
This Crispy Avocado Toast is not just delicious; it’s nutritious. Avocados are packed with heart-healthy monounsaturated fats, which help keep you full and satisfied. The bread provides complex carbohydrates for energy, and the egg adds protein to keep your muscles fueled. It’s a balanced meal that supports sustained energy levels throughout the afternoon.
- Healthy Fats: Rich in oleic acid, which supports brain health.
- Fiber: High in fiber from the avocado and whole-grain bread, aiding digestion.
- Protein: The egg adds a good amount of protein, making this a complete meal.
- Dietary Notes: Can be made gluten-free and vegan. Low in saturated fat.
Conclusion
I’m telling you, this Crispy Avocado Toast Recipe has completely changed my lunch routine. It’s crispy, creamy, and actually holds up in the fridge. It’s the kind of meal that makes you excited to open your lunchbox instead of dreading it. Give it a try this week. Make a batch on Sunday, and see how much easier your weekdays become.
I’d love to hear how you like it. Try adding your favorite toppings or spices, and let me know in the comments what variations you tried. Share your photos on social media and tag me. Happy meal prepping!
FAQs
Can I freeze Crispy Avocado Toast?
It’s not recommended. The avocado texture changes when frozen and thawed, becoming watery and mushy. It’s best enjoyed fresh or stored in the fridge for up to 4 days.
What type of bread is best for this recipe?
Thick-sliced sourdough or whole grain bread works best. You want a bread that is sturdy enough to hold the avocado and coating without falling apart. Avoid thin, soft sandwich bread.
Can I make this ahead of time for a party?
Yes, you can prepare them up to 4 hours ahead and keep them at room temperature. Just don’t store them in the fridge for too long before serving, as the bread may lose some crispness. Reheat briefly before serving if needed.
Why did my breading fall off?
This usually happens if the avocado mixture was too wet or if the breadcrumbs weren’t pressed firmly enough. Make sure to mash the avocado well, remove excess moisture, and press the crumbs onto the toast.
Is this recipe keto-friendly?
Not traditionally, as the bread and breadcrumbs contain carbs. However, you can make a keto version by using low-carb bread and almond flour or crushed pork rinds for the coating.
Pin This Recipe!


Crispy Avocado Toast: 5-Day Lunch Prep That Reheats
- Total Time: 30-35 minutes
- Yield: 10-12 pieces 1x
Description
A meal-prep friendly crispy avocado toast recipe that stays crunchy and fresh in the fridge, reheating perfectly in an air fryer or toaster oven for a satisfying lunch all week.
Ingredients
- 3 large ripe avocados
- 2 tablespoons fresh lemon juice
- 1 teaspoon garlic powder
- 1/2 teaspoon sea salt
- Generous crack of black pepper
- Pinch of red pepper flakes (optional)
- 1/2 cup all-purpose flour
- 1 teaspoon smoked paprika
- 2 large eggs, beaten
- Panko breadcrumbs (Japanese-style recommended)
- Olive oil or avocado oil for cooking
- Microgreens or arugula for serving
- Chili crisp or sriracha for dipping
Instructions
- Mash the avocados in a medium bowl until textured but not smooth. Mix in lemon juice, garlic powder, salt, pepper, and red pepper flakes. Taste and adjust seasoning.
- Cut bread slices into halves or quarters to create manageable lunch-sized pieces.
- Set up a breading station with three shallow bowls: one with flour mixed with smoked paprika, one with beaten eggs, and one with Panko breadcrumbs.
- Spread about 2 tablespoons of the avocado mixture onto each bread piece.
- Dip the avocado-covered side into the flour, shaking off excess, then into the egg wash, and finally press firmly into the Panko breadcrumbs to coat evenly.
- Pan-fry in a skillet with oil over medium heat for 2-3 minutes until golden, flip, and cook avocado side for 1-2 minutes. Alternatively, air fry at 375°F (190°C) for 8-10 minutes, flipping halfway.
- Cool the toast on a wire rack for 5 minutes to set the coating.
- Store in an airtight container in the refrigerator for up to 4 days.
- Reheat in an air fryer or toaster oven at 350°F (175°C) for 3-5 minutes to restore crispness.
Notes
Ensure avocados are ripe but not mushy to prevent soggy breading. Press breadcrumbs firmly to ensure they adhere during reheating. Cool completely before storing to prevent condensation. Avoid microwaving as it makes the bread soft.
- Prep Time: 20 minutes
- Cook Time: 10-15 minutes
- Category: Lunch
- Cuisine: American
Nutrition
- Serving Size: 1-2 pieces per servi
- Calories: 250
- Sugar: 1
- Sodium: 300
- Fat: 18
- Saturated Fat: 3
- Carbohydrates: 15
- Fiber: 5
- Protein: 6
Keywords: avocado toast, meal prep, crispy avocado, lunch ideas, air fryer recipes, healthy lunch, vegan options, gluten-free options


